Use Clarityflow Appointments to manage calendar bookings
With Clarityflow Appointments, you can manage all of your client scheduling directly within Clarityflow—without a separate calendar tool.
Sync Appointments with your calendar, take control of your availability, and sell coaching sessions or other bookings using Clarityflow Commerce. And, as always, it all works seamlessly with your async conversations and messages in Clarityflow.
The video above and the docs below will cover everything you need to get started with managing your scheduling in Clarityflow. Here's what's included:
What is Clarityflow Appointments?
Clarityflow Appointments is Clarityflow's native client scheduling functionality. With Clarityflow Appointments, you can:
Connect your Google calendar
Set custom appointment types and availabilities
Easily share a booking link for your clients to schedule time with you
Charge clients to book time on your calendar using Clarityflow Commerce
Put simply, with Clarityflow Appointments, you can give your clients the option to easily book time on your calendar without needing to use a separate scheduling tool. It's a far more seamless and cohesive experience for you and your coaching clients.
A booked appointment can also serve as a trigger for Clarityflow's Zapier integration, meaning it can kickstart an automated workflow you create.
How to connect your Google calendar
You don't have to connect your Google calendar to Clarityflow Appointments, but we highly recommend it. When you connect your calendar, Clarityflow will automatically factor any appointments, restrictions, or limits from your calendar when offering booking windows to your clients.
Have a dentist appointment marked on your calendar at 2pm on Tuesday? Then Clarityflow will automatically remove that time from the available time windows offered to your clients.
Connecting your Google calendar is easy. Here's how:
1. Click Appointments in the left-side menu. Alternatively, you can click your account name in the upper left corner and go to My Settings > Calendar Connection.
2. Here's where you'll be prompted to connect your Google calendar.
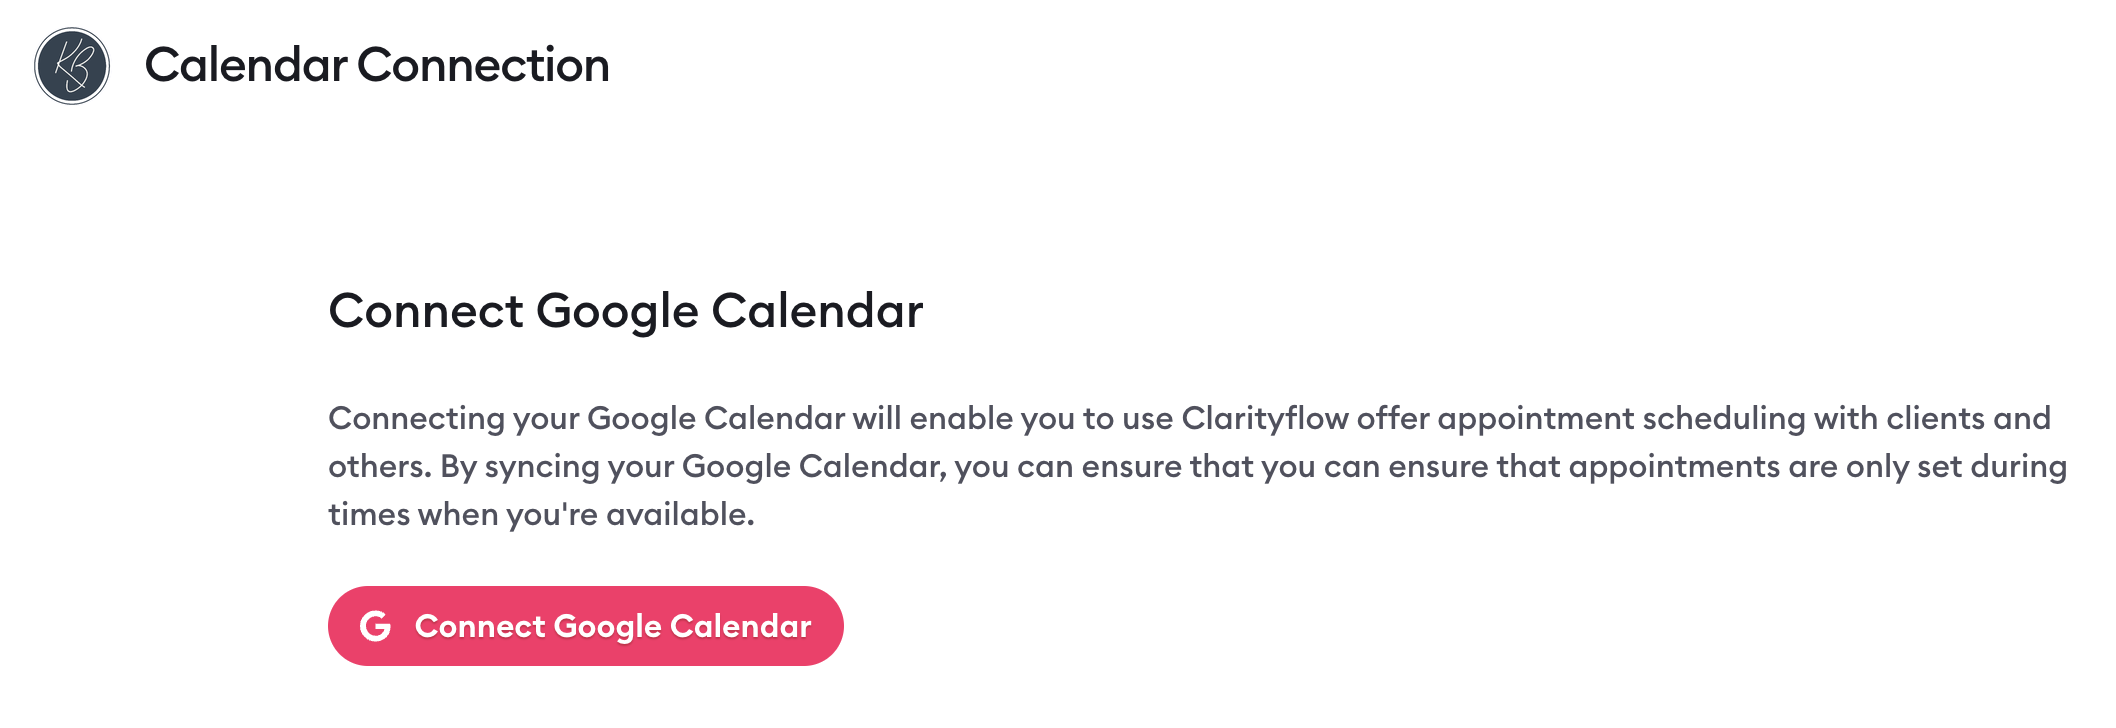
3. Click "Connect Google calendar." From there, you'll be prompted to log into your Google account (make sure to log into the account that "owns" the calendar you want to use) and follow the rest of the instructions. It's very simple—there are only a few clicks and a couple of sections.
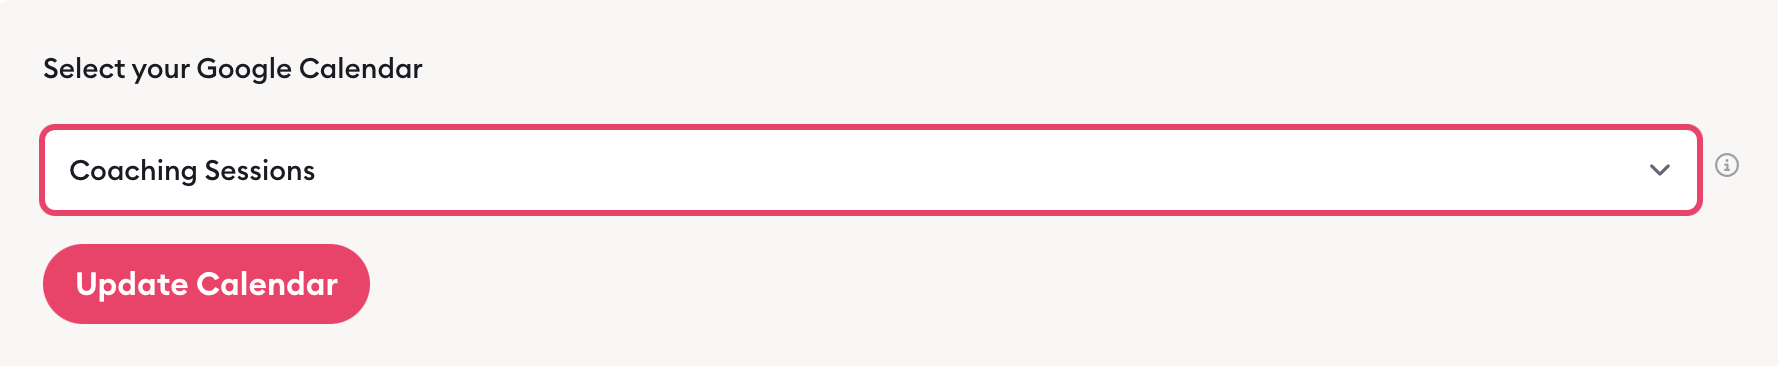
4. Once you've successfully connected your calendar, you'll see it listed. If your Google account owns multiple calendars, you can click the "Change calendar" button to select which calendar you want to use with Clarityflow. Note: You need to choose one calendar—you can't use multiple.
If you need more help, check out our detailed guide on connecting your Google calendar to Clarityflow Appointments.
Creating your Appointment types and scheduling links
Need to give your clients and other people the option to schedule different types of appointments with you? For example, you might want to offer separate scheduling links for a:
90-minute coaching session
15-minute consultation call
With Clarityflow Appointments, you can create multiple appointment types—each of which has its own settings, availability, and scheduling link.
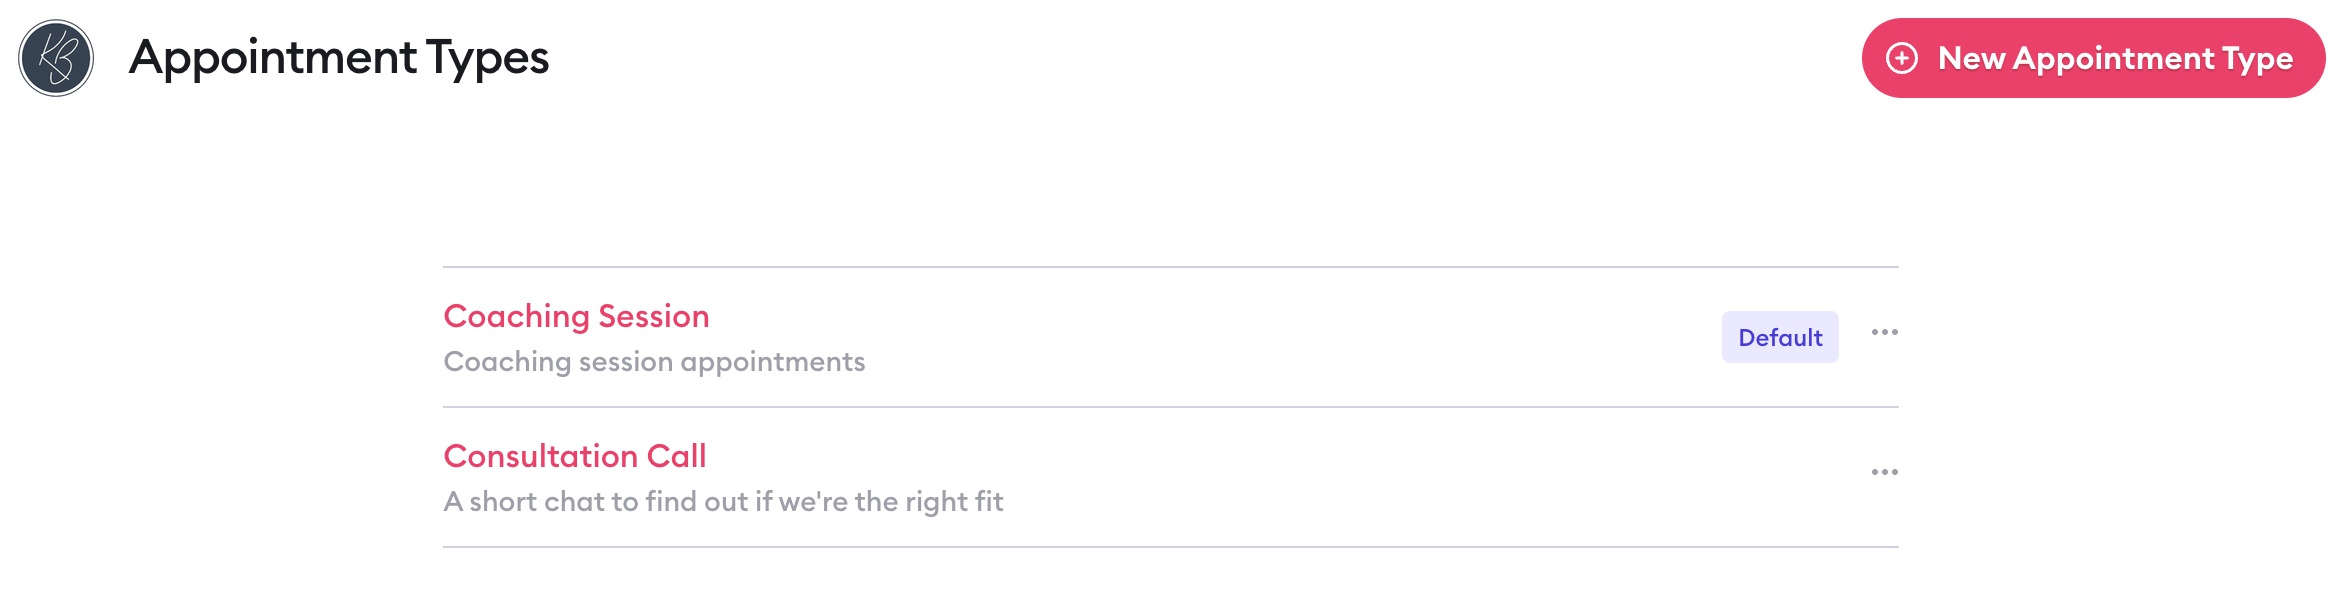
Start by navigating to Appointments > Scheduling Links. Your Clarityflow account comes with one appointment type by default (called "Coaching Session"). You can customize that appointment and add new ones by clicking "New Appointment Type" in the upper right-hand corner.
You can create as many appointment types as you need and customize the following for each of them:
Details (name, description, etc.)
Availability
Team members
Scheduling page
Conversation
Location or call link
Booking questions
Appointment reminders
Ready to dig even further into appointment types? Learn more in our detailed guide to creating and customizing your appointment types and scheduling links.
Setting your availability
Setting your availability in Clarityflow limits the time windows when your clients can schedule with you.
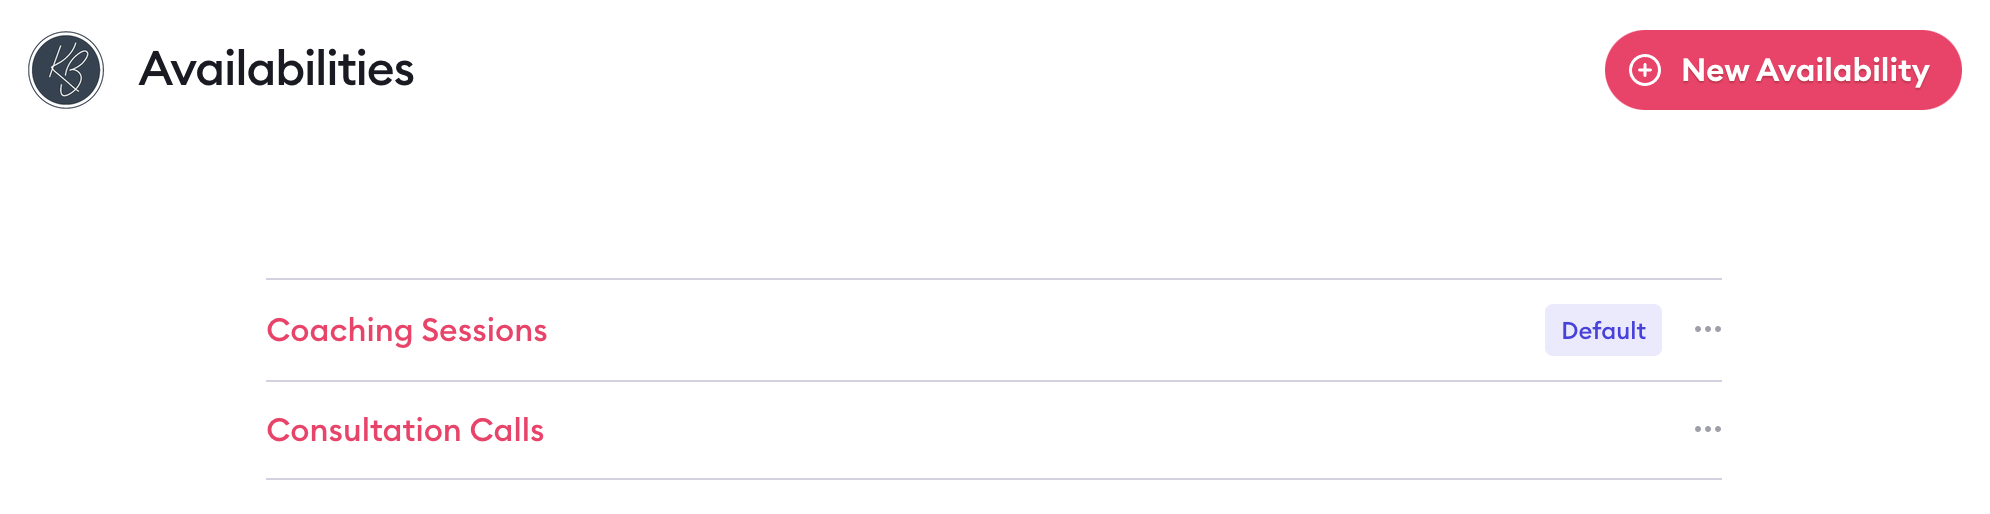
To set your availability, click Appointments > Settings > Availabilities. Your Clarityflow account comes with one pre-set availability by default (set to Monday through Friday from 9am to 5pm). You can customize that availability as well as add new ones by pressing "New Availability" in the top right corner.
You can create multiple different availabilities to apply to your different appointment types. For example, maybe you do:
Coaching sessions Monday through Friday
Consultation calls only on Tuesdays and Thursdays
You can create one availability called "Coaching Sessions" and another called "Consultation Calls" and then set your available time windows accordingly. To create a new availability, press "New Availability" and then customize your details and available time windows.
You need to select one availability as your default. This availability is automatically applied to all of your new appointment types, but you can change this when setting up your Appointment type. It'll be set to your default, but you'll can select an alternate availability from the dropdown to define when your clients can book with you.
Again, if you've connected your Google calendar, Clarityflow will factor any other appointments from your calendar into your available time slots as well.
NOTE: It's not recommended to use "all day events" to block off an entire day in your Google calendar. Instead, block off specific hours for that day. For example, create an event called "Unavailable" or "No calls" that starts at 9am and ends at 5pm.
Learn even more about creating and customizing your availability in our detailed guide.
Managing availabilities with multiple team members
Imagine that you (let's call you Coach A) have another coach on your team (Coach B) who also runs coaching calls for your business.
You created a custom availability for your coaching calls, set to Monday through Friday from 9am to 5pm. However, you (Coach A) never work on Fridays. You want to make yourself unavailable on that day while still allowing your clients to schedule with Coach B for Fridays.
You can do that by setting your own personal availability—rather than adjusting the availability for the entire appointment type. Here's how:
Click your account name in the top left corner and then navigate to My Settings > My Availability
Set the days and times you're available for new bookings (in this case, Monday through Thursday)

This means that, when a client visits the booking page to schedule a new coaching call with your business, they'll still have the option to schedule for Fridays—but only according to Coach B's availability. You (Coach A) are automatically ruled out, as your personal availability excludes Fridays.
You can learn more about appointment booking for teams in our detailed guide.
Selling bookings with Clarityflow Commerce
If you're using Clarityflow Commerce (available on our Standard plan and higher), you can sell access to your calendar bookings—which means clients can purchase and schedule a coaching session in one spot.
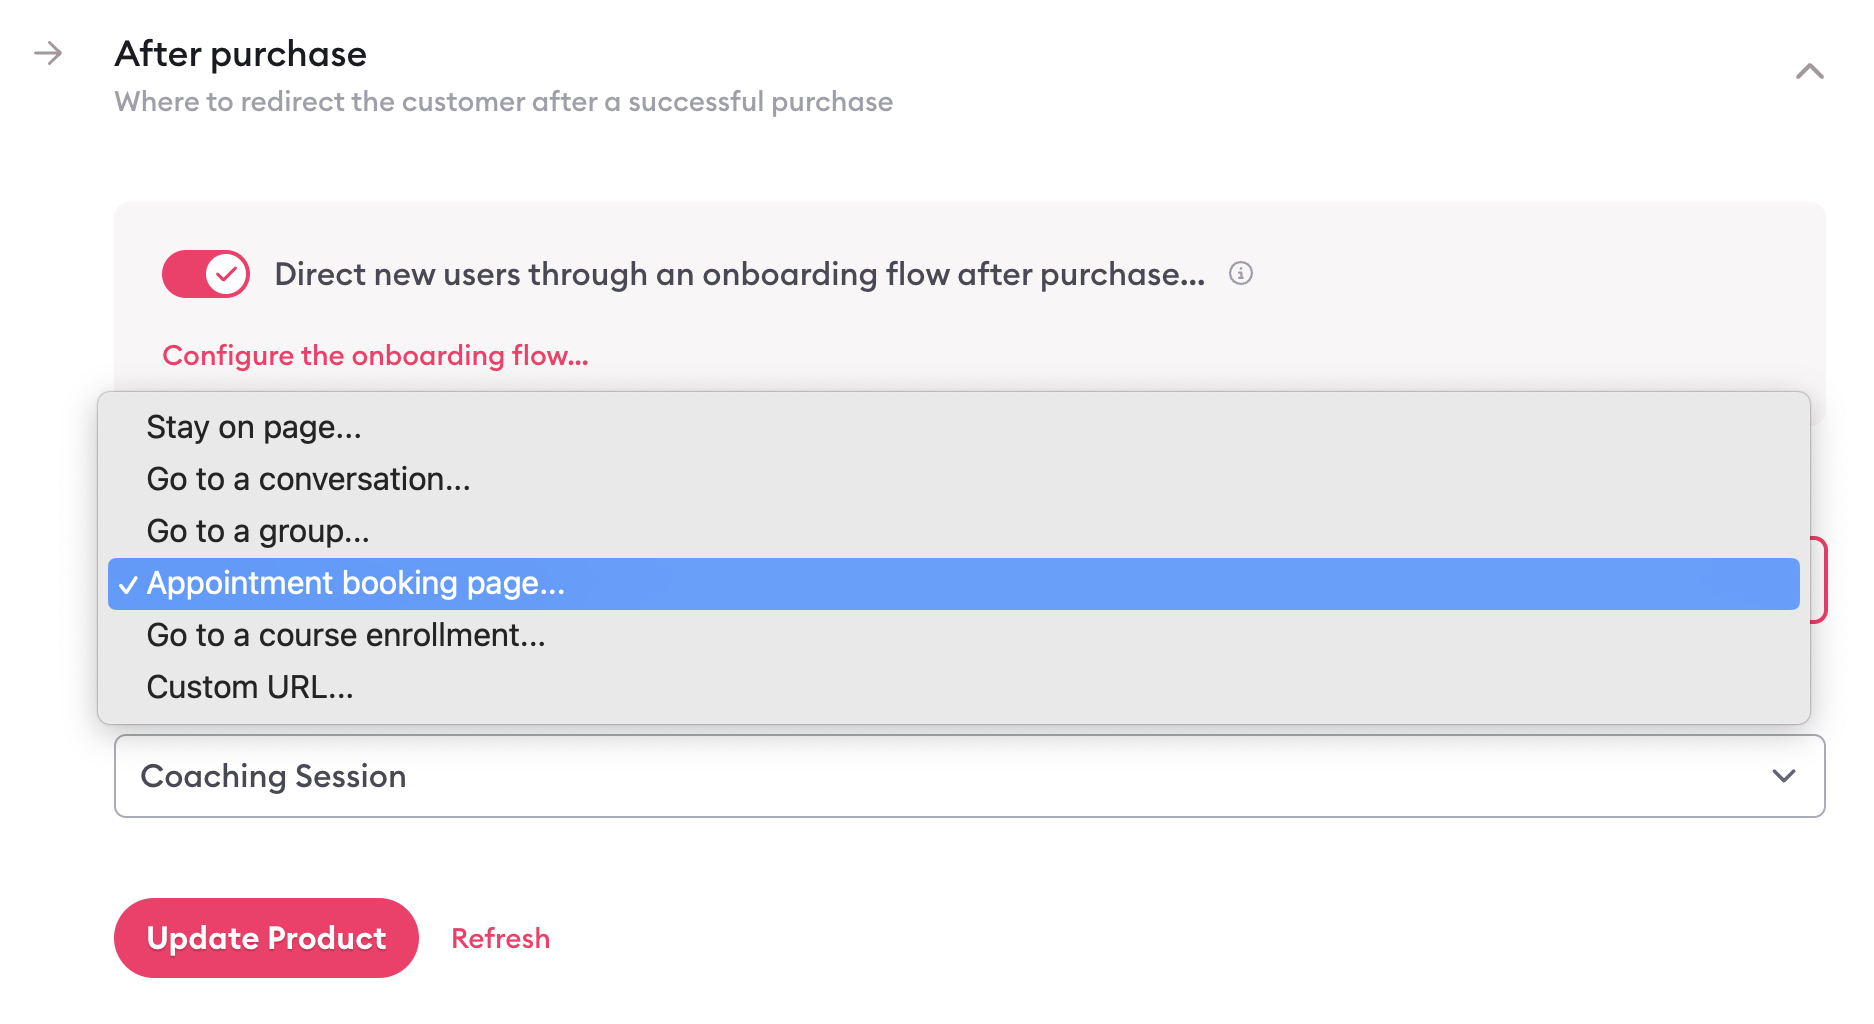
Navigate to Commerce, create a new product, assign a name (for example, "Coaching Session"), and then customize your product details and price.
Expand the "After purchase" menu and select "Appointment booking page" under "Redirect type." This means, once a client completes their checkout, they're automatically redirected to your booking page.
Underneath that, select the appointment type the client is able to book (e.g. if they're purchasing a coaching session, you'd select your "Coaching Session" appointment type). That will automatically apply your availability and other parameters to the booking page your client will access.
Learn more about how to sell your clients access to your calendar in our detailed guide.
Making a booking offer in an async conversation
When you're swapping async messages back and forth with a client, you might want to offer them the option to book a live call or meeting on your calendar. With Clarityflow, you can do that directly in the context of your conversations.
Within any Clarityflow conversation, hover over "Record" in the top right corner of the new message window. From those options, select "Appointment."
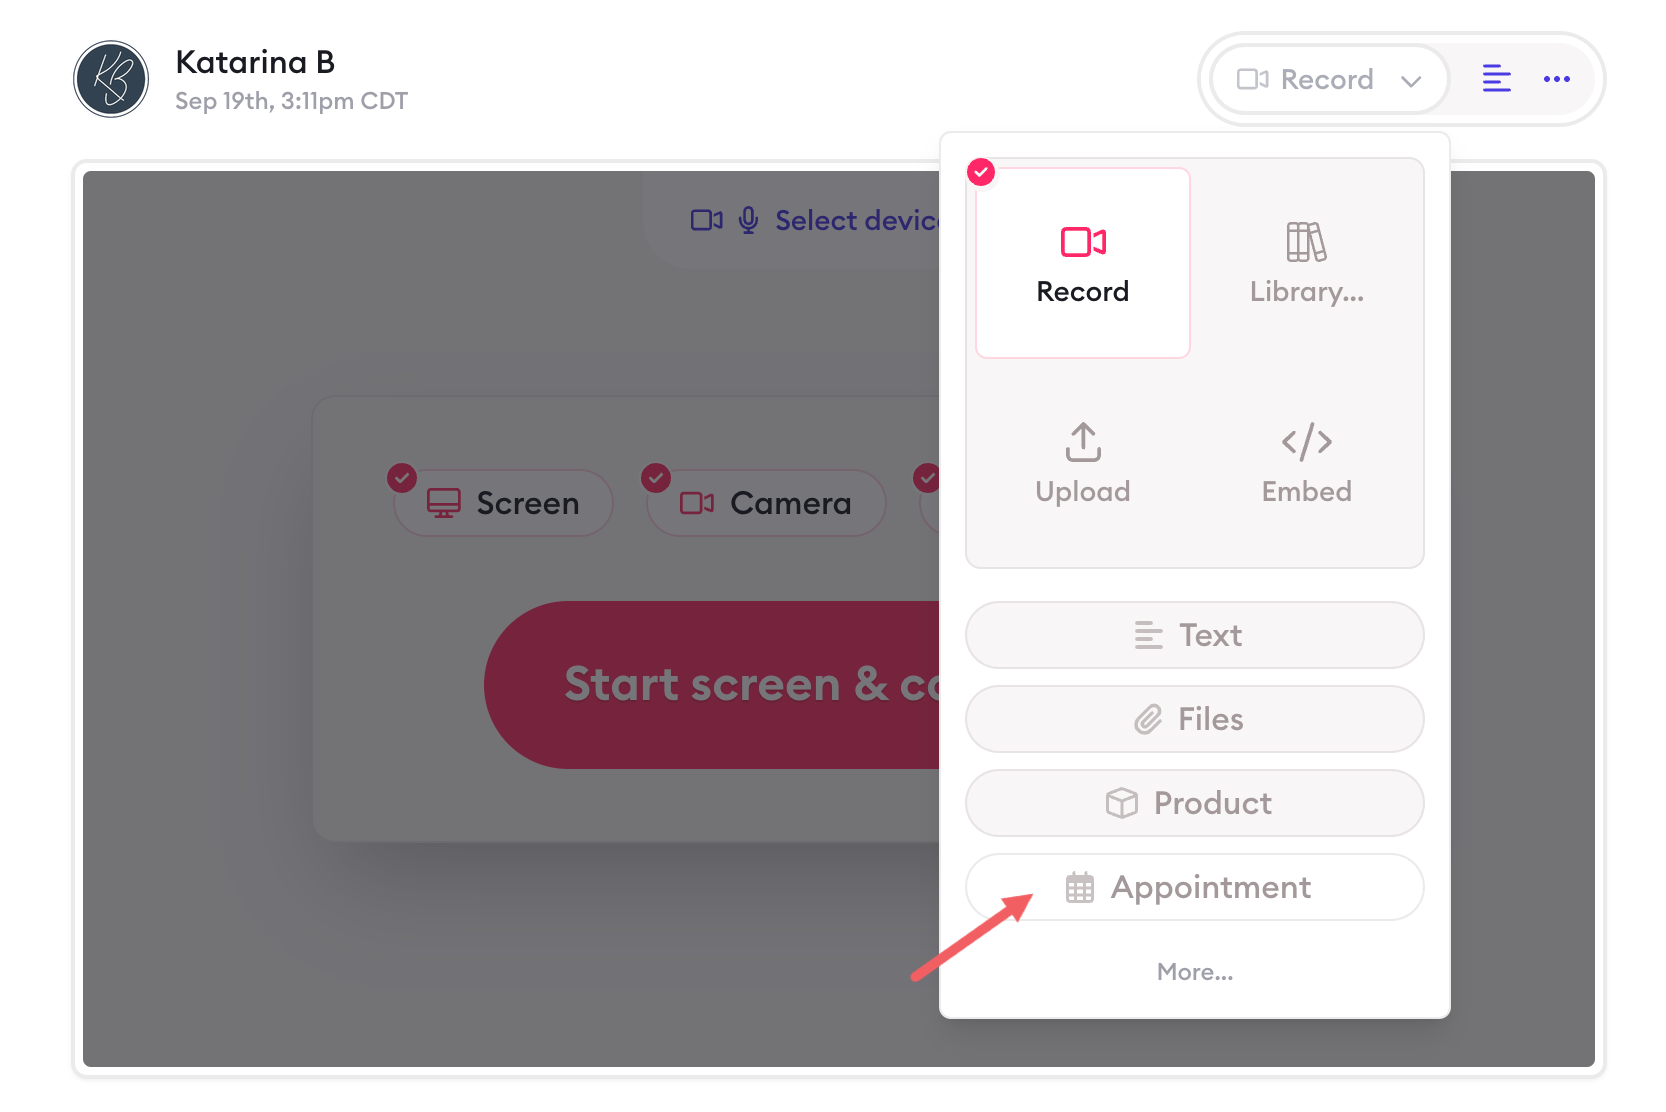
Next, select the type of appointment you want your client to be able to book. Click "Create Message" and it'll send your message into the conversation.
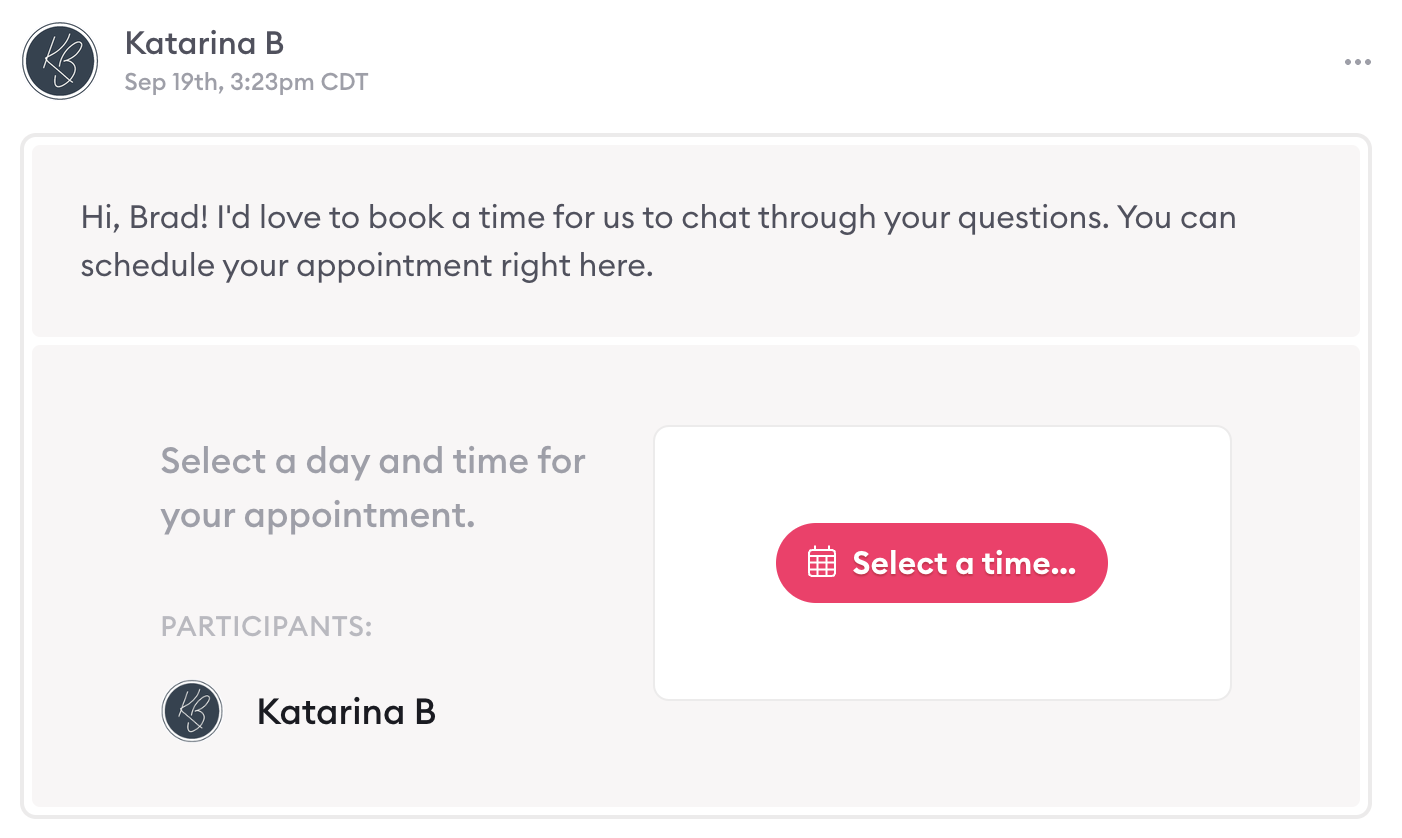
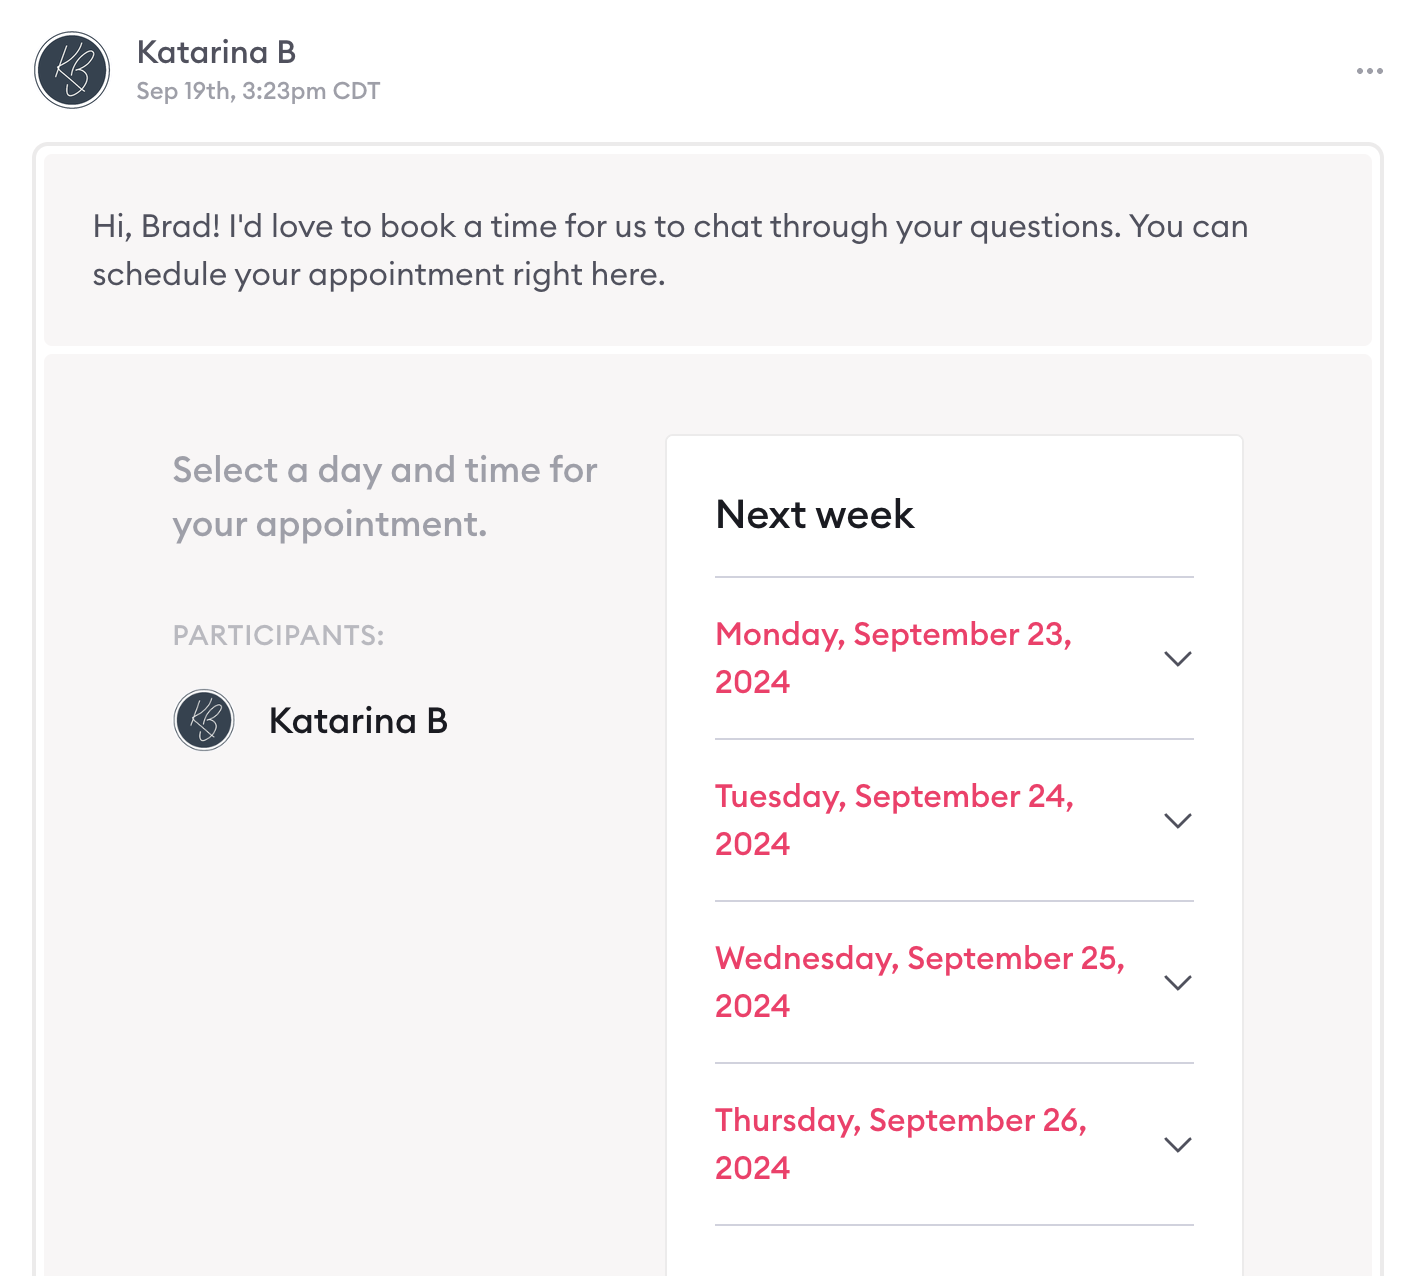
When your client clicks "select a time," it opens your available times directly within the message window so your client can book right there.
Filter booking slots by start date
Use the `start` query parameter to show appointment slots beginning from a specific date.
Format
Parameter: start
Value format: MMMDD (example: May22, Jun05)
Example
https://your-domain.com/a/consultation-call?start=May22

How it works
Open your normal appointment booking link.
Append ?start=<MMMDD> to the URL.
Share that URL.
Recipients will see available slots starting from that date window.
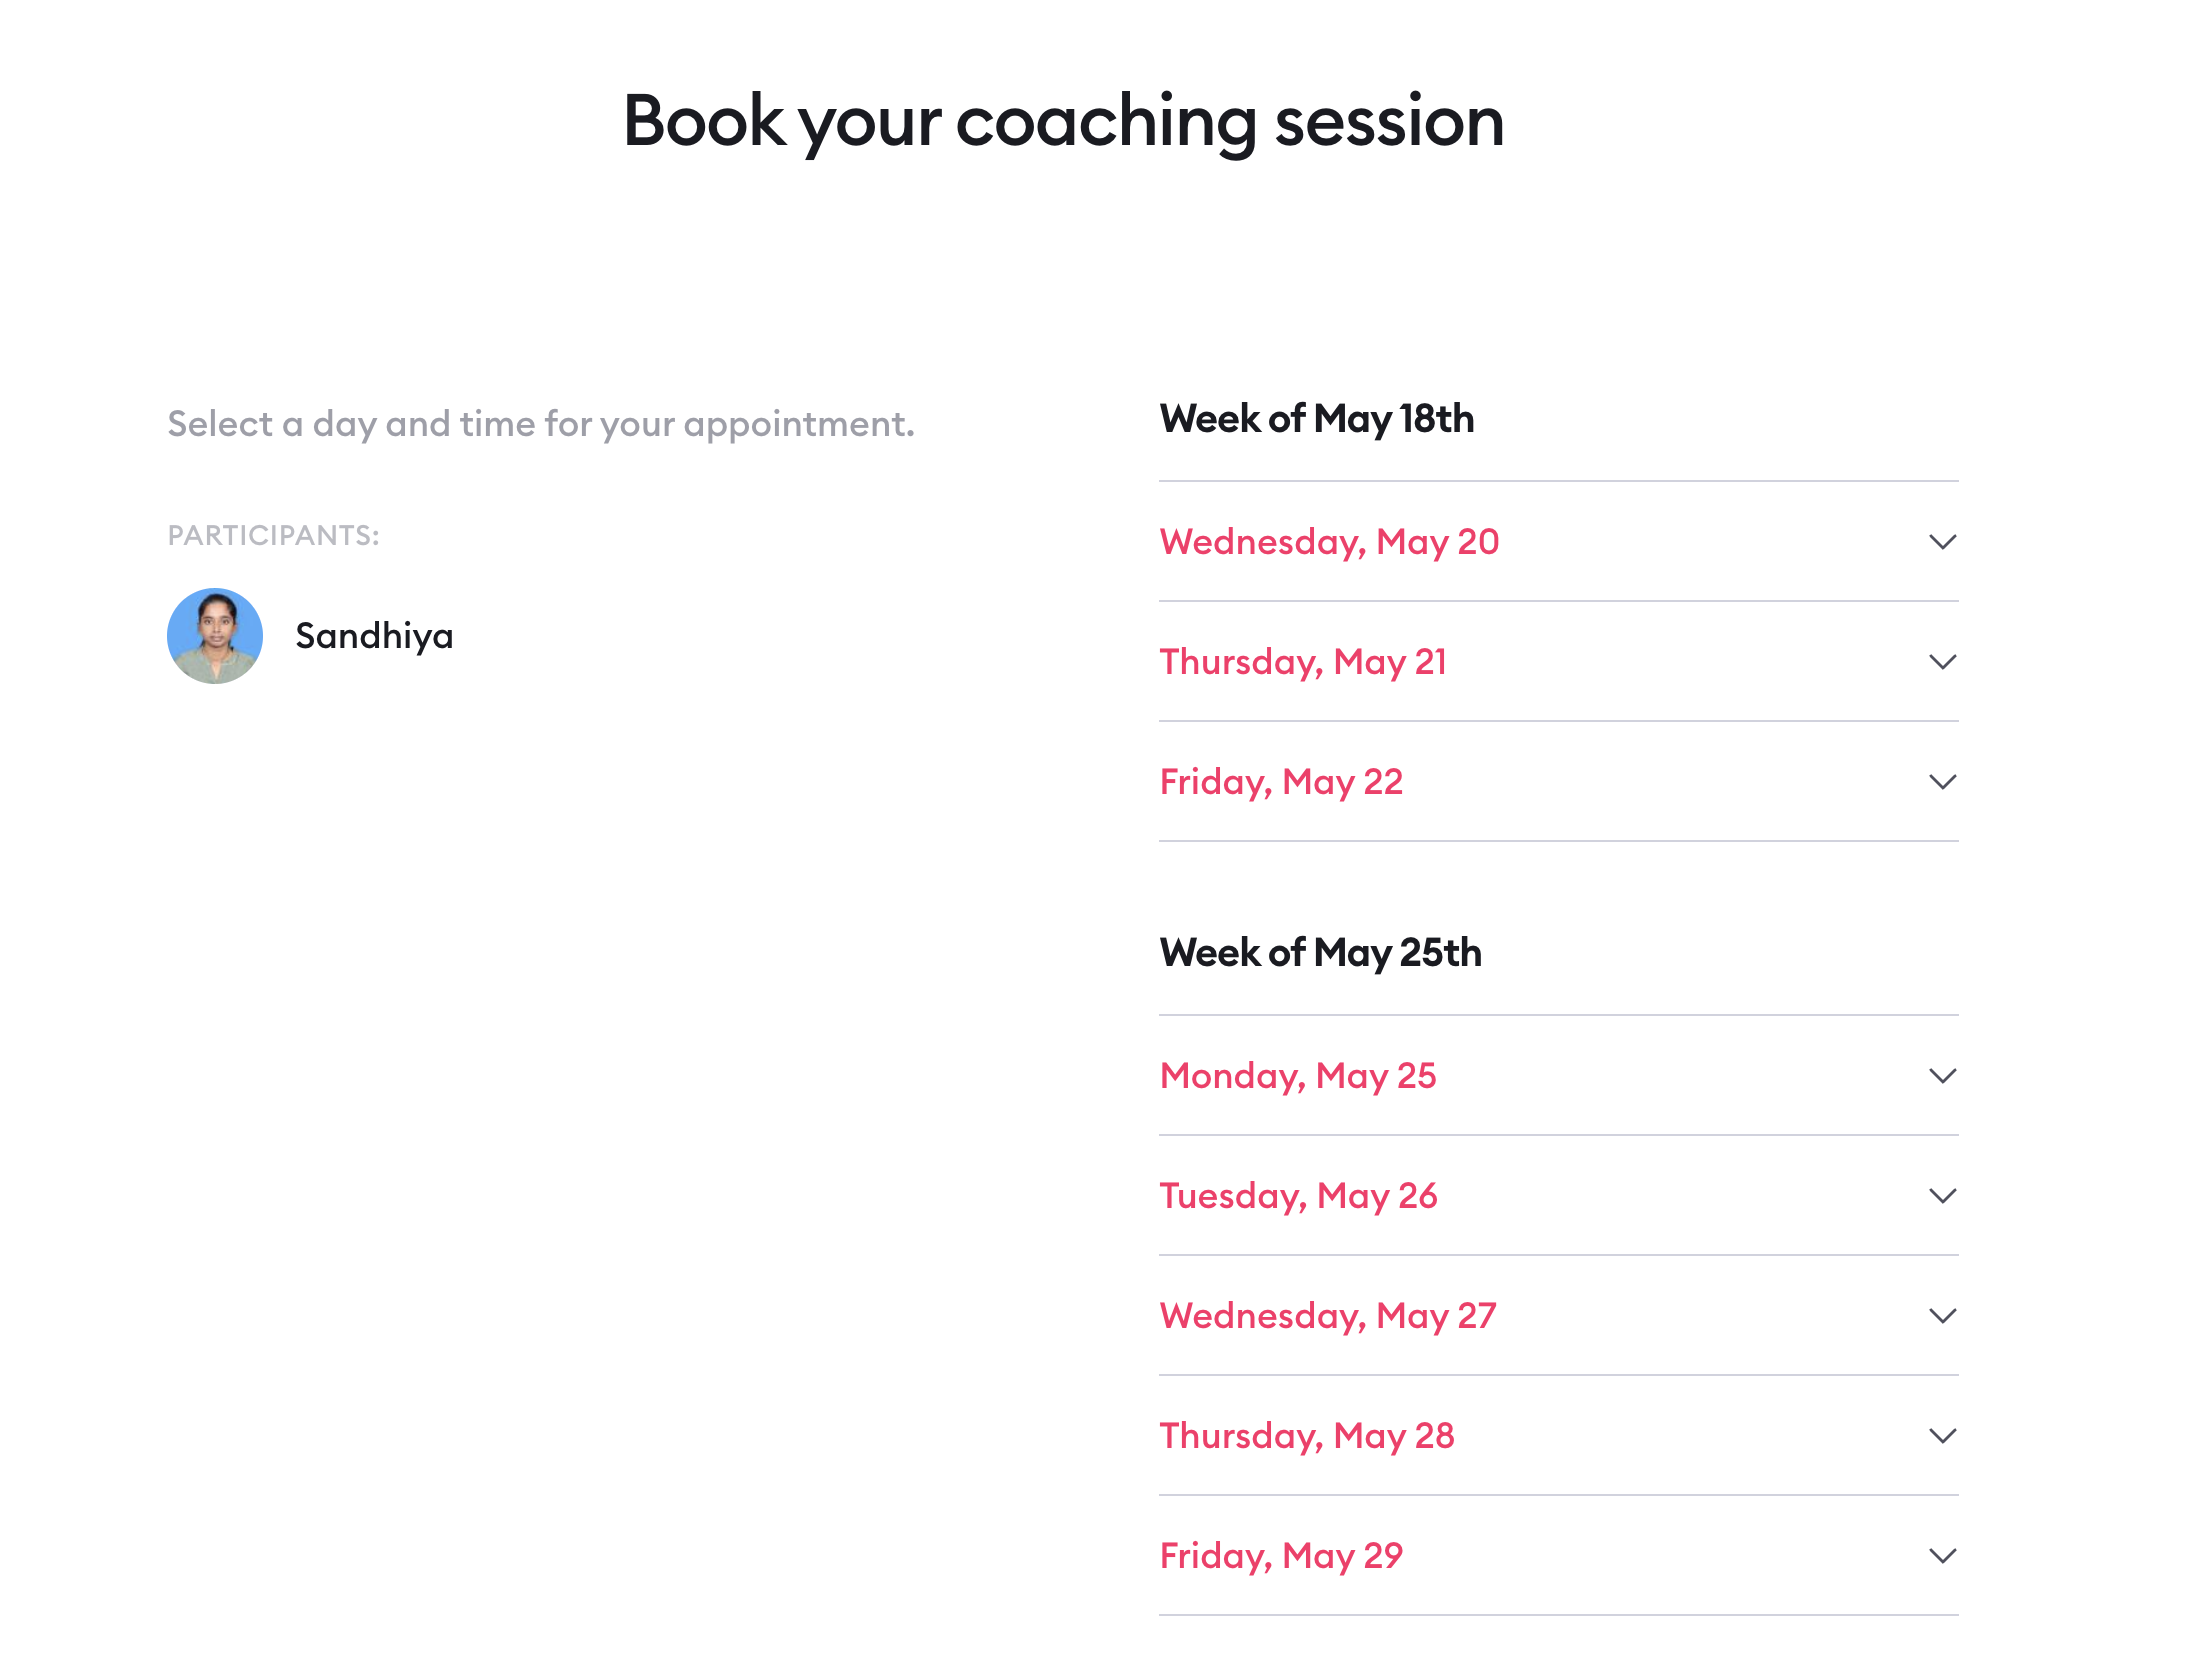
Important
This is a display filter only.
It does not modify availability rules, booking window settings, or minimum notice settings.
Learn more about how Clarityflow integrates Appointments with your async conversations in our detailed guide.
Learn more about Clarityflow.