Use Clarityflow Tasks to manage to-do's and action items
With Clarityflow Tasks, you can create to-do's and action items, assign people and due dates, and keep an eye on progress—all directly within Clarityflow.
Like everything else in Clarityflow, Tasks can integrate seamlessly with your async conversations so you and your clients can communicate and take action in one place.
The video above and the docs below will cover everything you need to start assigning and managing tasks in Clarityflow. Here's what's included:
Creating a task
There are two places you can create a task in Clarityflow:
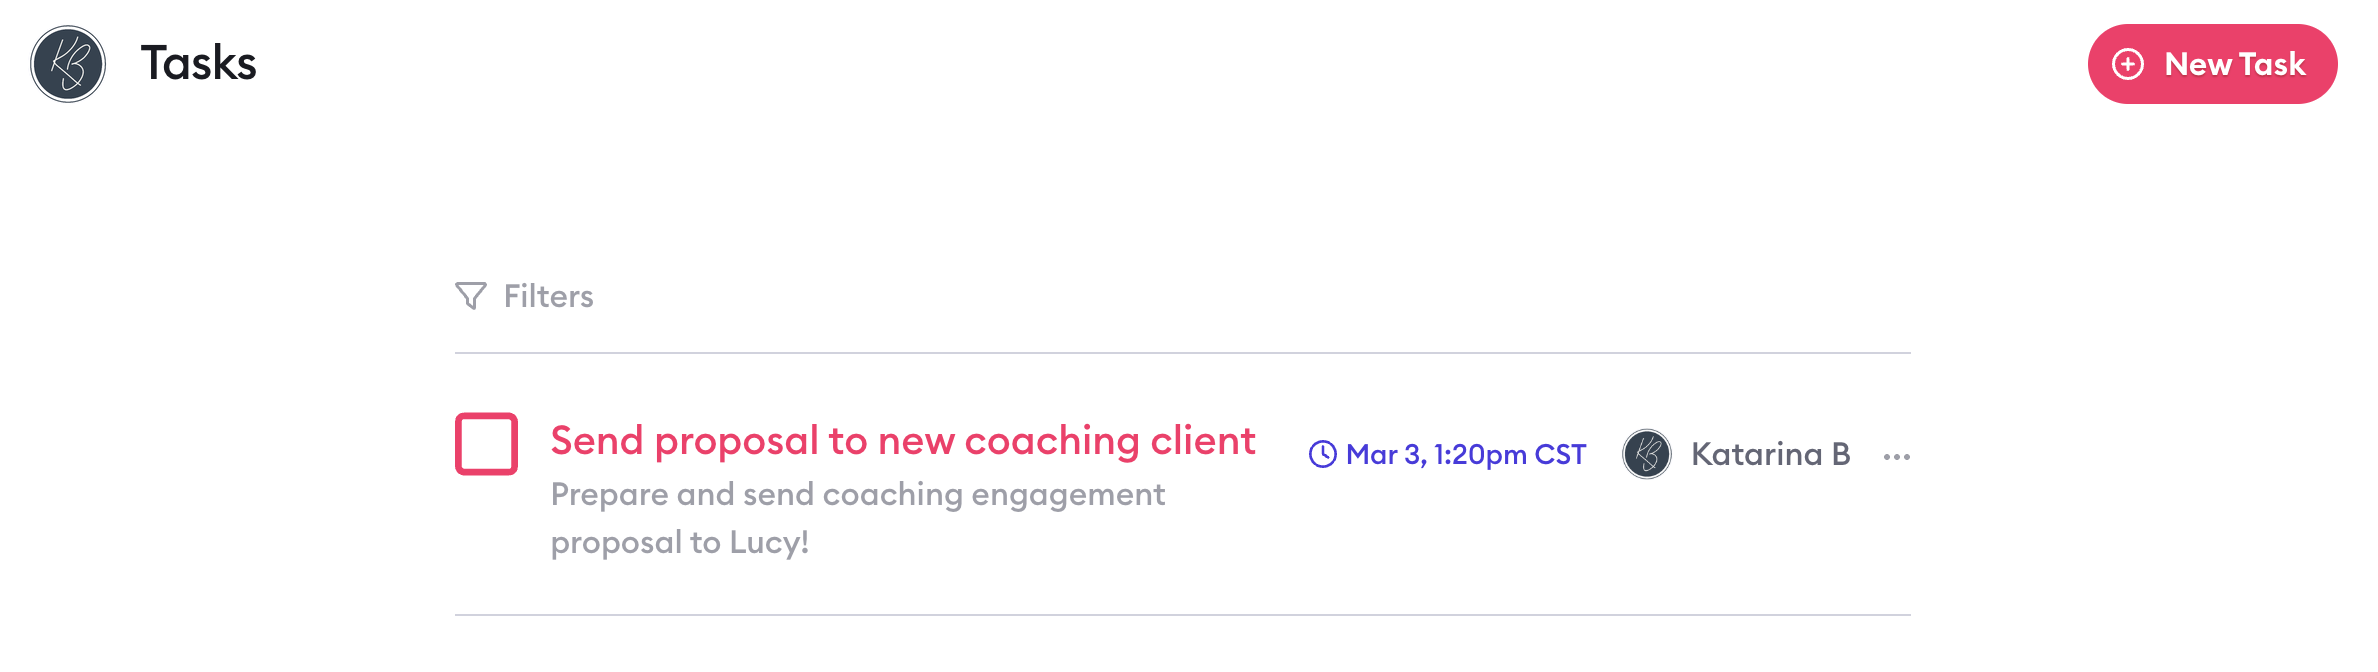
1. From your Tasks page (by clicking "New Task")
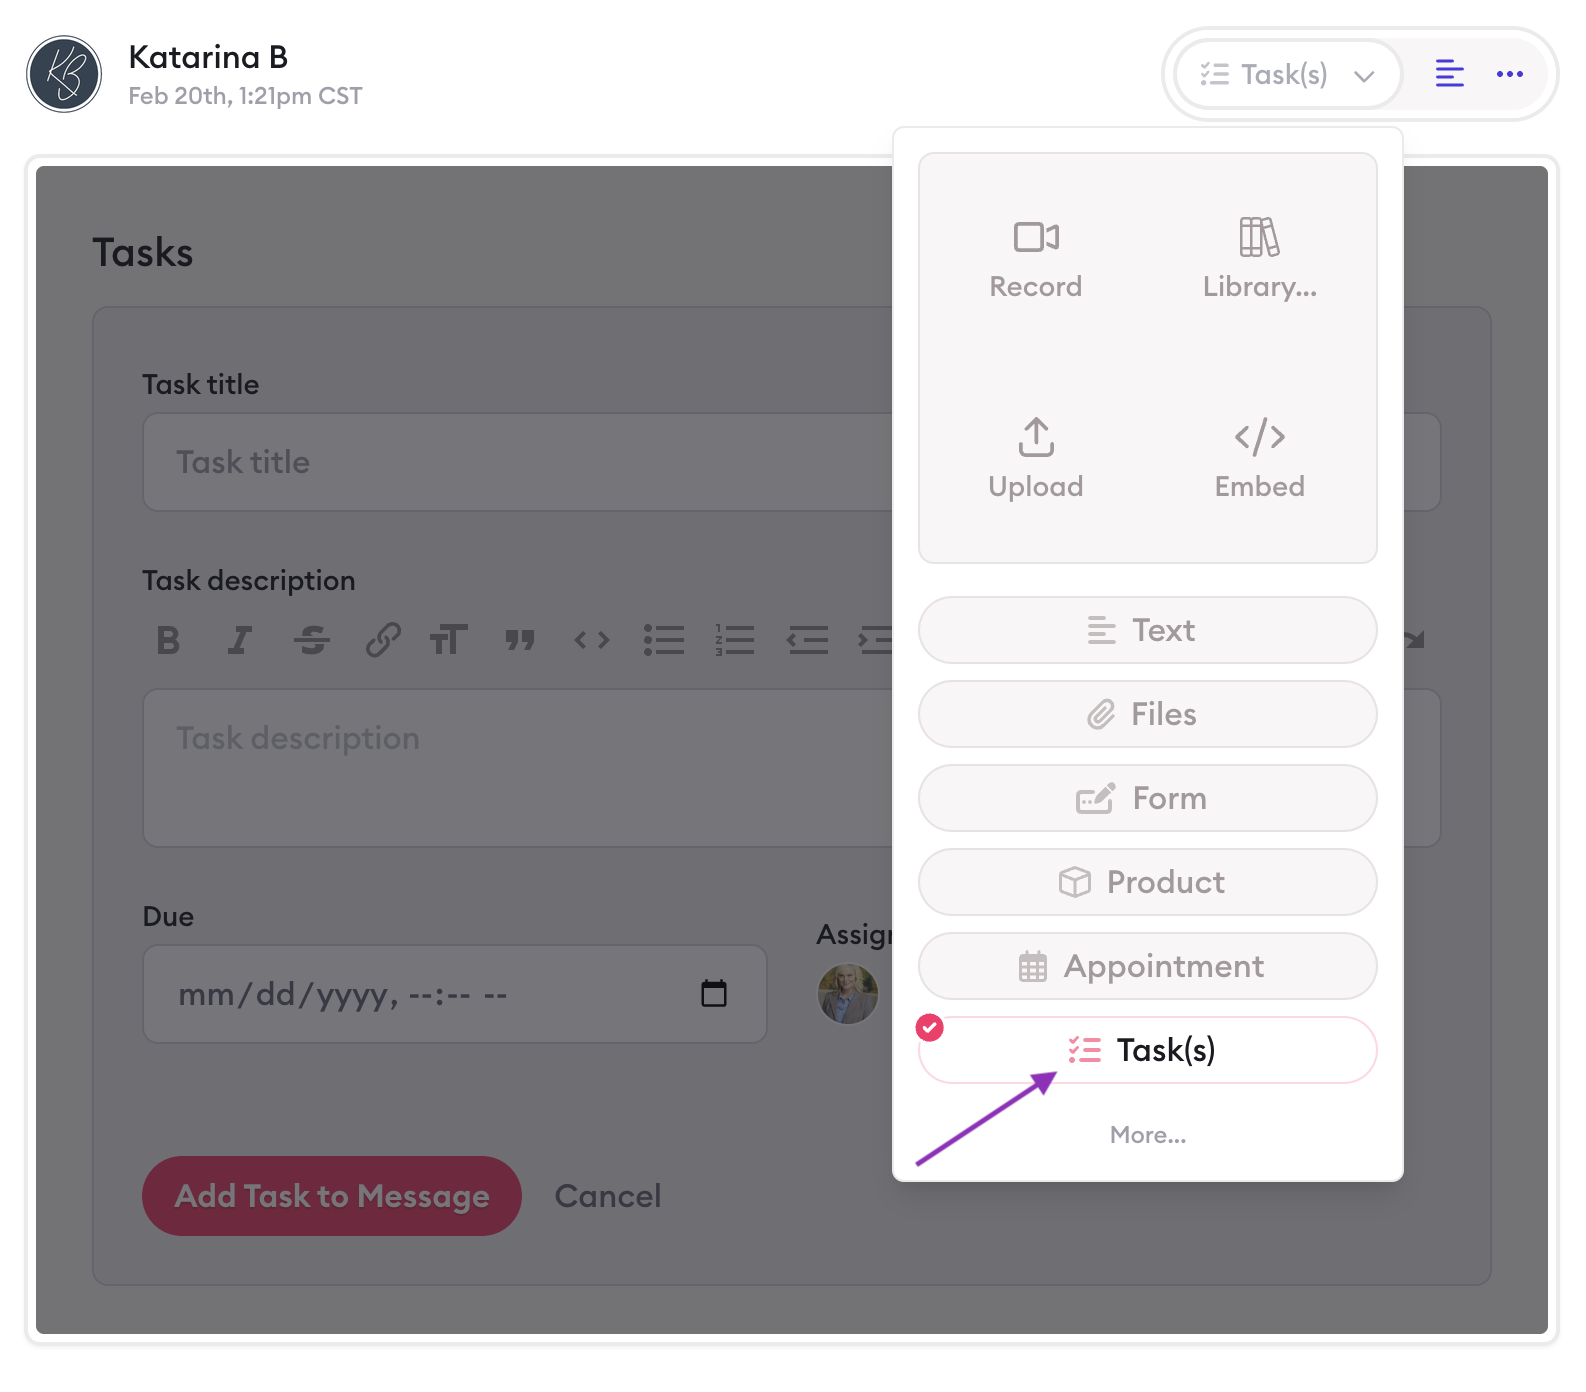
2. Within a Clarityflow message (by selecting "Tasks") from the dropdown
In both places, you have the option to:
Write a title and description for the task
Select an assignee
Set a due date
When you create a task as part of a Clarityflow message, the task is associated (or, essentially, linked with) with that message. When you view and access the task from your Tasks page, you'll also have the option to navigate back to the message that task is associated with.
Ready to learn more about creating tasks in Clarityflow? Check out this detailed guide.
Editing a task
Things change—and that's why your tasks aren't set in stone. Fortunately, it's easy to edit tasks in Clarityflow even after you've created and assigned them.
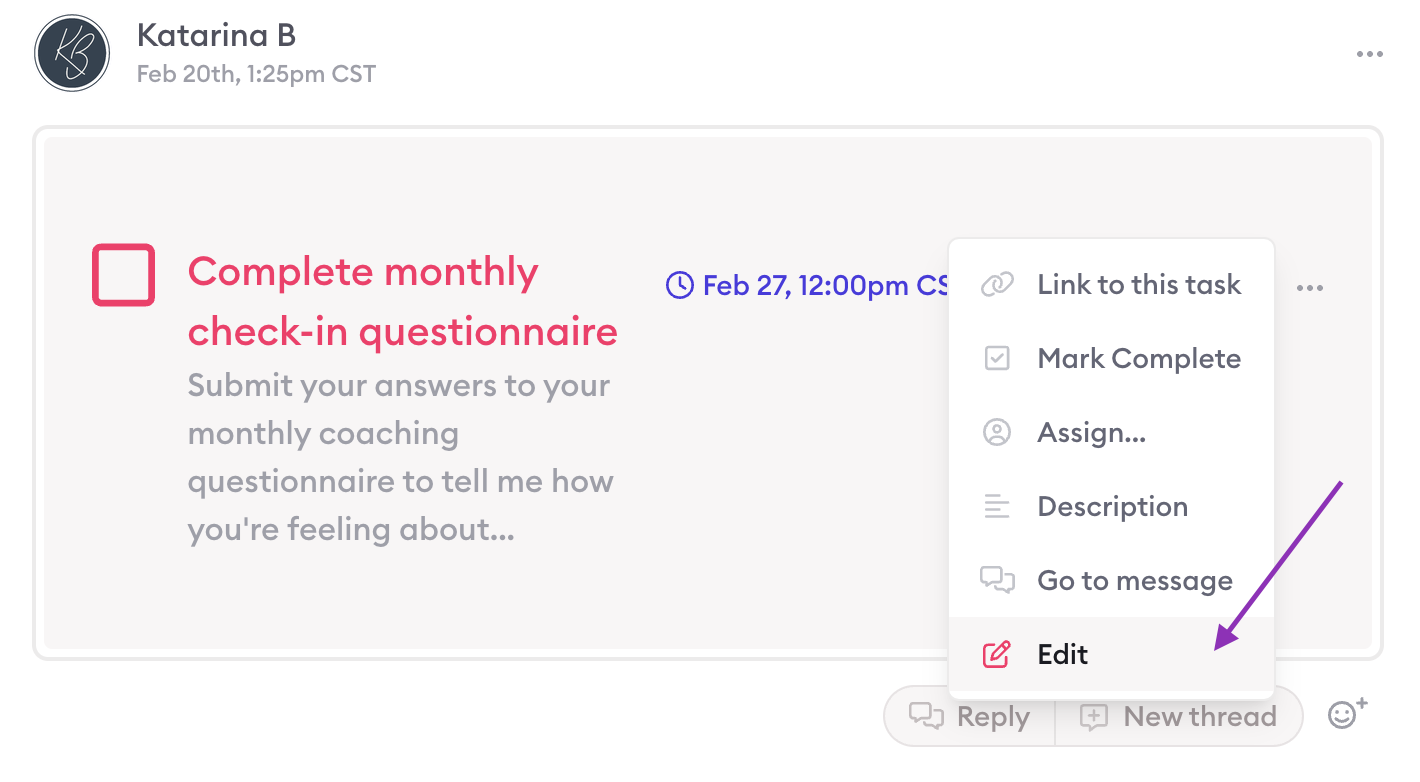
Again, you can do this in two places: from your Tasks page or within the conversation where you created the task. To do so in either place, press the three dots to the right of the task and select "Edit."
Then you'll have the option to adjust any aspect of your task, including:
Changing your task's title
Unassigning the task and reassigning it to someone else
Clearing the due date and setting a new one
Editing the task description
Subscribing yourself to the task so you're able to track progress
Tracking a task
Want to keep track of tasks that are assigned to you? Or see how your clients are progressing on the action items you assigned to them? It's easy to keep an eye on progress in Clarityflow.
One great way to do that is by "subscribing" to a task. When you're a subscriber to a task, you receive notifications when any actions are taken on that task—such as your client marking it "complete." You can add yourself as a subscriber to a task by editing the task, selecting the "Subscriber" tab, and pressing "subscribe to this task."
Your main Tasks page is another place where you can keep an eye on all of the tasks created and assigned in Clarityflow. In the left-side menu, you'll see filters to view the following tasks:
My tasks: Tasks that are assigned to you
Watching: Tasks that you're subscribed to
All tasks: All the tasks you've created in Clarityflow
You can also press the "Filters" button to open additional filters—like showing complete or incomplete tasks.
Want more information about tracking tasks in Clarityflow? Take a look at this detailed guide.
Using tasks in your async conversations
Just like anything else in Clarityflow, you can use tasks seamlessly within your async conversations. This means that you can create and assign tasks directly within the context of your conversations.
You can drop tasks into your async conversations by:
We'll take a closer look at both of these in the below sections.
Creating tasks in a new message
Here's how to create and assign tasks directly within your conversation:
Within your conversation, press "New Message"
Input your content—this could be video or audio recordings, text content, files, or anything else you want to include with your tasks
Select "Tasks" from the dropdown menu in the top right corner of the message window
Enter your task details and press "Add Task to Message"
Press "New Task" to add another task to your same message (if necessary)
When you're ready, press "Send Message" to send your message—and the tasks associated with it—into your conversation.
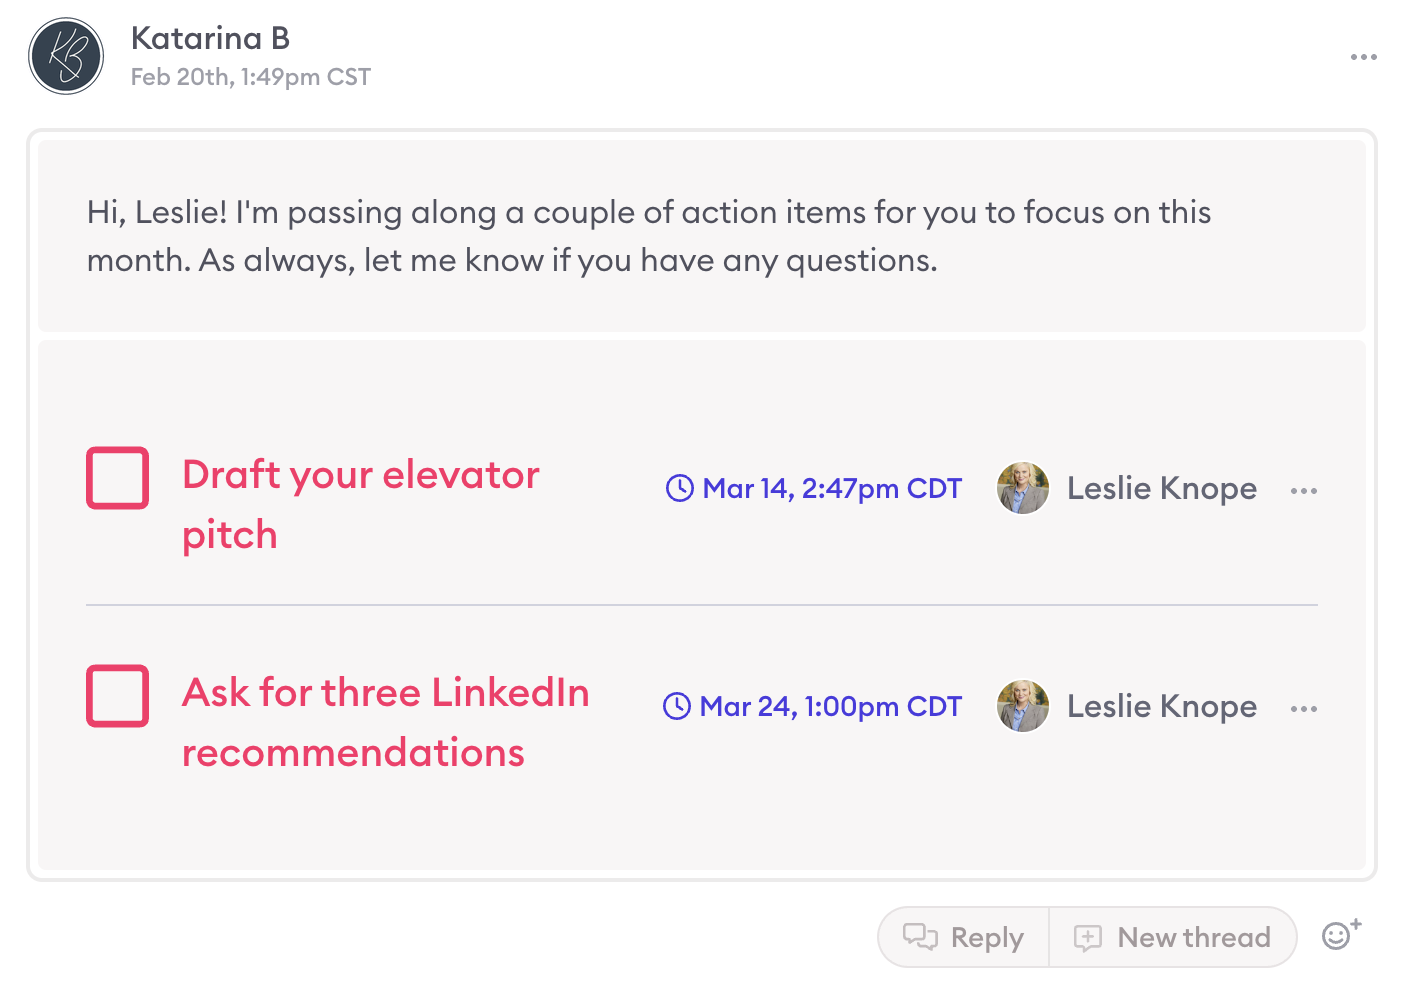
You and your client can view those tasks—and, of course, check them off as complete—directly within the context of your conversation.
Need to get back to that message at a later date? It's easy to navigate back to the exact message the task(s) is associated with. Click the three dots to the right of any task and select "Go to Message." That opens up a window where you can push the "Go to Message" button and navigate directly back to the Clarityflow message that contains the task(s).
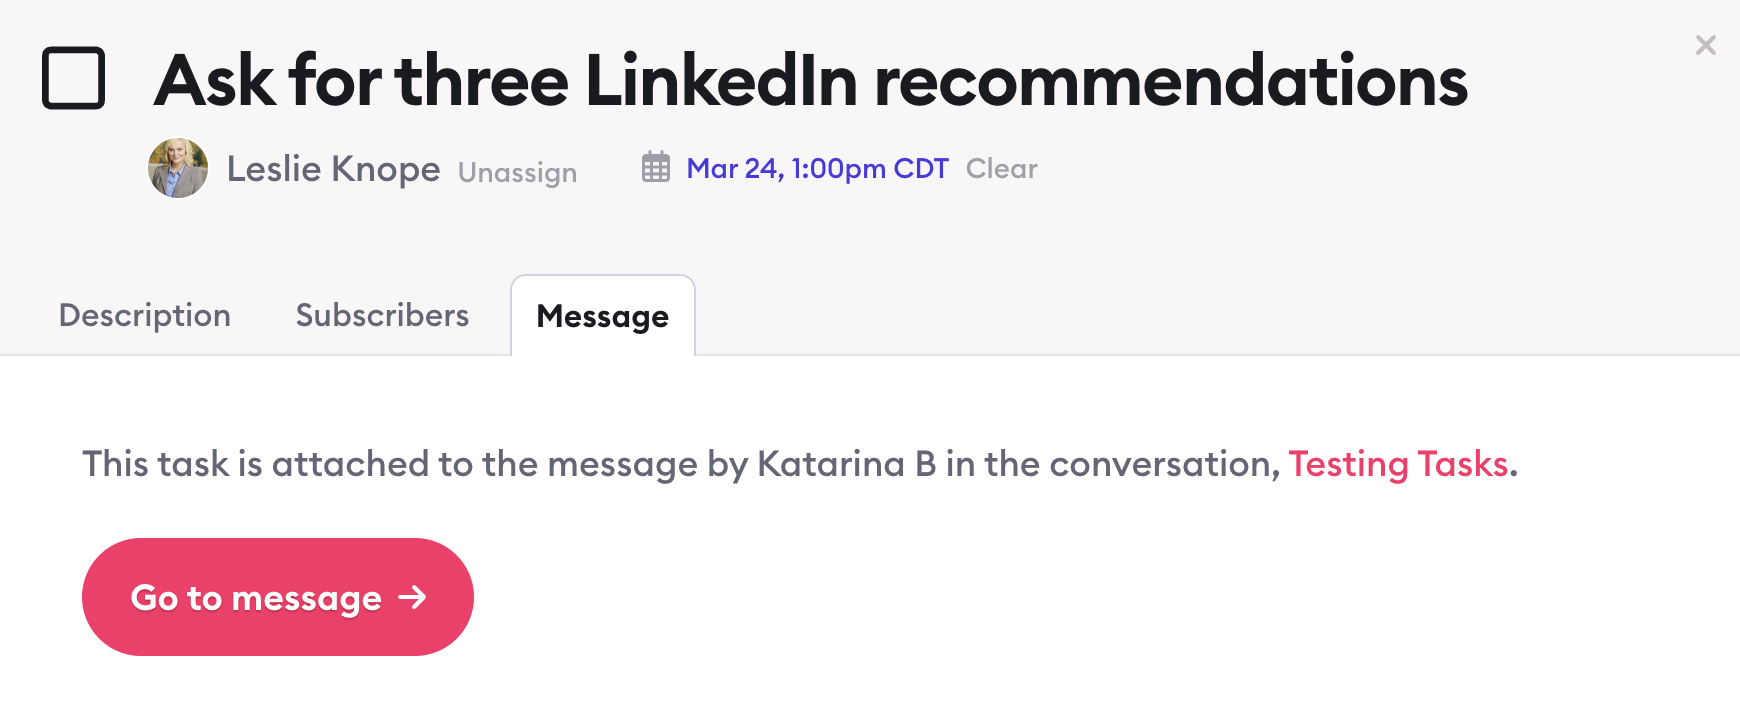
Alternatively, you can select "Edit" on any task, click into the "Message" tab of the popup, and press the "Go to Message" button.
Building task message templates
You might have certain types of tasks that repeat frequently—like monthly to-do's for your clients or action items you always use when onboarding a new client.
You can create message templates in your Clarityflow Library and attach tasks to those templates.
Doing so means you can easily drop the message (and all of its associated tasks) any place in Clarityflow with just a couple of clicks. It's great for frequently used tasks or for inserting action items into your course modules, as just a few examples.
Within your Library, press "New Message Template" and enter a name for your template (e.g. "Client Monthly Wrap-Up"). You can input any content you want to include with your message template (this can be audio or video recordings, text, files, forms, and more).
Then, from the dropdown in the top right corner of the message window, select "Tasks." Here you can add the details of your task and also set default rules for when the task should be due and who it should be assigned to.
Save your template and then you can use that message and its associated task(s) across your conversations, courses, groups, and more.
Want to learn more about creating task message templates? Check out this detailed guide.
Understanding what your clients see
As the coach and the account owner, you have more control and visibility in Clarityflow than your clients do. That means they won't see all of the same task options that you do.
In general, your clients can:
See tasks that are assigned to them
Create new tasks within a conversation
Edit tasks that they've created
Your clients can not:
Edit tasks that you or other people have created
See tasks that are assigned to your other clients
Tasks & automation workflows
Did you know that you can apply automation workflows to tasks? Yep! Use them to automatically post messages when a task has been completed, and/or trigger things when a task becomes past due.
Click here for the full guide on using automations with tasks
Learn more about Clarityflow.