Use Forms for assessments, questionnaires, and more
With Clarityflow Forms, you can create and share custom forms directly within Clarityflow—without needing to use an external form builder.
From client intake questionnaires to coaching assessments to anything in between, Clarityflow Forms allows you to seamlessly collect information from your clients. Plus, your forms can be integrated directly into your async conversations and messages in Clarityflow.
The above video and the information below will cover everything you need to get started with creating and managing forms in Clarityflow. Here's what you'll find:
What is Clarityflow Forms?
Forms is Clarityflow's native form builder that makes it easy to build customized and user-friendly forms.
With this feature, you can create a variety of forms—questionnaires, quizzes, interactive worksheets, surveys, coaching assessments, and more—directly in Clarityflow, without needing to rely on an external form builder.
You can share your forms outside of Clarityflow using a simple link. Or, you can easily integrate them into your existing Clarityflow conversations, groups, courses, and more with just a couple of clicks.
Building your form
Ready to create your first form in Clarityflow? Here's how to get started with the form builder:
1. Navigate to "Forms" in your left-side navigation menu
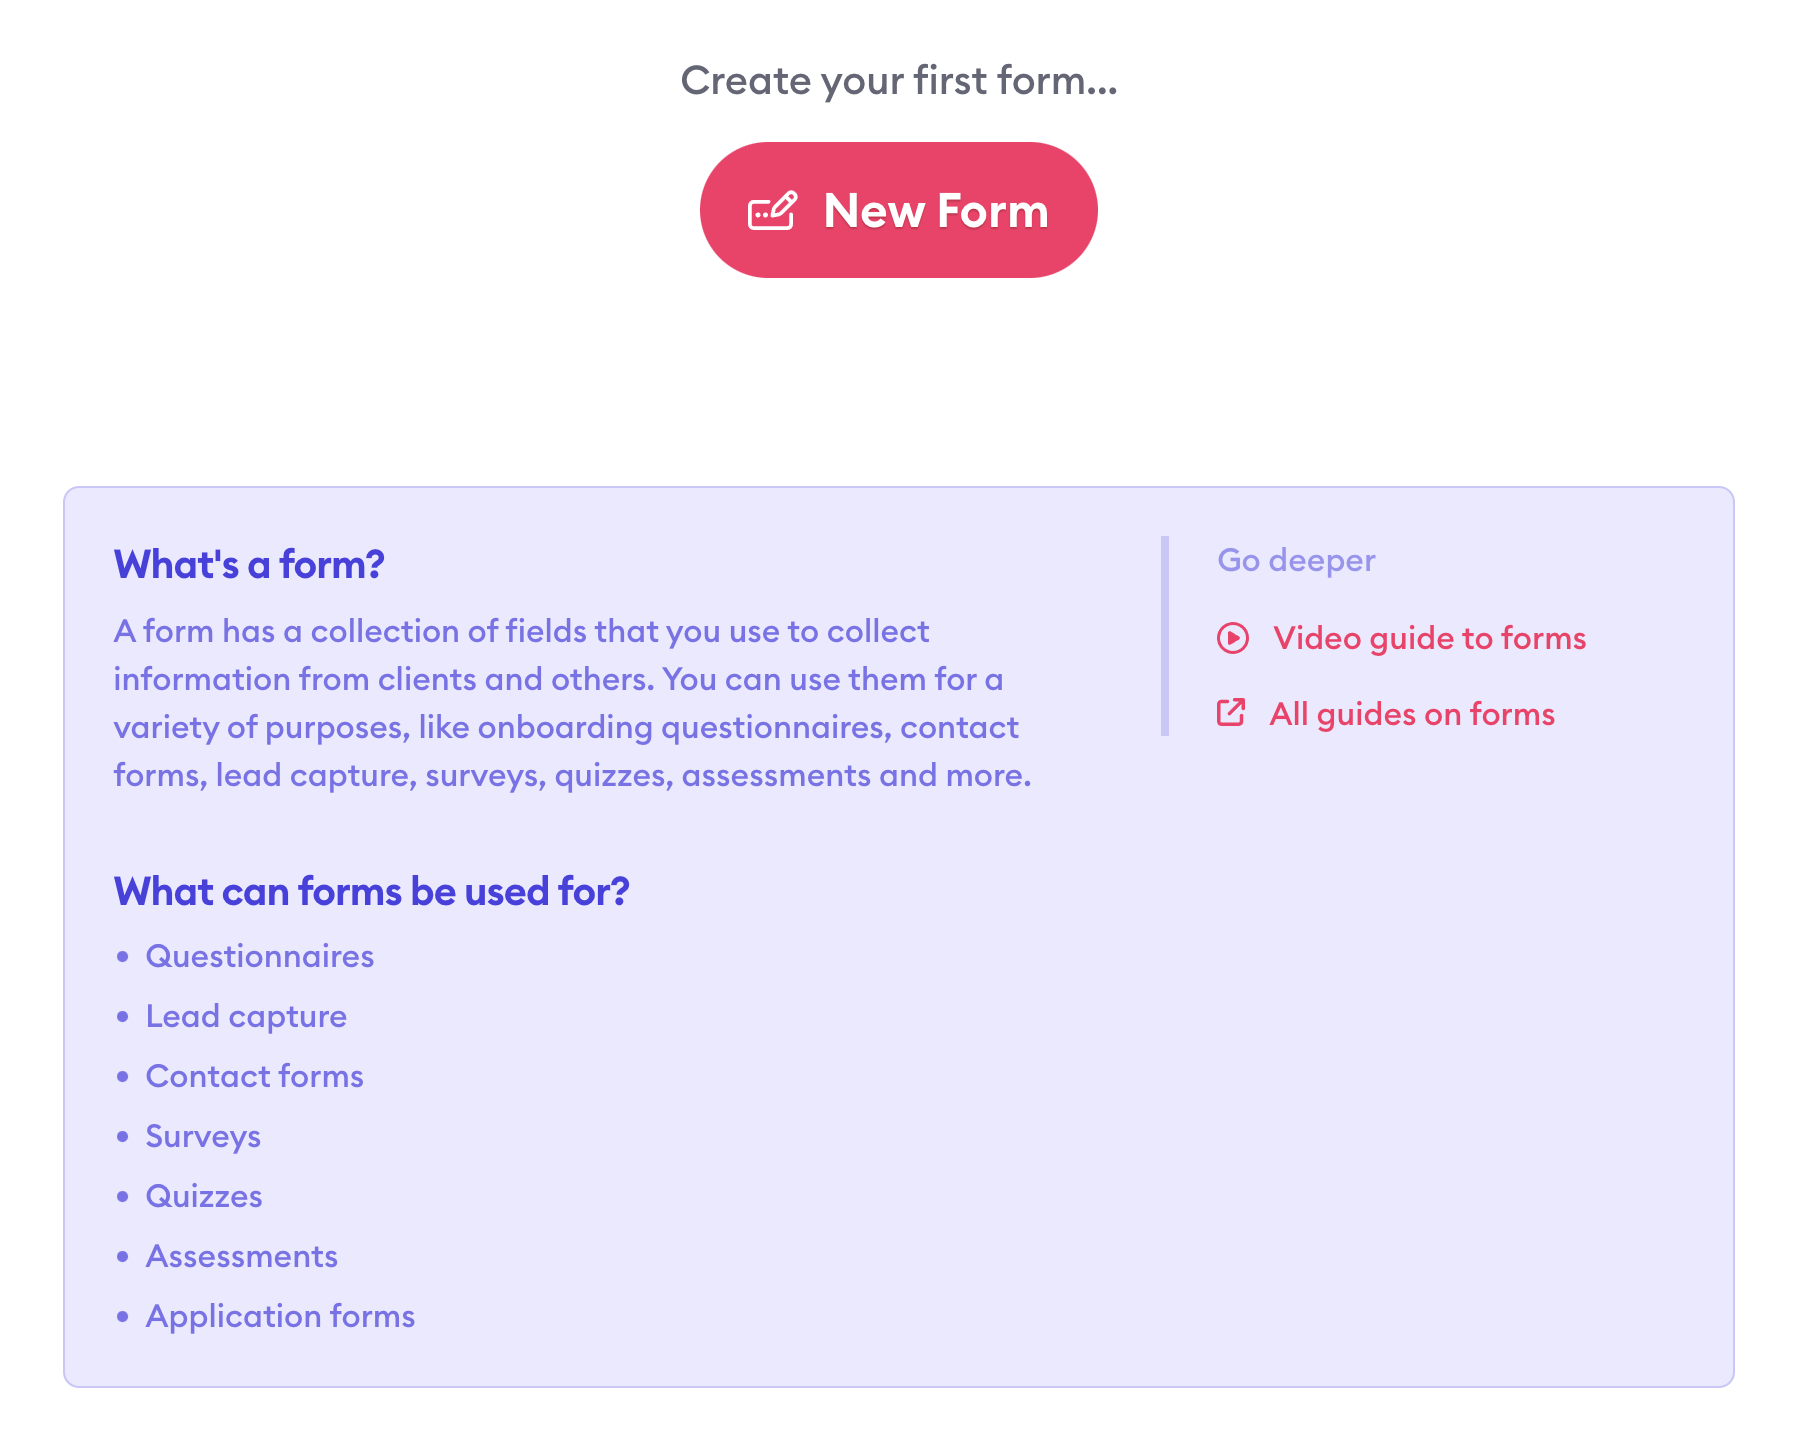
2. If this is your first time creating a form, you'll be prompted to create your first form by clicking the "New Form" button
3. Enter a name for your form (e.g. "Client Intake Questionnaire") and click "Create Form"
4. This takes you into the form builder. By default, your first form comes with three fields: first name, last name, and email address. You can edit these fields, move them, delete them, and add entirely new fields.
5. To add a new field, press the "Add a field" button. You can choose from a variety of different field types, including:
Text
Rich text
Single selection
Single checkbox
Multiple selection
File upload
Static content block
You can also customize various details of the field, such as adding helper text, setting default values, or marking fields as required.
Learn more about all of the different types of form fields and how to build forms in our detailed guide.
Customizing your form
You can customize many different pieces of your form within your form's settings. Here, you'll find several expandable menus where you can adjust:
Your form's details (name, description, etc.)
How you want to identify submissions (or if you'll allow anonymous submissions)
What should happen after someone submits a form response
Your form's appearance and branding
Who should receive notifications of new submissions
You can dig into the details of how to customize all of these aspects of your form in our detailed guide.
Sending and sharing your form
When you're happy with how your form looks and functions, you're ready to share it and start collecting submissions. There are several ways you can do this:
Copy the form URL to send it to anyone
Form Settings > Form URL > Copy
Drop a form into a Clarityflow conversation
Within a conversation, press "New Message," select "Form" from the upper right dropdown, select your desired form, and press "Send Message"
Save a form as a message template
Library > New Message Template > name your message template > select "Form" from the upper right dropdown, select your desired form, add any other text or desired content to your template, and press "Create Message Template"
Integrate a form into a Clarityflow course
Within your course builder, press "Add content," search for your form message template, click the template, and press "Add to Course"
...orWithin your course builder, press "Add Content," select "Form" from the upper right dropdown, select your desired form, name your message template, and press "Add to Course"
In our guide to sending and sharing your form, we walk through each of the above options in greater detail.
Receiving form notifications
Understandably, you want to know when someone submits a response to your form. You have control over who should receive notifications for each of your forms using simple toggles.
Within your form's settings, expand the menu for "notifications." Here you can customize different aspects of your form submission notifications.
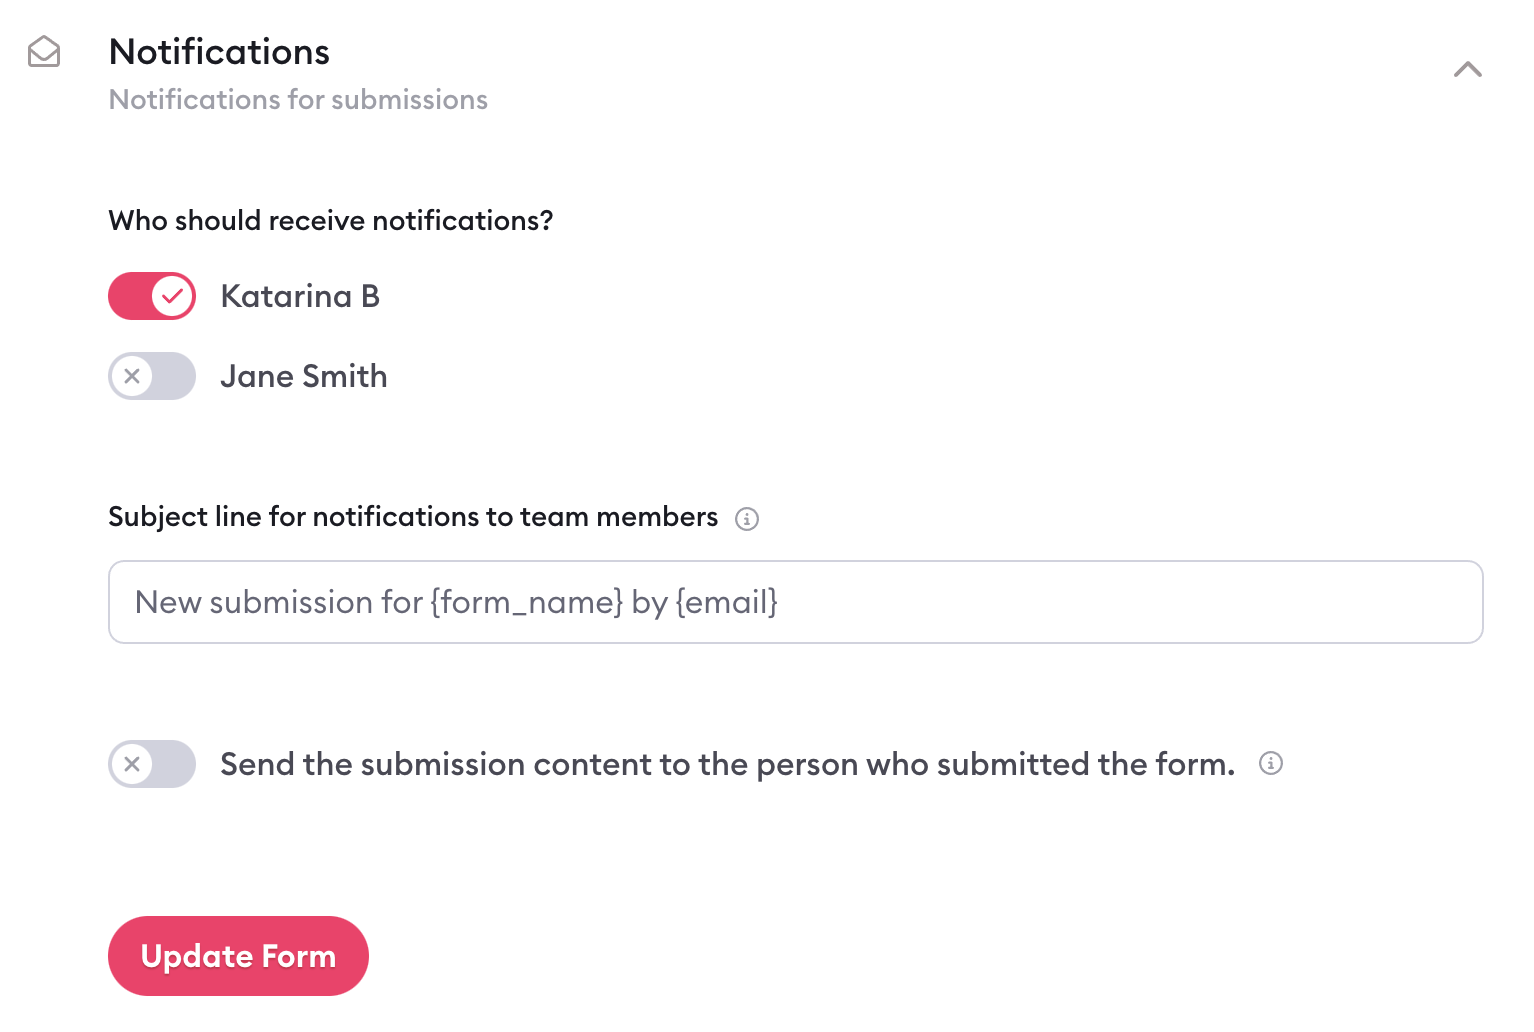
Start by selecting which members of your team you want to receive notifications about new form submissions.
You can also customize the subject line for the email notifications that are sent when a new form response is submitted.
Additionally, you can use the toggle to decide whether you want to send submission content to the person who submitted the form. If you turn that toggle on, the person will receive a confirmation email that contains the answers and information they submitted in their form.
Remember to press "Update Form" to save any changes you make here.
Managing form submissions
Form notifications will keep you up-to-date on who's submitting responses to your form. However, it's also easy to see all of the submissions to your different forms directly within Clarityflow. Here's how.
See all of your form submissions at once
Want to see all of the submissions you received—not separated by different forms? Click "Forms" in the left-side navigation menu and then select "Submissions." Doing so displays a list of all of your form submissions.
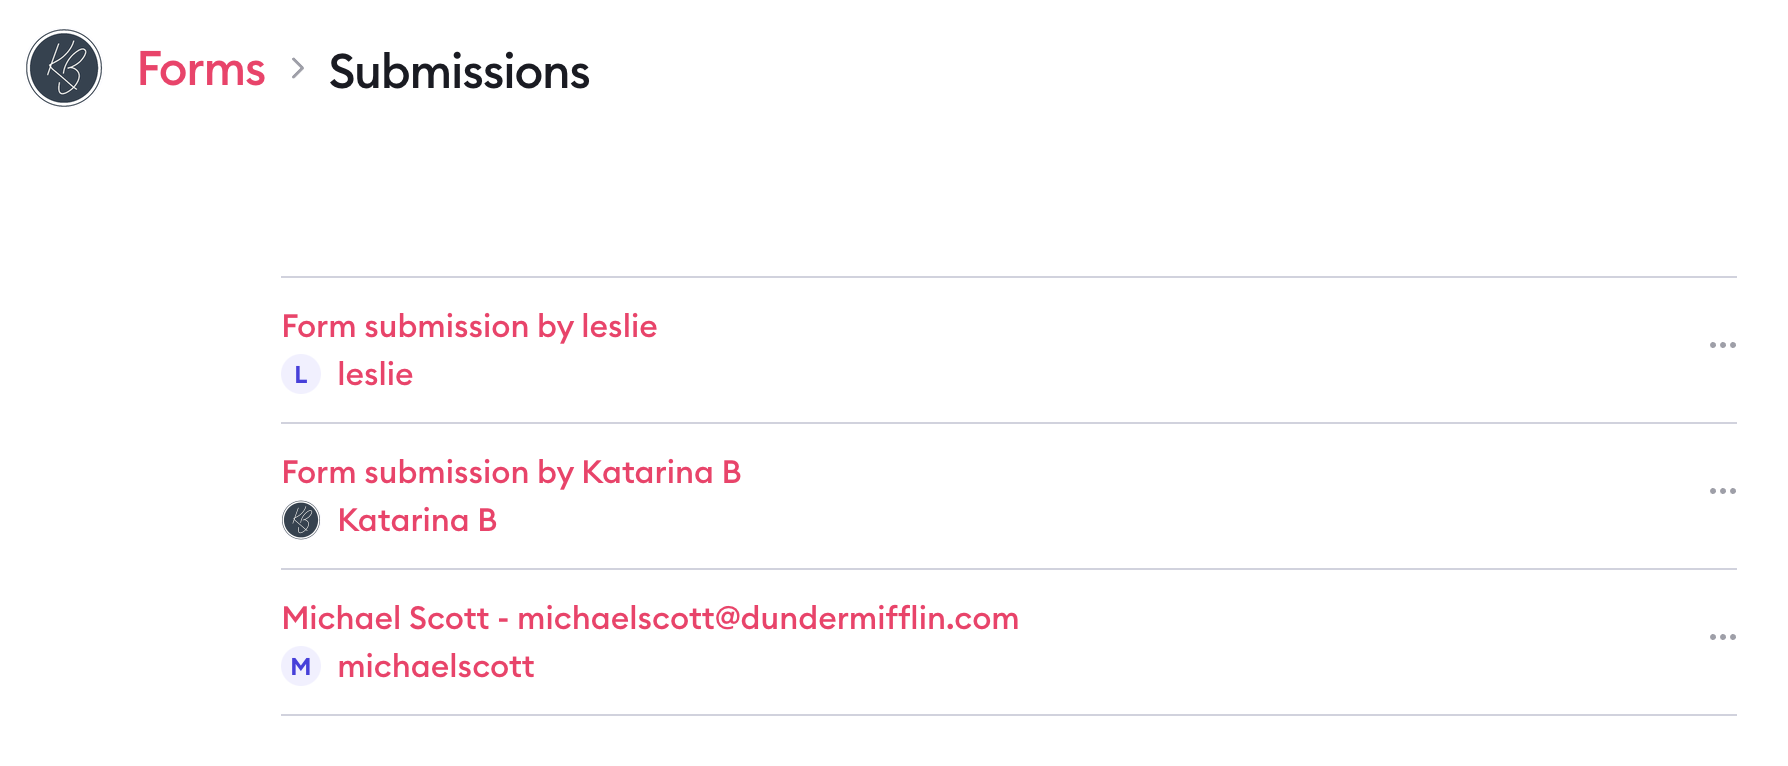
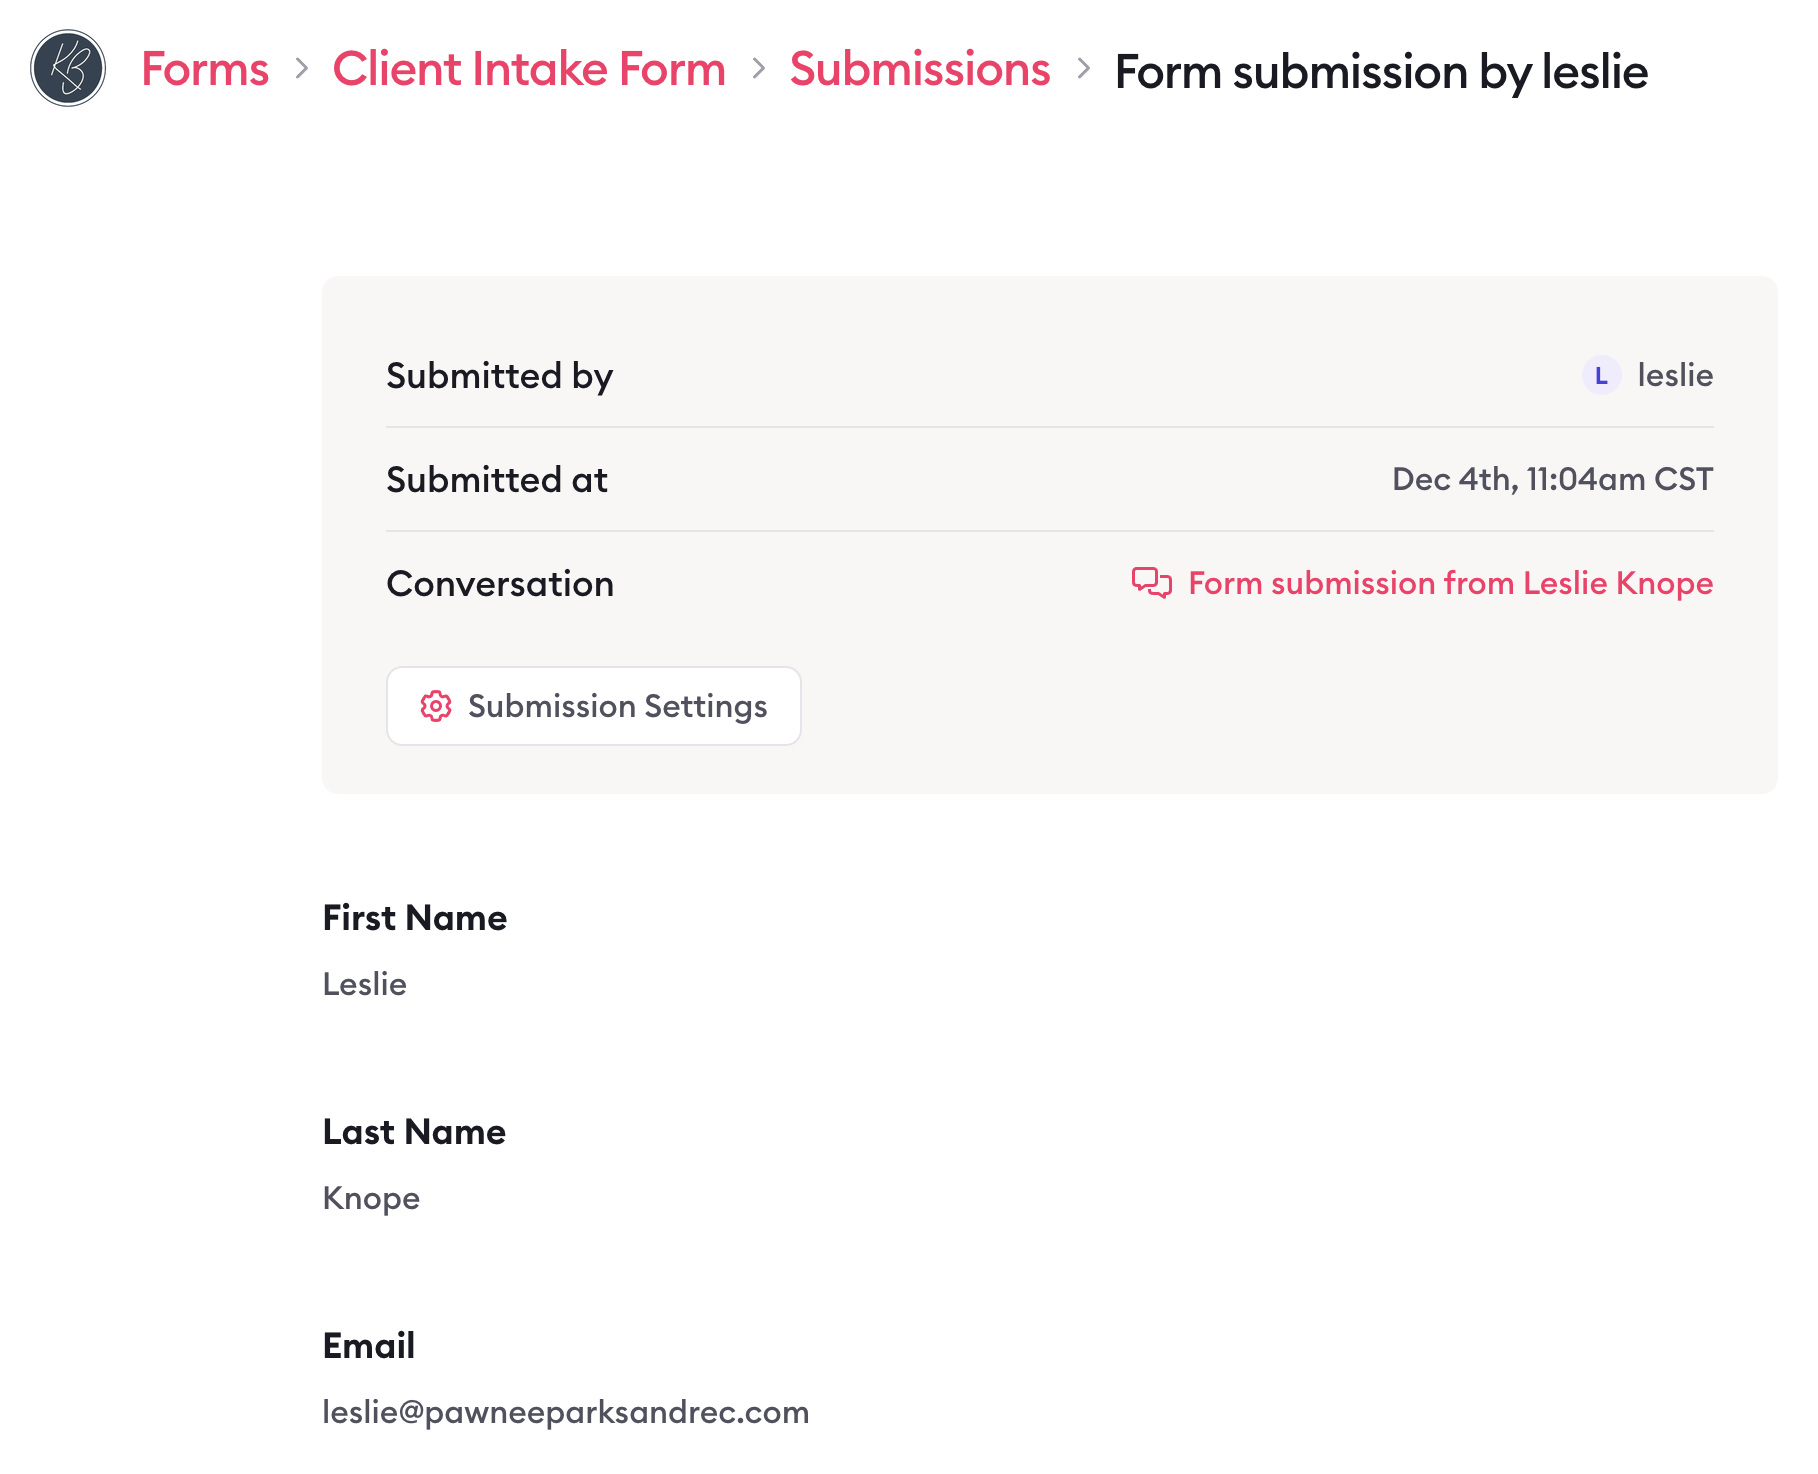
You can click each one to open the details of that specific submission.
See submissions for specific forms
Let's say you only want to see the submissions for one particular form. For example, you want to see the responses to your client intake form—but not to your coaching progress questionnaire.
You can do this in two different ways:
1. Navigate to "Forms" in the left-side menu, select "Submissions," and then select which form's submissions you want to see (e.g. your client intake form).
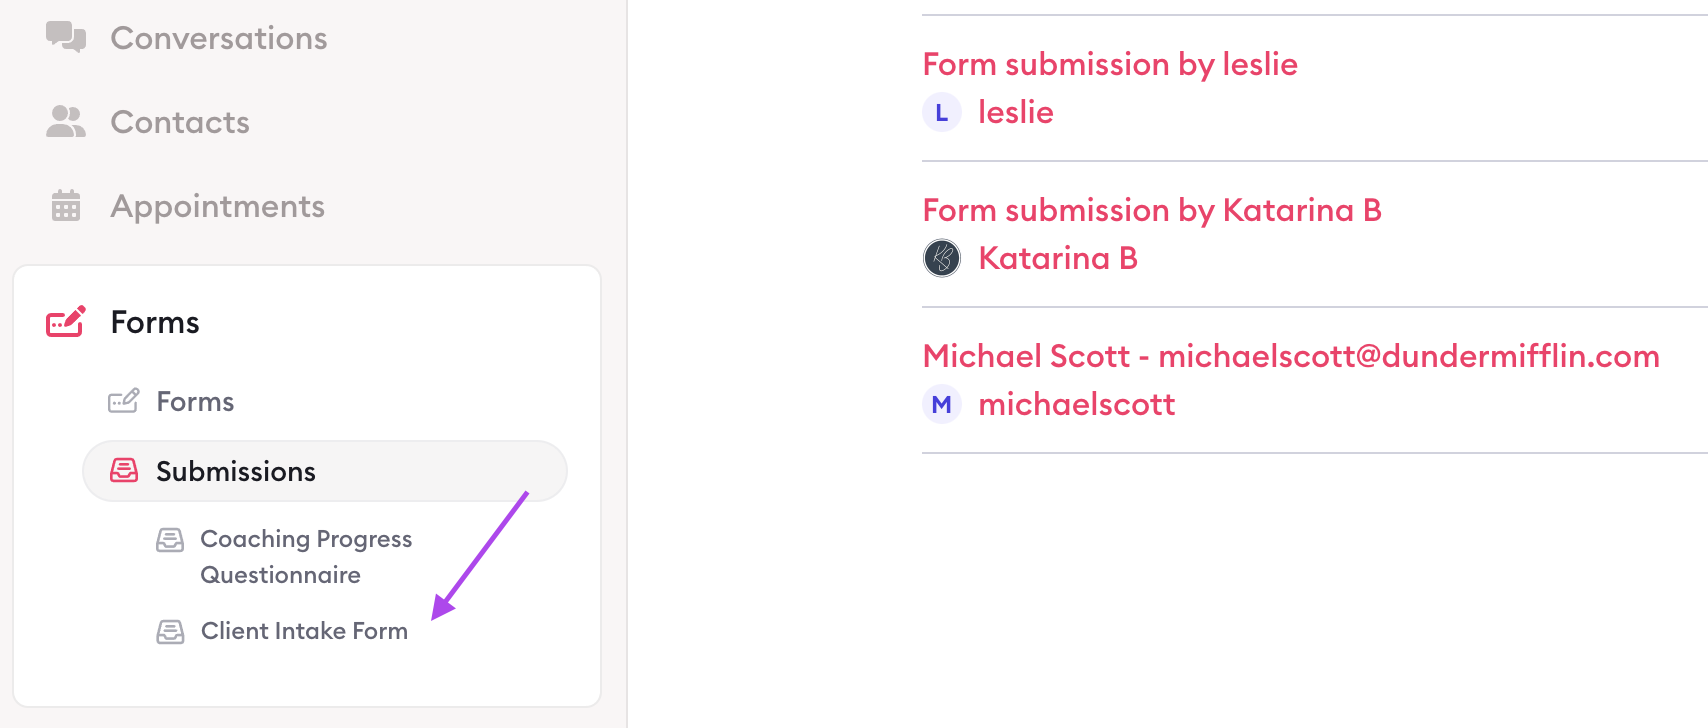
Doing so brings you directly to the list of submissions for that particular form.
2. Navigate to "Forms" in the left-side menu, click into your desired form, and select "Submissions" from the left-side menu.
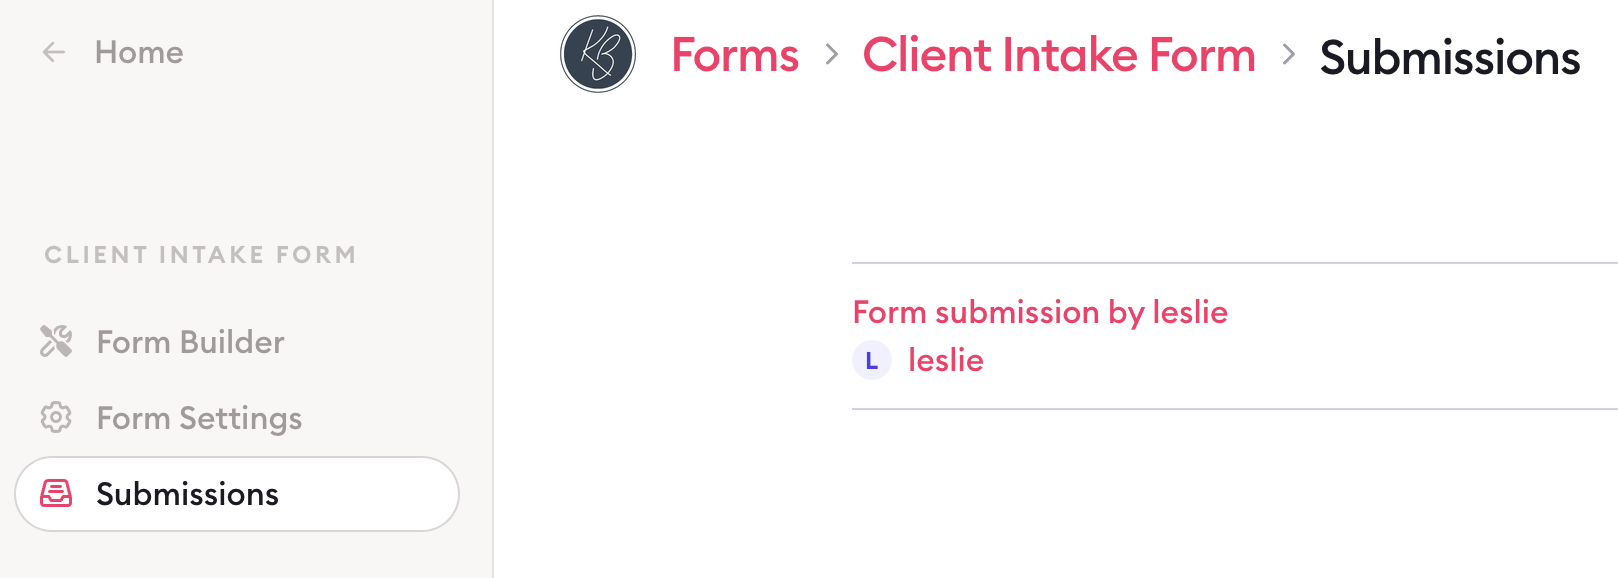
Both options ultimately bring you to the same place—they're just two different routes for getting there.
Understanding form spam protection
You don't want to have to wade through endless spam submissions, which is why Clarityflow's Forms feature has built-in spam protection.
NOTE: If you are using a custom domain with Clarityflow, the built-in spam protection widget will not work. You will need to install your own spam protection on your forms. Here's our detailed guide to do so.
You have control over your spam protection preferences in your Form Settings > Form Display > Spam protection preference.
By default, spam protection is set to "invisible," meaning your clients and people who submit responses to your form won't actually see or need to interact with any sort of spam filtering.
However, you can switch to a visible version of spam protection if you'd like. This will display a small widget directly under your form's "Submit" button. You have two different options for this widget:
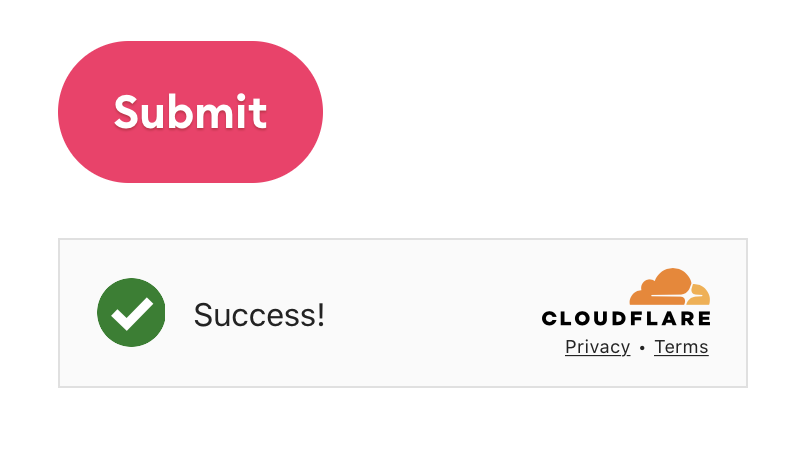
Non-interactive widget
This requires no interaction from the person submitting the form. They'll see the widget, but it will automatically check for spam and display a "success" message—no action required.
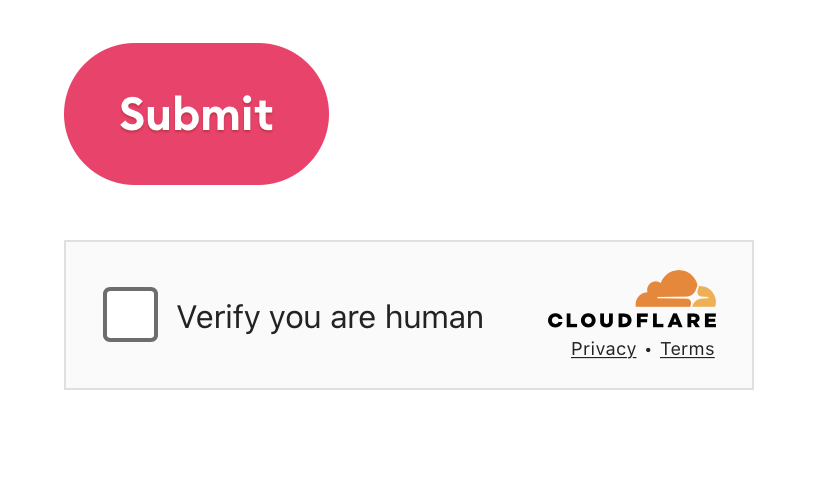
Checkbox widget
With this option, the person submitting your form will need to click the checkbox to confirm they're human before submitting.
Alternatively, you can also disable spam protection entirely. But, we recommend keeping it on to better control and weed out any spam responses.
Learn more about Clarityflow.