Customize your Clarityflow form
Your form builder is where you'll add and edit form fields to collect the information you need, but your form's settings are where you can customize all of the other aspects of your form.
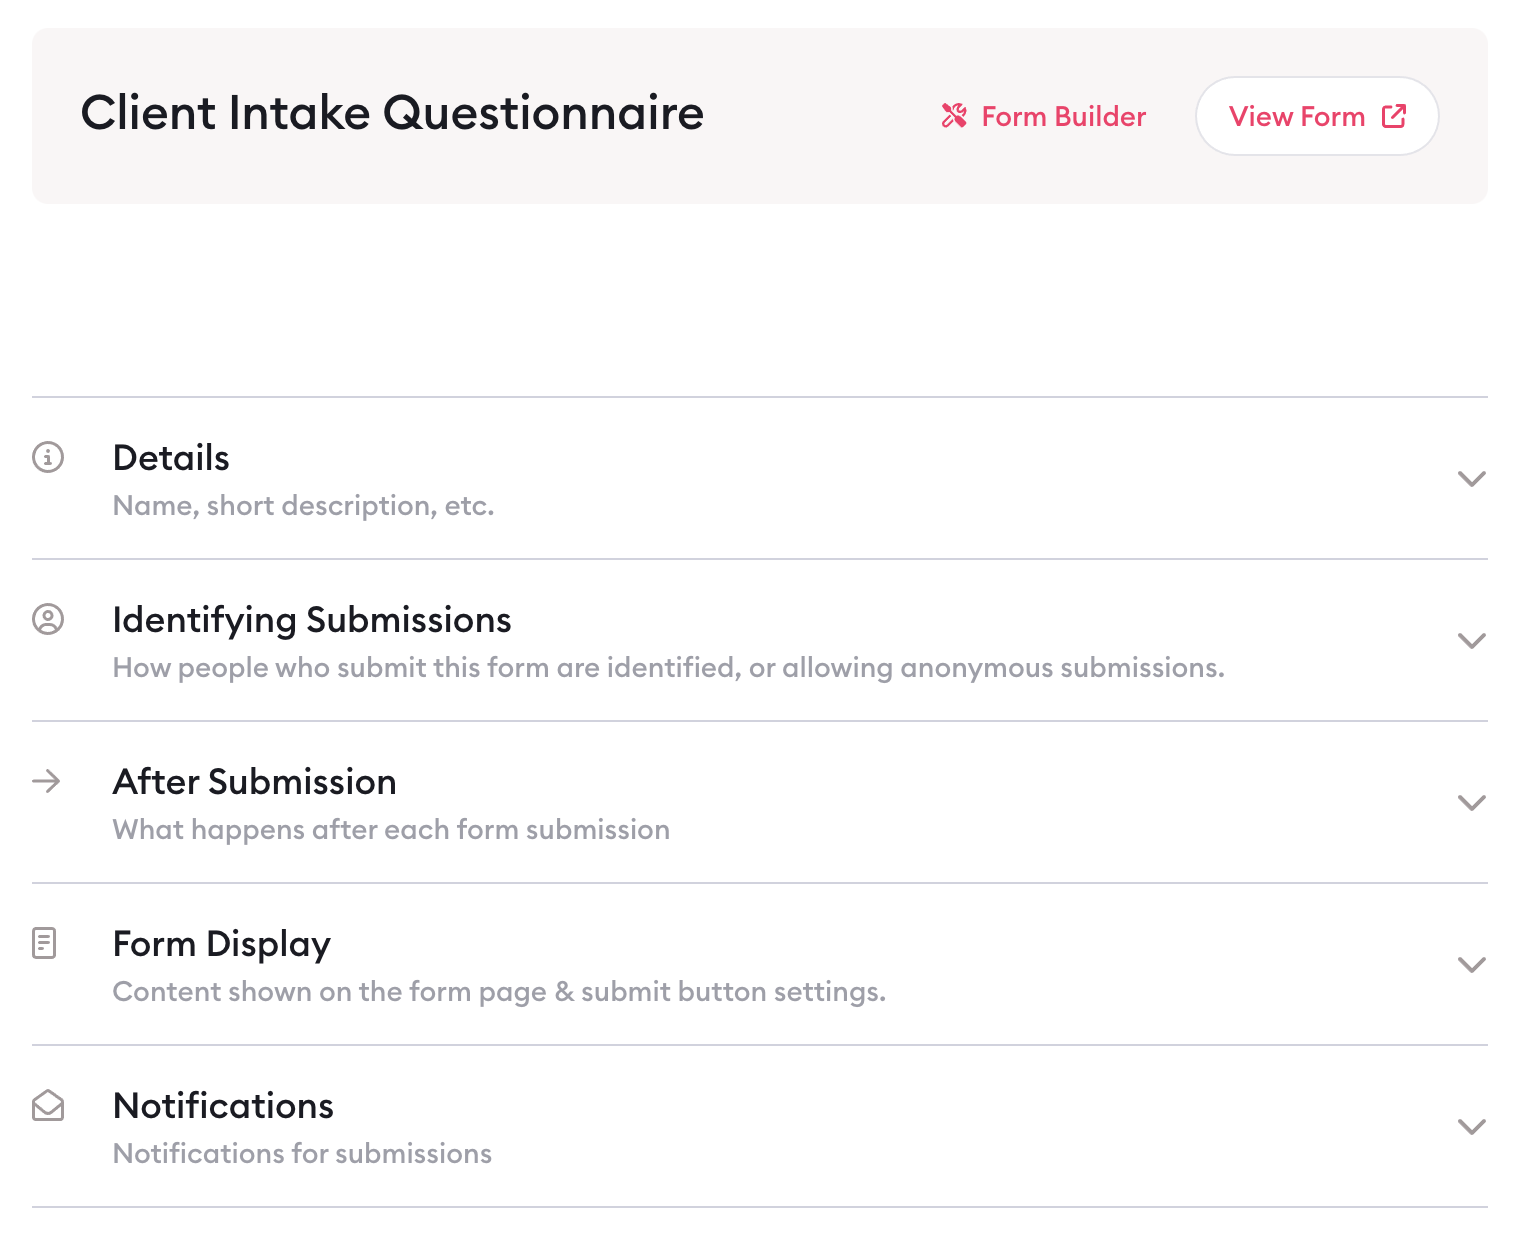
Click into the form you want to edit and select "Form Settings" in the left-side menu. Here, you'll find expandable menus where you can adjust:
Your form's details (name, description, etc.)
How you want to identify submissions (or if you'll allow anonymous submissions)
What should happen after someone submits a form response
Who should receive notifications of new submissions
Let's take a look at each of these different sections and the customizations that are available in each.
Customizing your form's details
Here's where you can adjust some nuts and bolts information on your form, including:
Your form name
A short description of the form
Your form's URL
Whether the form should be active (i.e. accepting submissions) or not
The title you want to use for submissions (you can use {field_name} to display a specific value from the form submission, using the field name you specified in the field's settings)
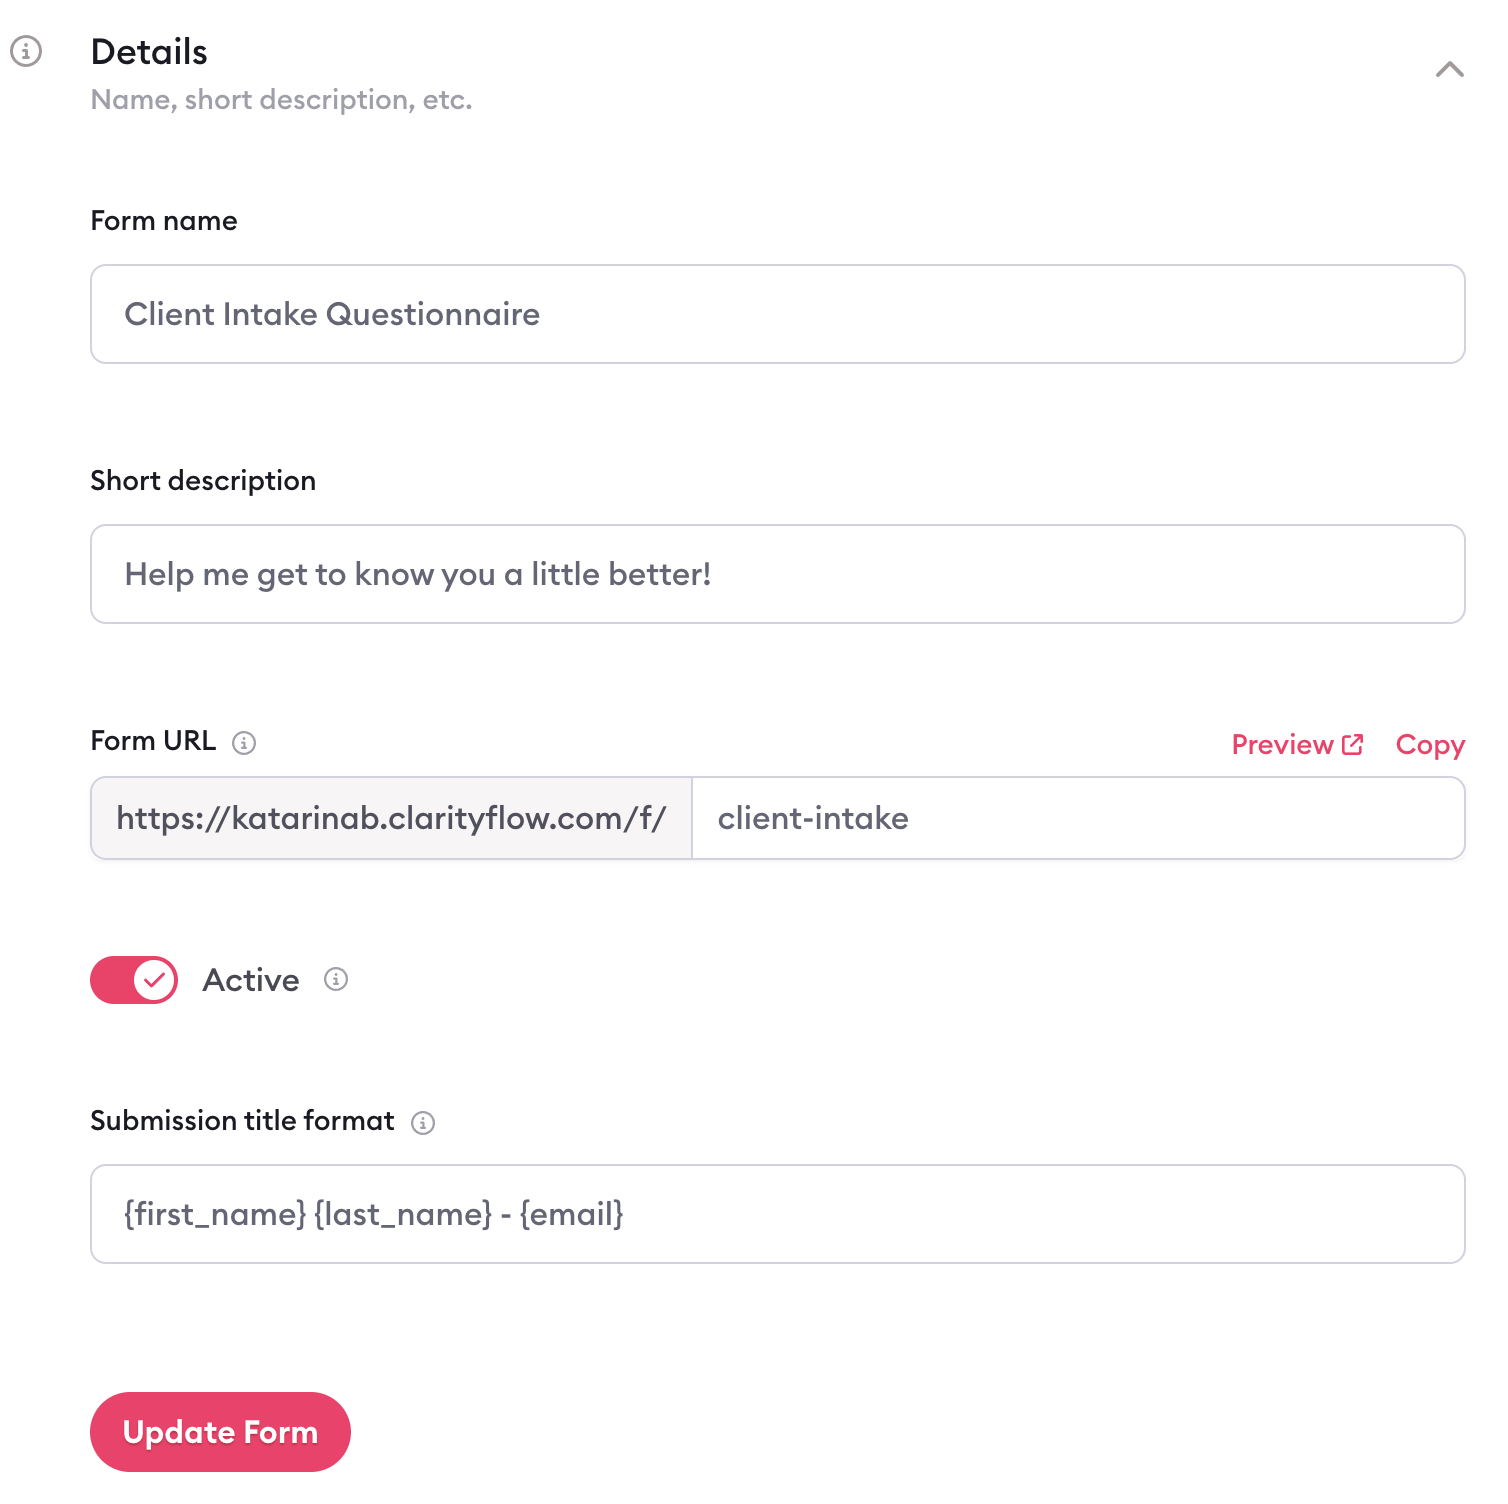
Remember to hit "Update Form" to save your changes.
Identifying form submissions
In this section, you control how (or if) you want to identify people who submit a response to your form.
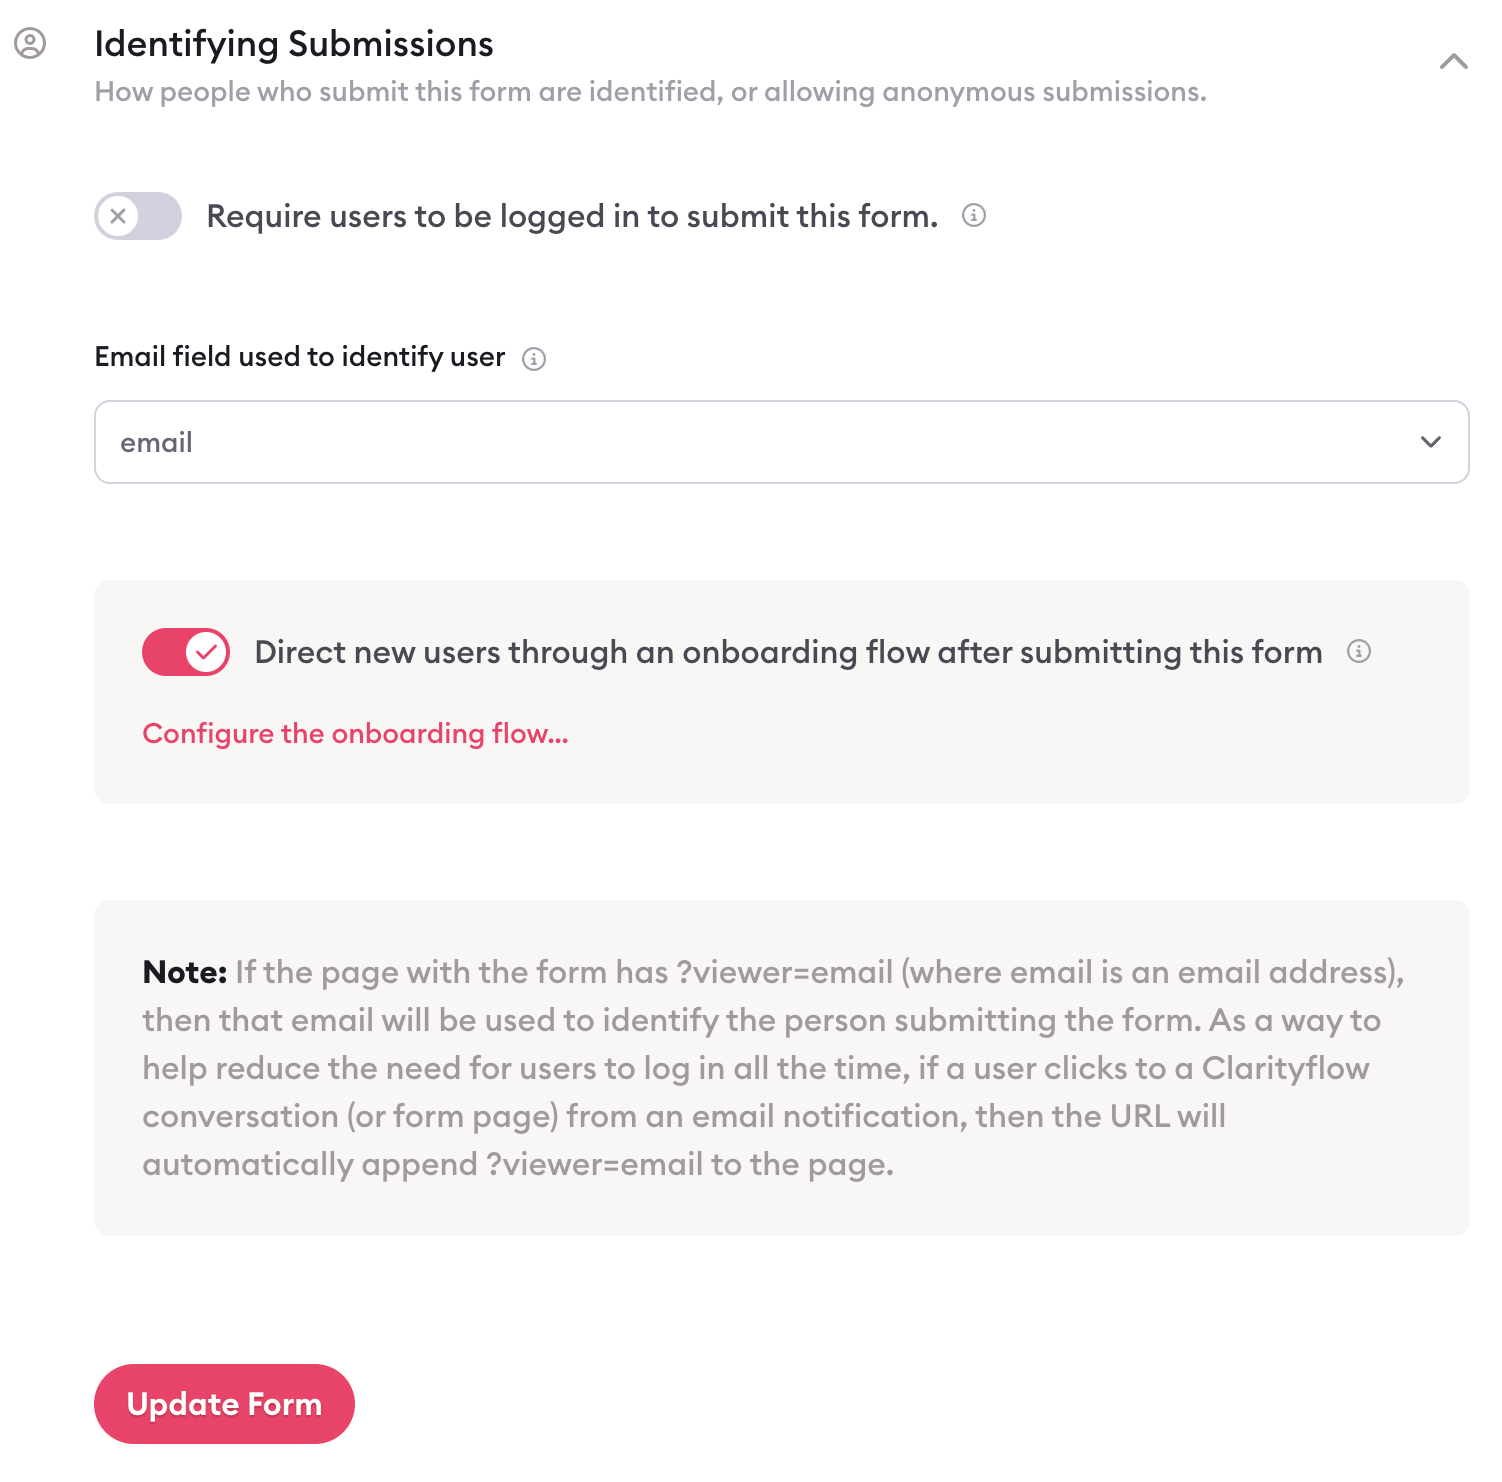
You can turn on the toggle to require users to be logged in to Clarityflow to submit a response to the form.
You'll also specify which email field from your form Clarityflow should use to identify a user (which only matters if you have more than one email field on your form—otherwise it will default to your sole email field).
Finally, you can decide whether or not you want users to go through an onboarding flow after submitting the form. And, if so, you can configure the steps they'll go through by clicking the "configure the onboarding flow" link.
When you have this toggle turned on to push users through an onboarding flow, this means that:
If the person submitting the form has not registered with Clarityflow, they'll go through the brief onboarding steps you defined
If the person submitting the form has registered with Clarityflow, Clarityflow will recognize them and send them to your "after submission" destination (without pushing them through any onboarding steps)
Again, remember to hit the "Update Form" button to save your changes.
Setting an "after submission" destination
Where do you want people to land after they submit a response to your form? That's what you'll specify in this section.
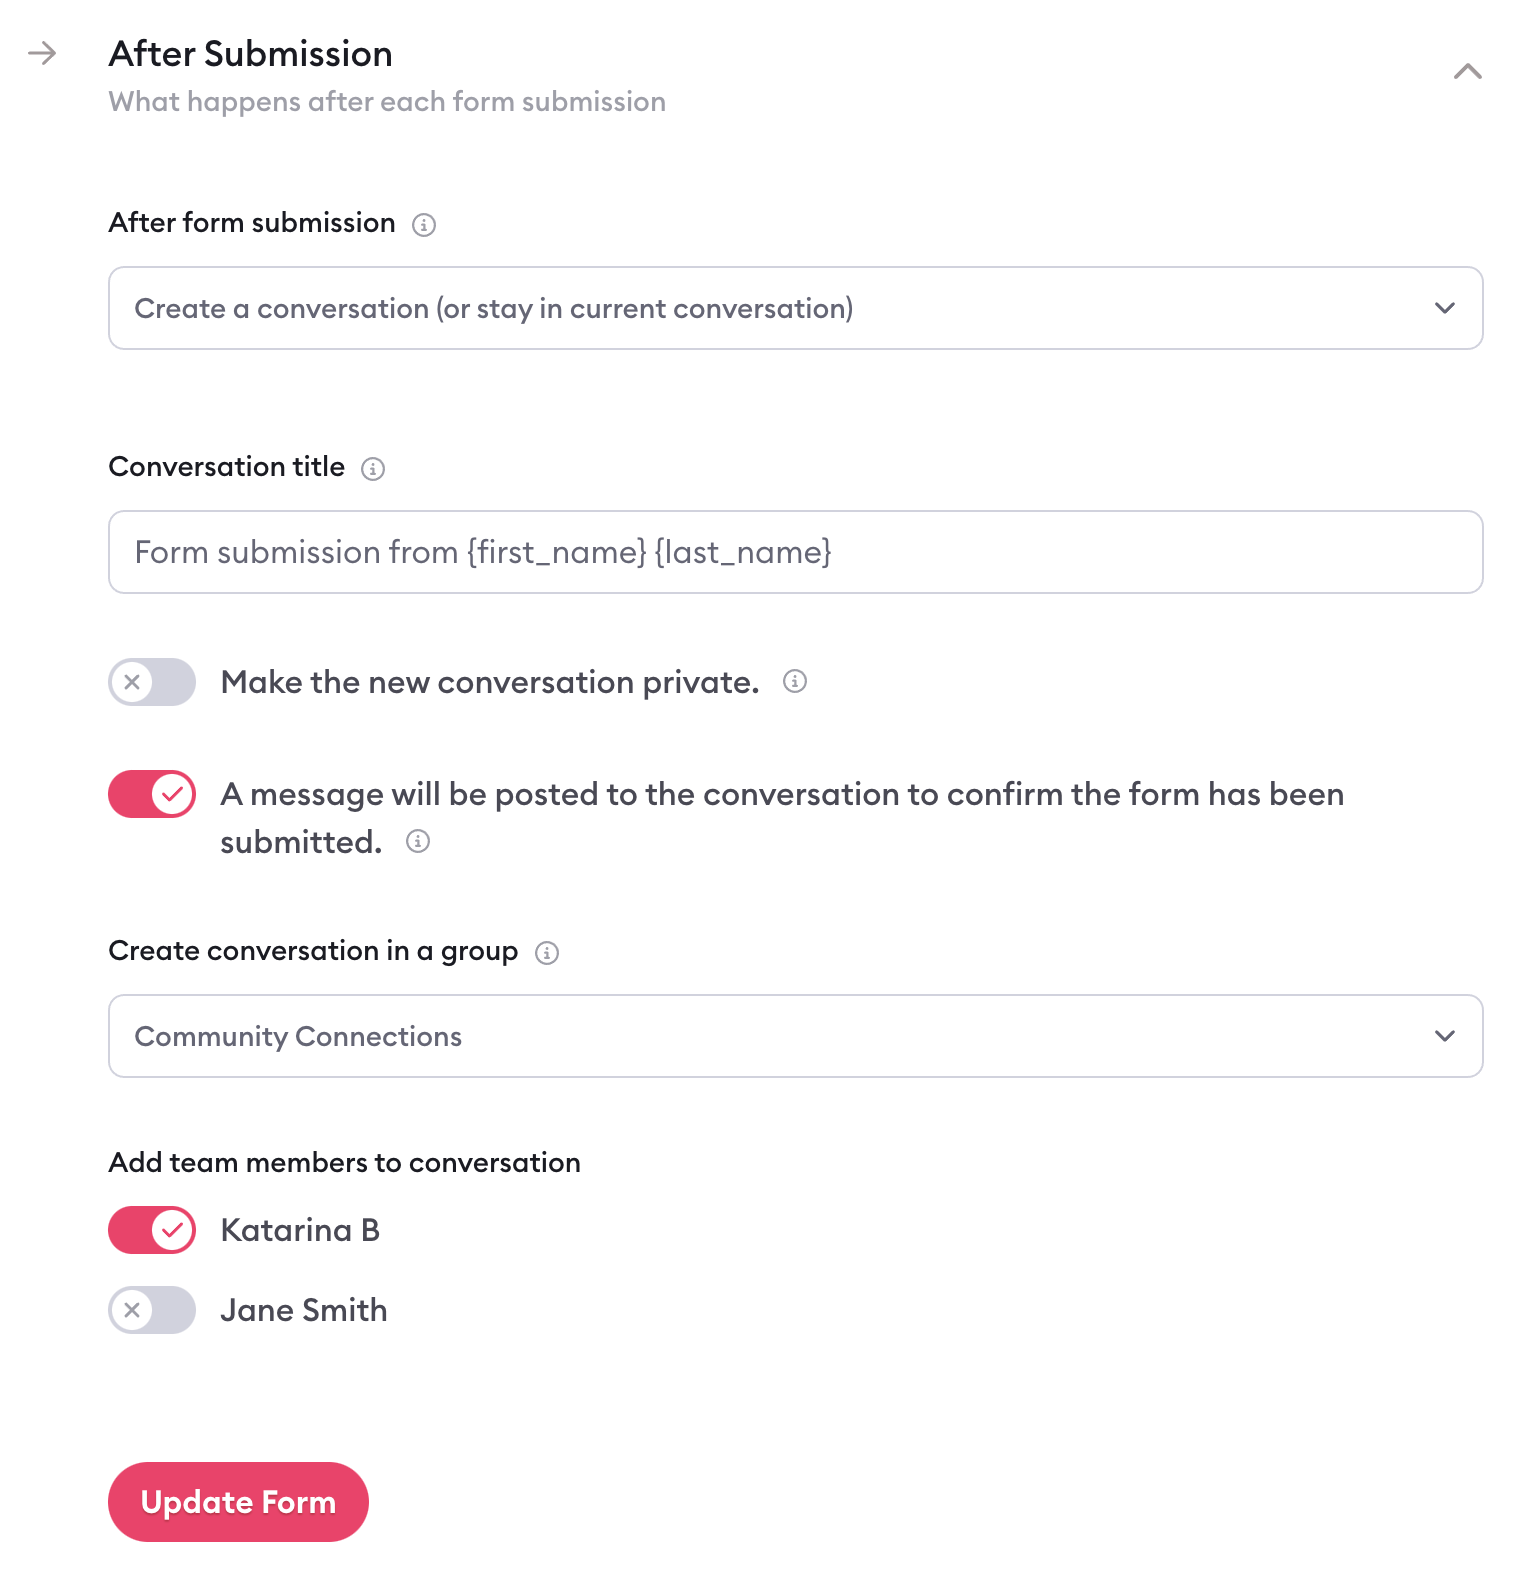
Within the dropdown for where Clarityflow should push people after form submission, you have three different options:
Create a conversation (or stay in current conversation): After the person submits the form, Clarityflow will create a new conversation between you and that person that fills with the form submission details. If you shared the form within an existing Clarityflow conversation, the person will stay in that existing conversation.
Display a success message: This will display a success page (you can customize the headline and page content) to let the person know their submission was successful. They'll stay on that success page and won't be pushed anywhere else.
Redirect to a URL: You can enter a URL to push the person to a different page (for example, a page on your website) after they've submitted their form.
When you opt to have Clarityflow create a new conversation and push users to that conversation, you can customize the details of that conversation, including:
The title of the conversation
Whether the conversation should be private
Whether you want Clarityflow to automatically post a message to the conversation confirm form submission
Whether you want the conversation to be created in a group
Which team members you want to automatically add to the conversation
Again, if you sent or initiated the form within an existing Clarityflow conversation, then Clarityflow will post the submission message to the existing conversation—rather than creating an entirely new one.
Adjusting your form display
In this section, you can add and customize the content that appears on your form to build something that suits your business and your use case.
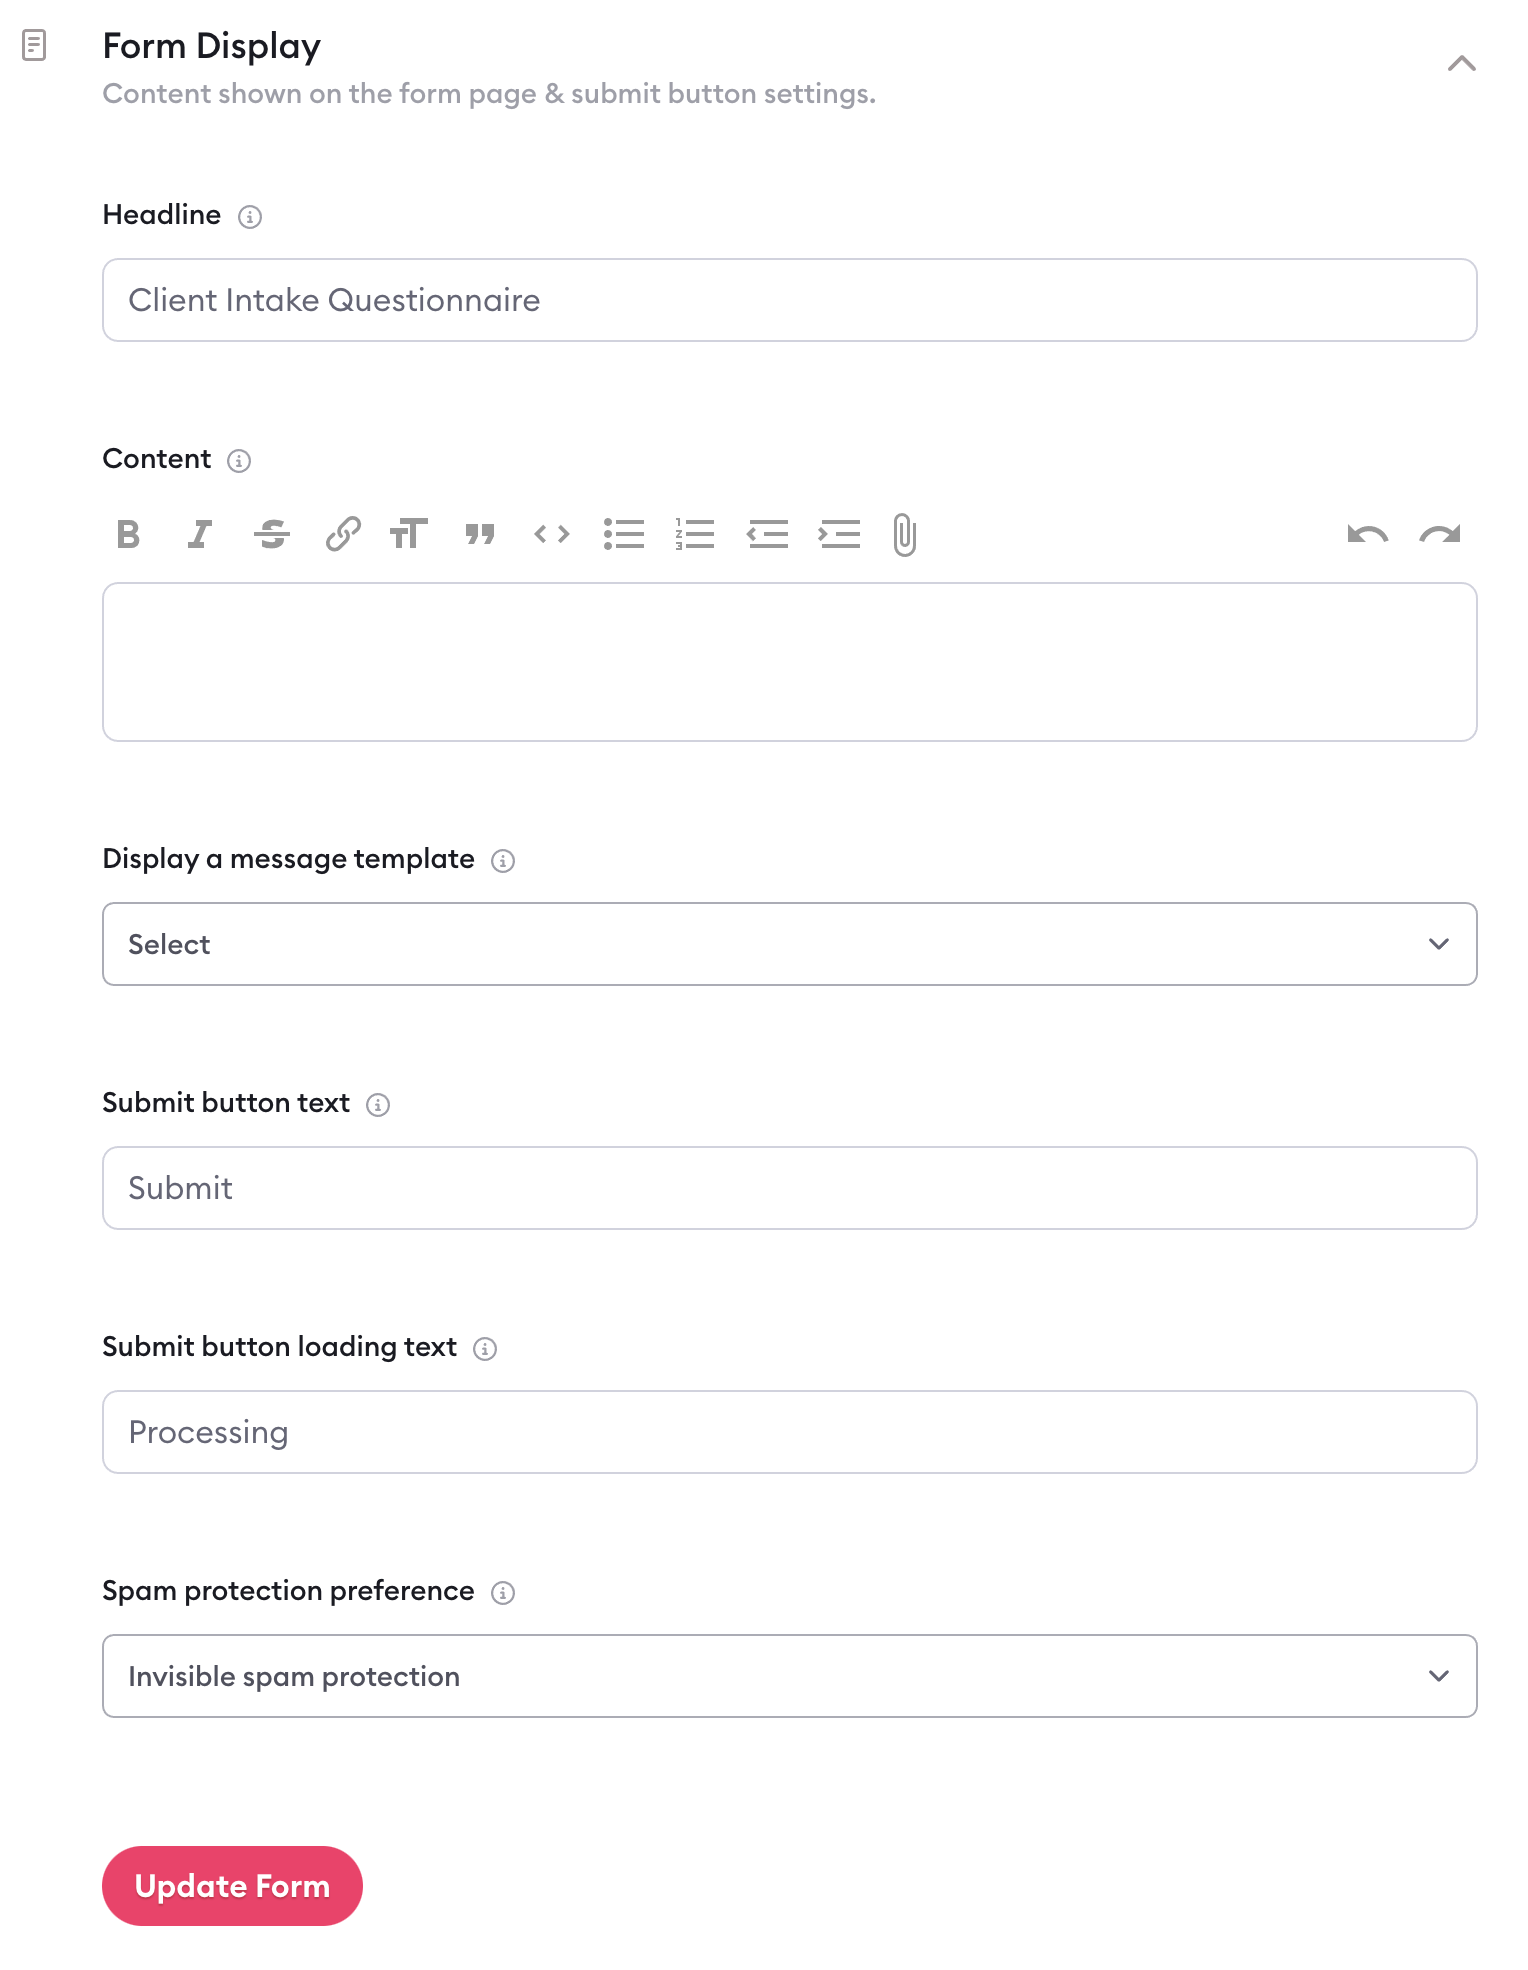
Here's a look at the elements you can adjust:
Your form's headline: Set the text that shows at the top of your form
Content: This shows up near the top of your form (between your headline and your form fields), making it the perfect spot for instructions, some welcome text, or other helpful content
Display a message template: If you want to display a welcome video or other content on your form, you can select a message template from your Library to display. Learn more about creating message templates in this guide.
Submit button text: Adjust the text that appears on your form's "submit" button
Submit button loading text: Adjust the text that appears when the form is processing
Spam protection preference: By default, Clarityflow forms have built-in and invisible spam protection. However, you can opt to change to visible spam protection if you prefer. Learn more in this detailed guide.
Remember to hit the "Update Form" button to save your changes.
Controlling your submission notifications
Understandably, you want to know when someone submits a response to your form. You have control over who should receive notifications for each of your forms using simple toggles.
Within your form's settings, expand the menu for "notifications." Here you can customize different aspects of your form submission notifications.
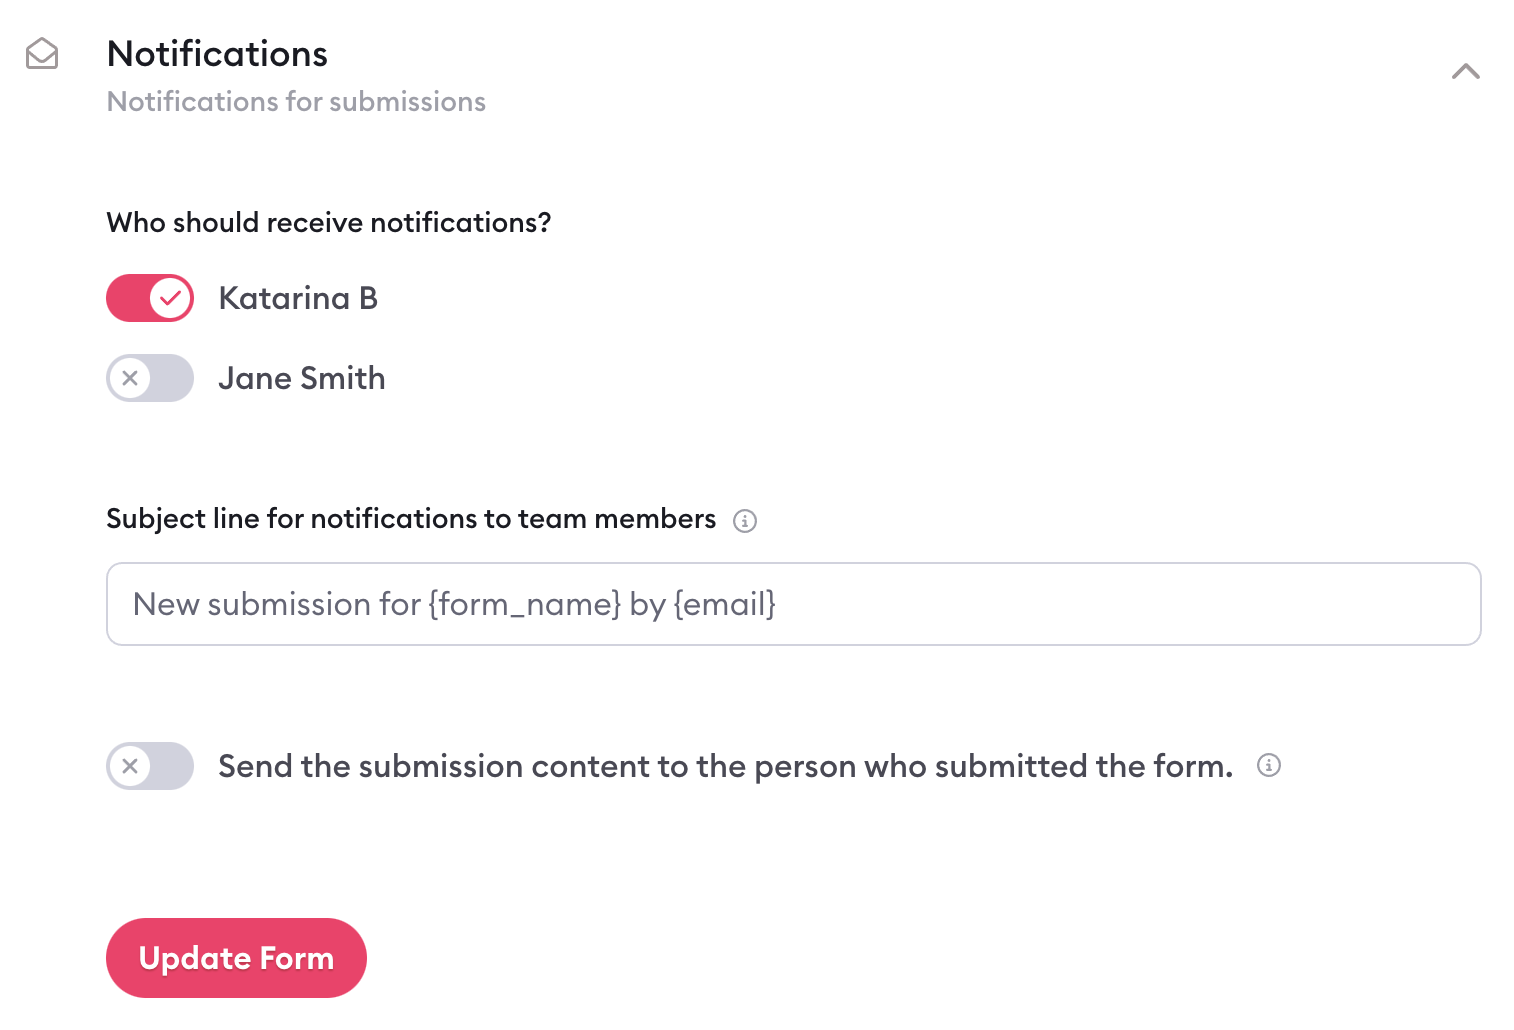
Start by selecting which members of your team you want to receive notifications about new form submissions.
In the next field, you can customize the subject line for the email notifications that are sent when a new form response is submitted.
Additionally, you can use the toggle to decide whether you want to send submission content to the person who submitted the form. If you turn that toggle on, the person will receive a confirmation email that contains the answers and information they submitted in their form.
Remember to press "Update Form" to save any changes you make here.
Learn more about Clarityflow.