Create a multi-use invitation link
A multi-use invitation link is just one of several ways you can invite people into Clarityflow. You can also:
A multi-use invitation link is most helpful when you want to create a simple link to share with a large group of people. People can use that link to be onboarded and then access what you're offering in Clarityflow.
Here's what we'll cover in this guide:
What is a multi-use invitation link?
A multi-use invitation link is a simple link that gives people easy, guided access to something you're offering for free in Clarityflow—like enrollment in a course, membership in a community, or participation in a specific conversation.
For example, imagine that you create a free course and want to offer it to your newsletter subscribers and social media followers.
Using a multi-use invitation link for your course gives you a simple link that you can use to promote the course and enroll people. When users click the link, they're walked through your customized onboarding steps before landing in the final destination you set (in this case, a course enrollment conversation).
Where do you manage your multi-use invitations?
You can view all of your multi-use invitations by navigating to your "Account Settings" and selecting "Multi-Use Invitations" in the left-side menu.
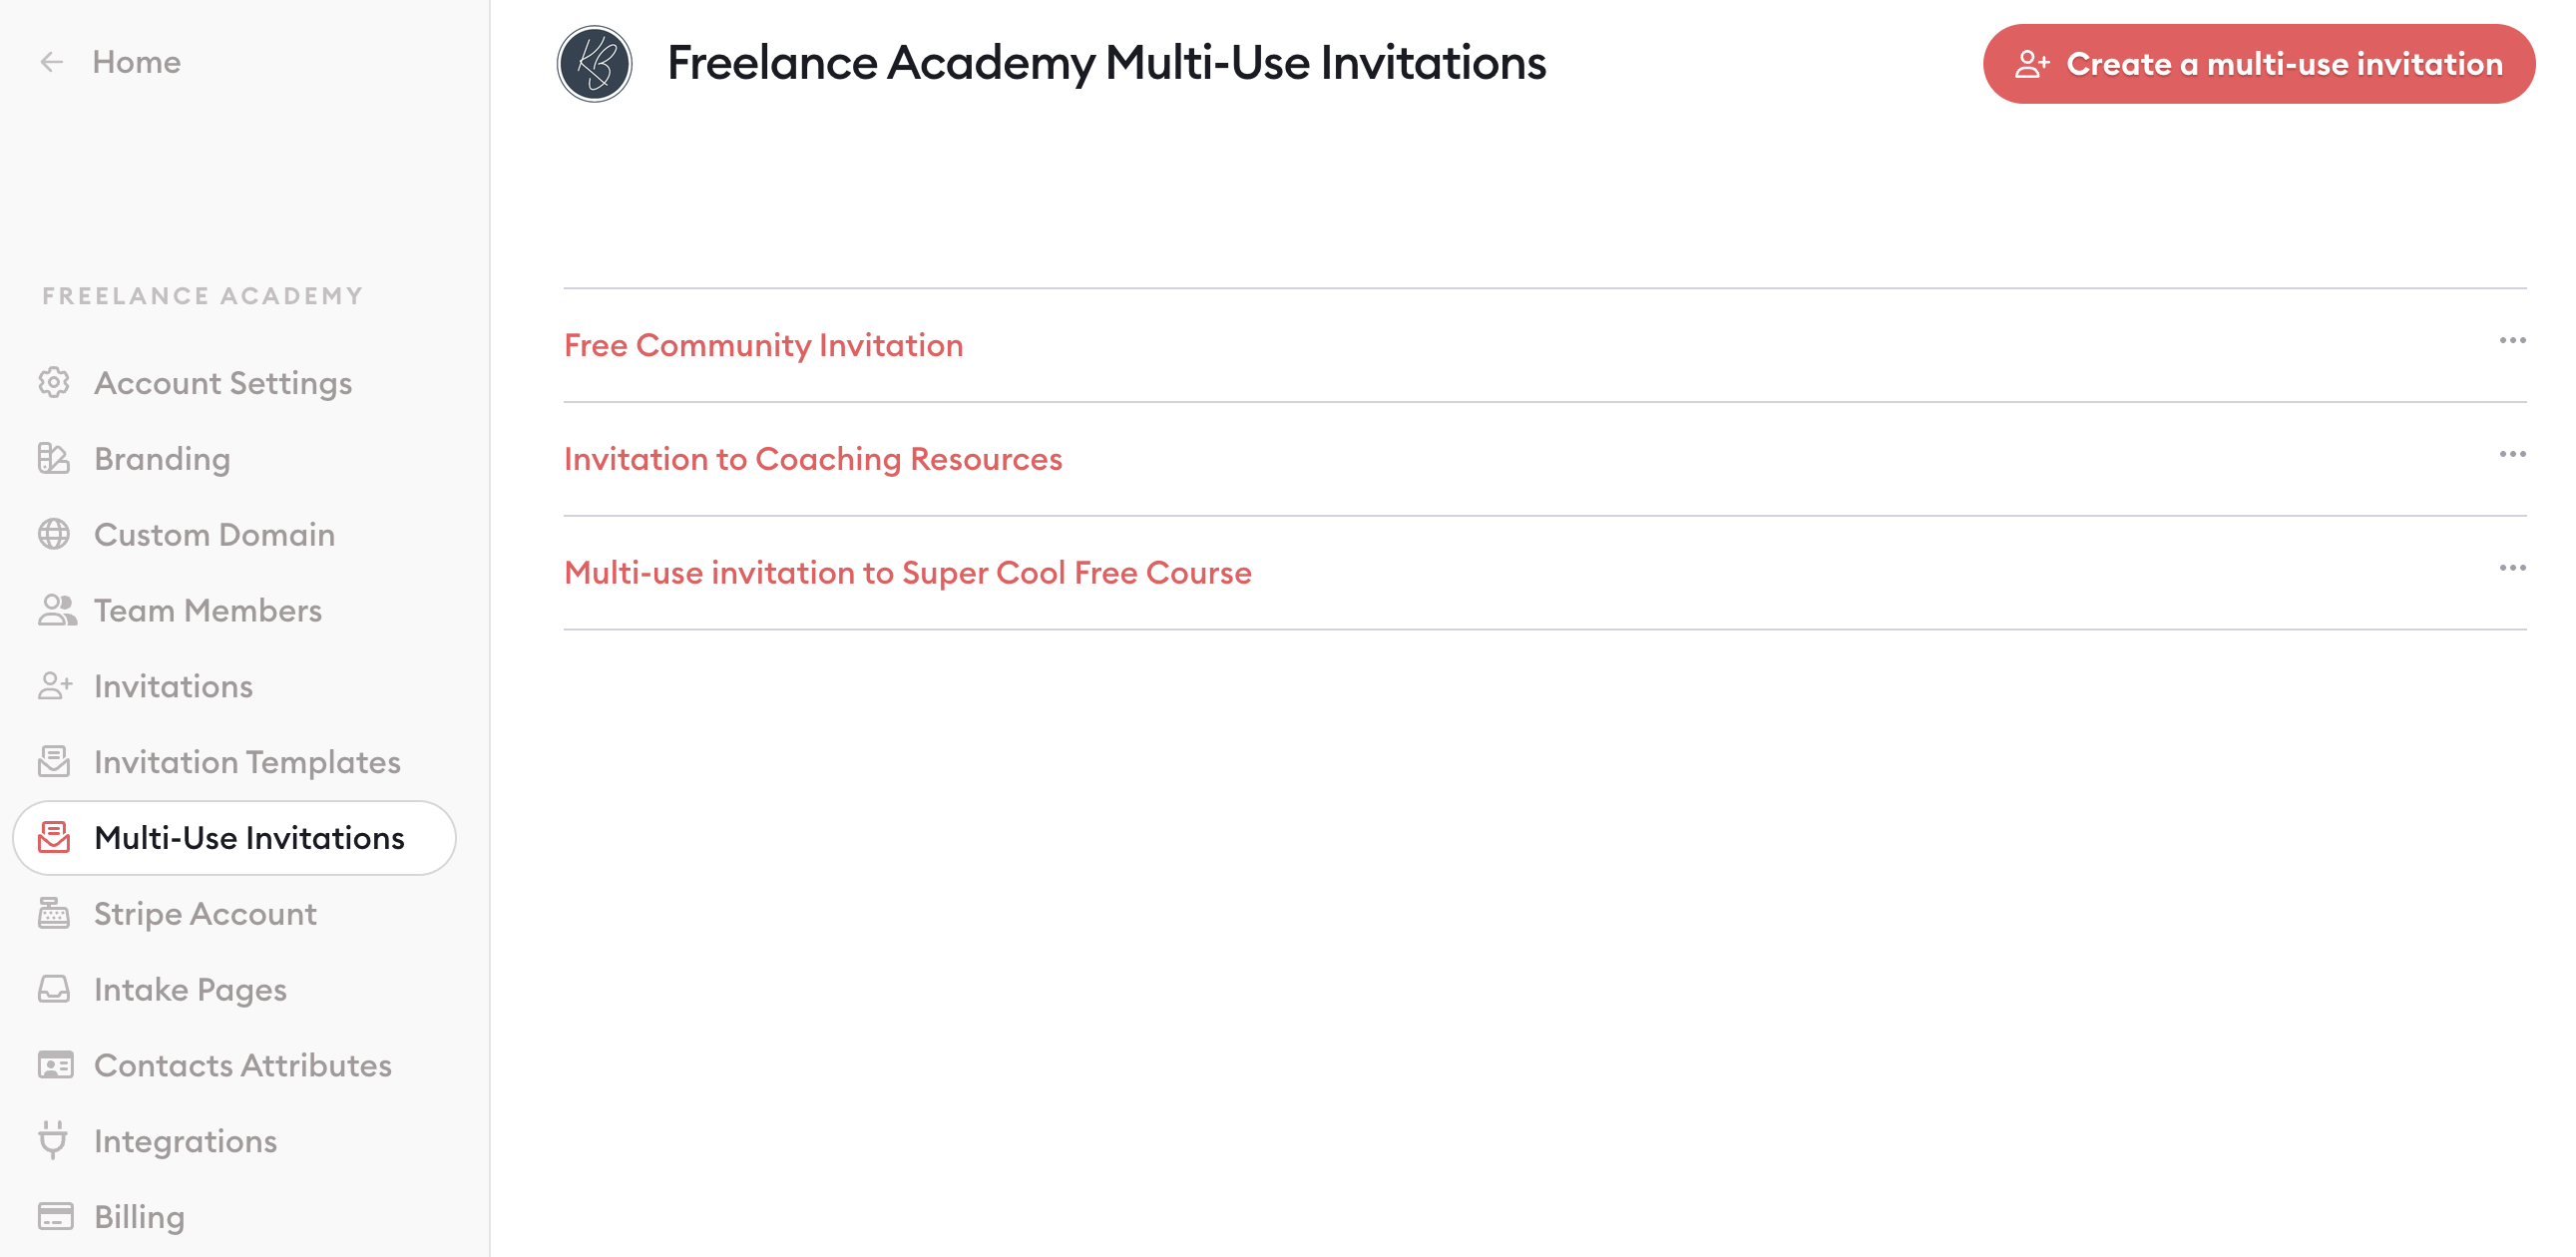
You'll see all of your multi-use invitations listed there, where you can edit them, remove them, or create new ones.
How do you create a multi-use invitation?
You'll see the option to create a multi-use invitation in several different places throughout Clarityflow, including within your:
Let's take a closer look at how to create and customize a multi-use invitation link in each of those areas.
Creating a multi-use invitation link in the multi-use invitations menu
Navigate to your "Account Settings"
Select "Multi-Use Invitations" in the left-side menu
Click the "Create a multi-use invitation" button
Name your invitation and click "Continue"
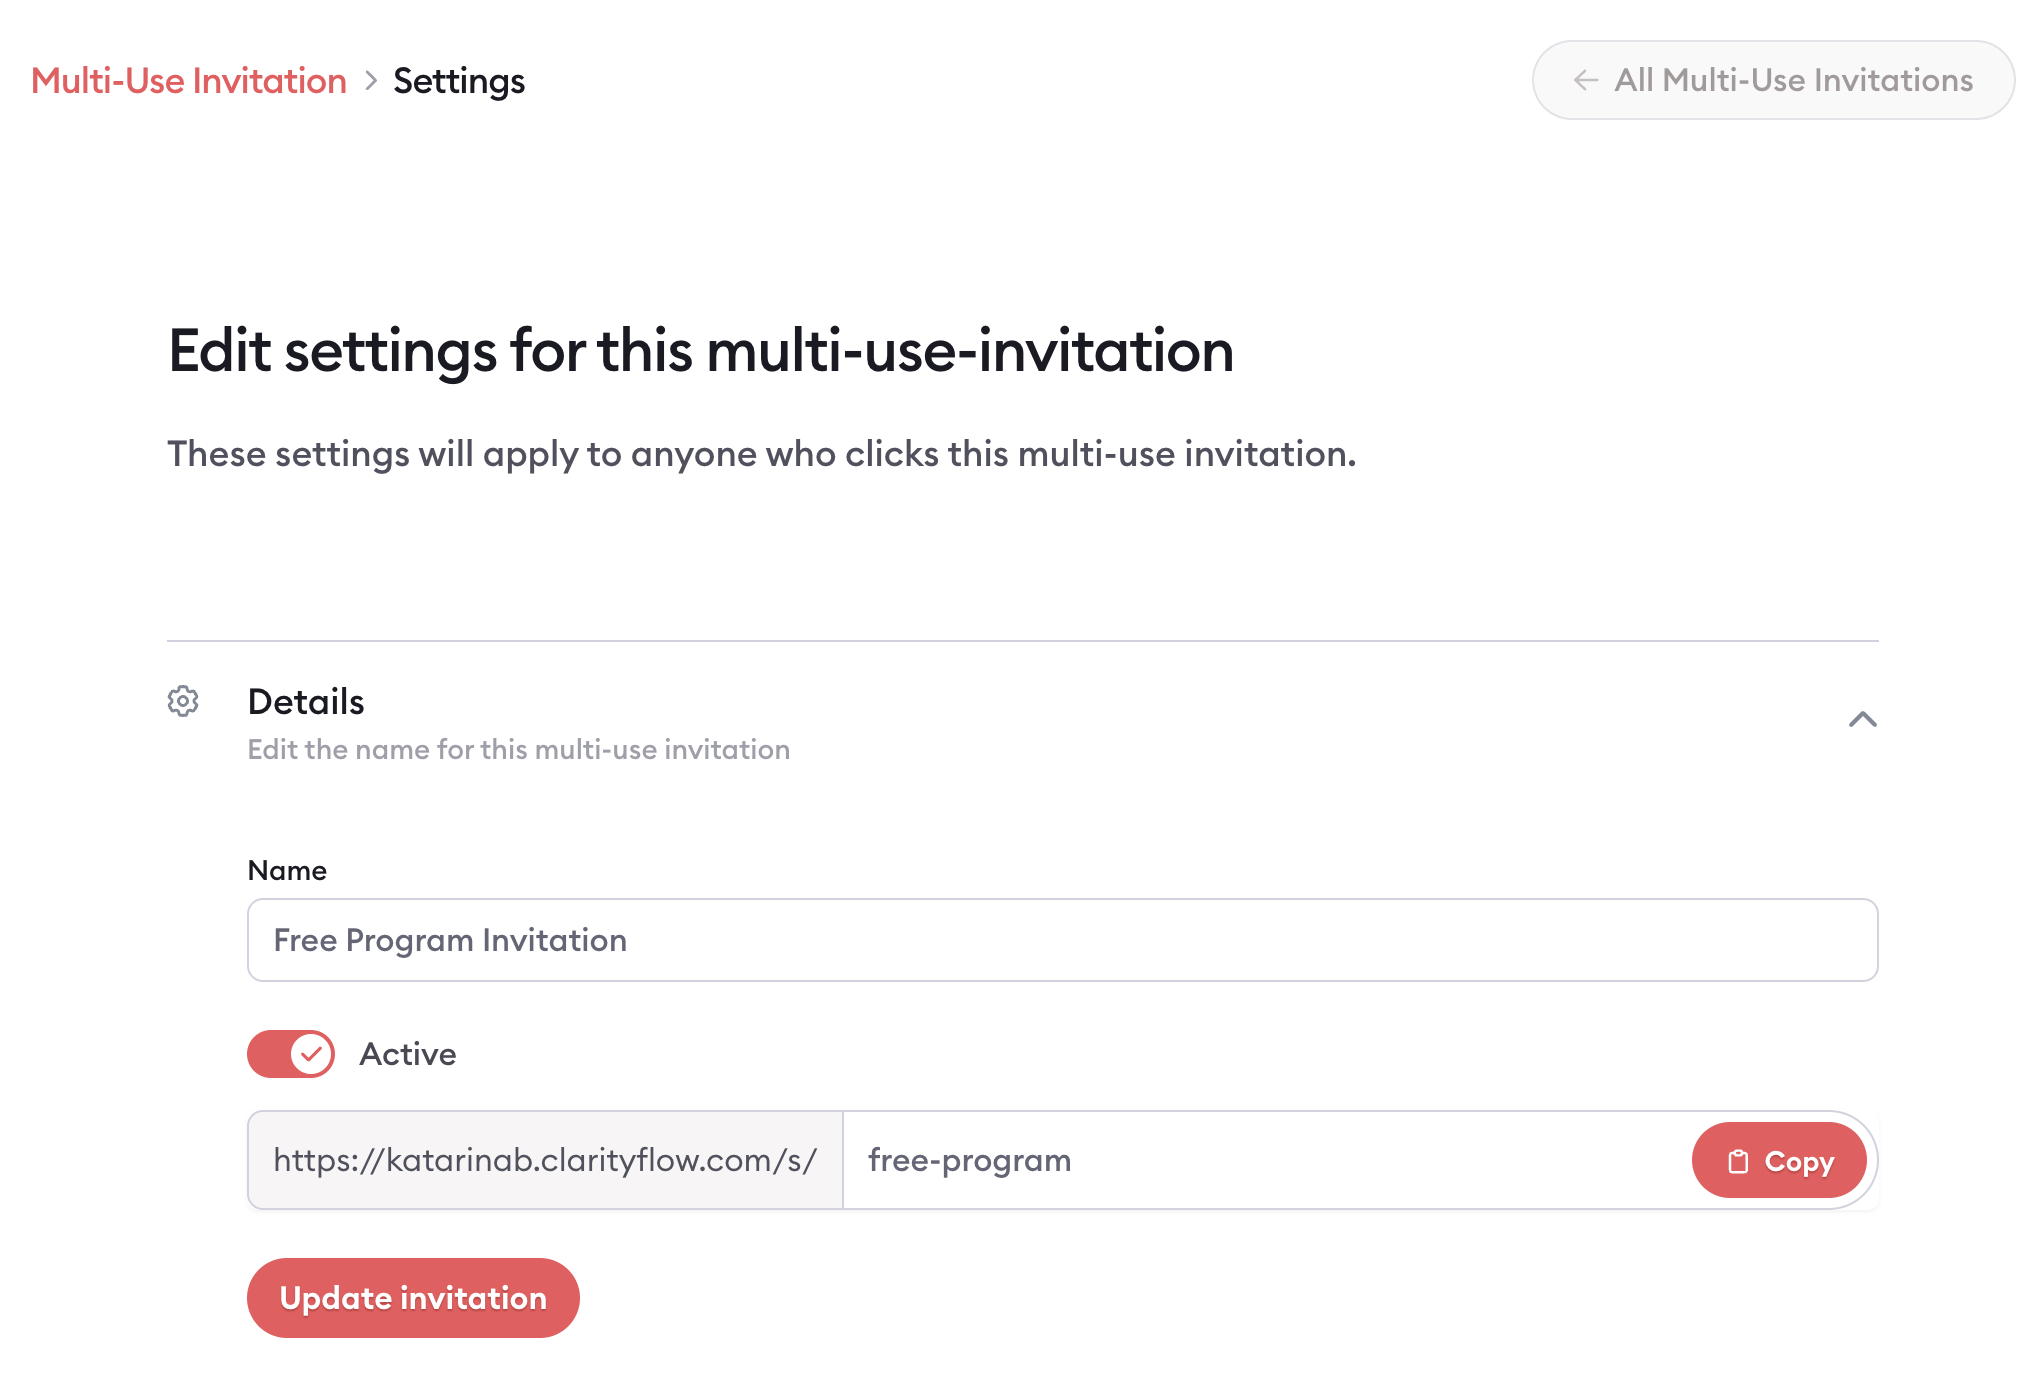
Customize the details for your invitation, including the name and URL
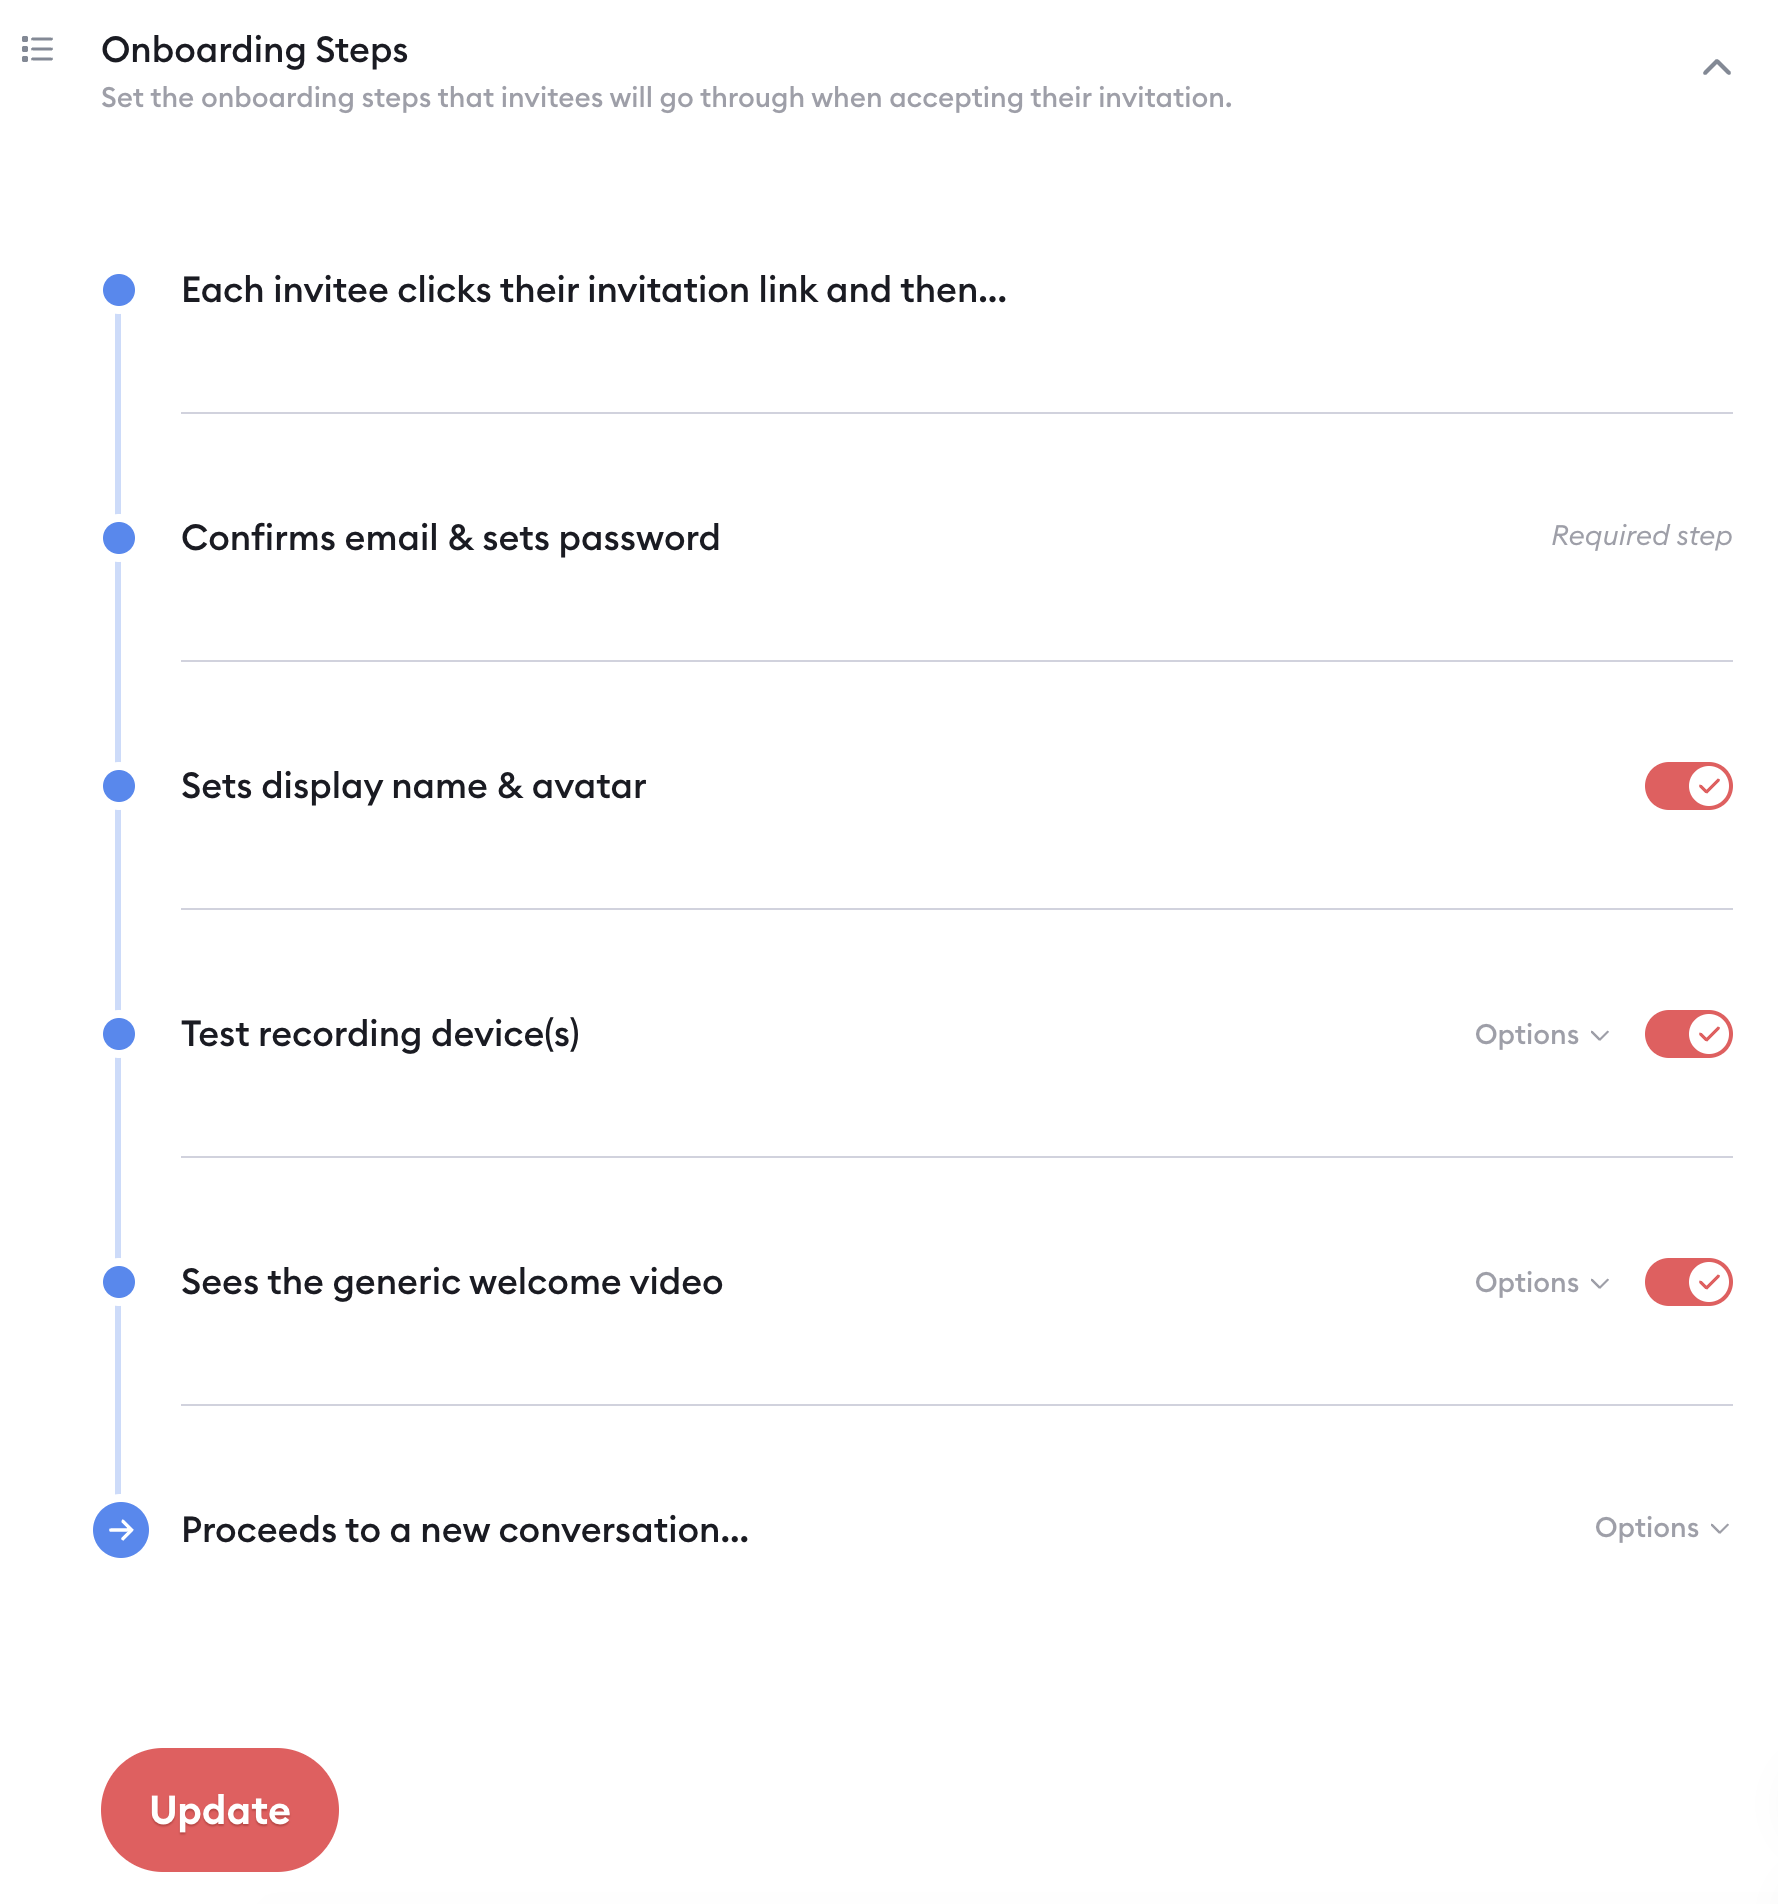
Customize your onboarding steps
Set the final destination (i.e. the place you want people to land after they click the link and onboard). You can choose a:
New conversation
Existing conversation
Course
Group
Intake page
Conversations list
Custom URL
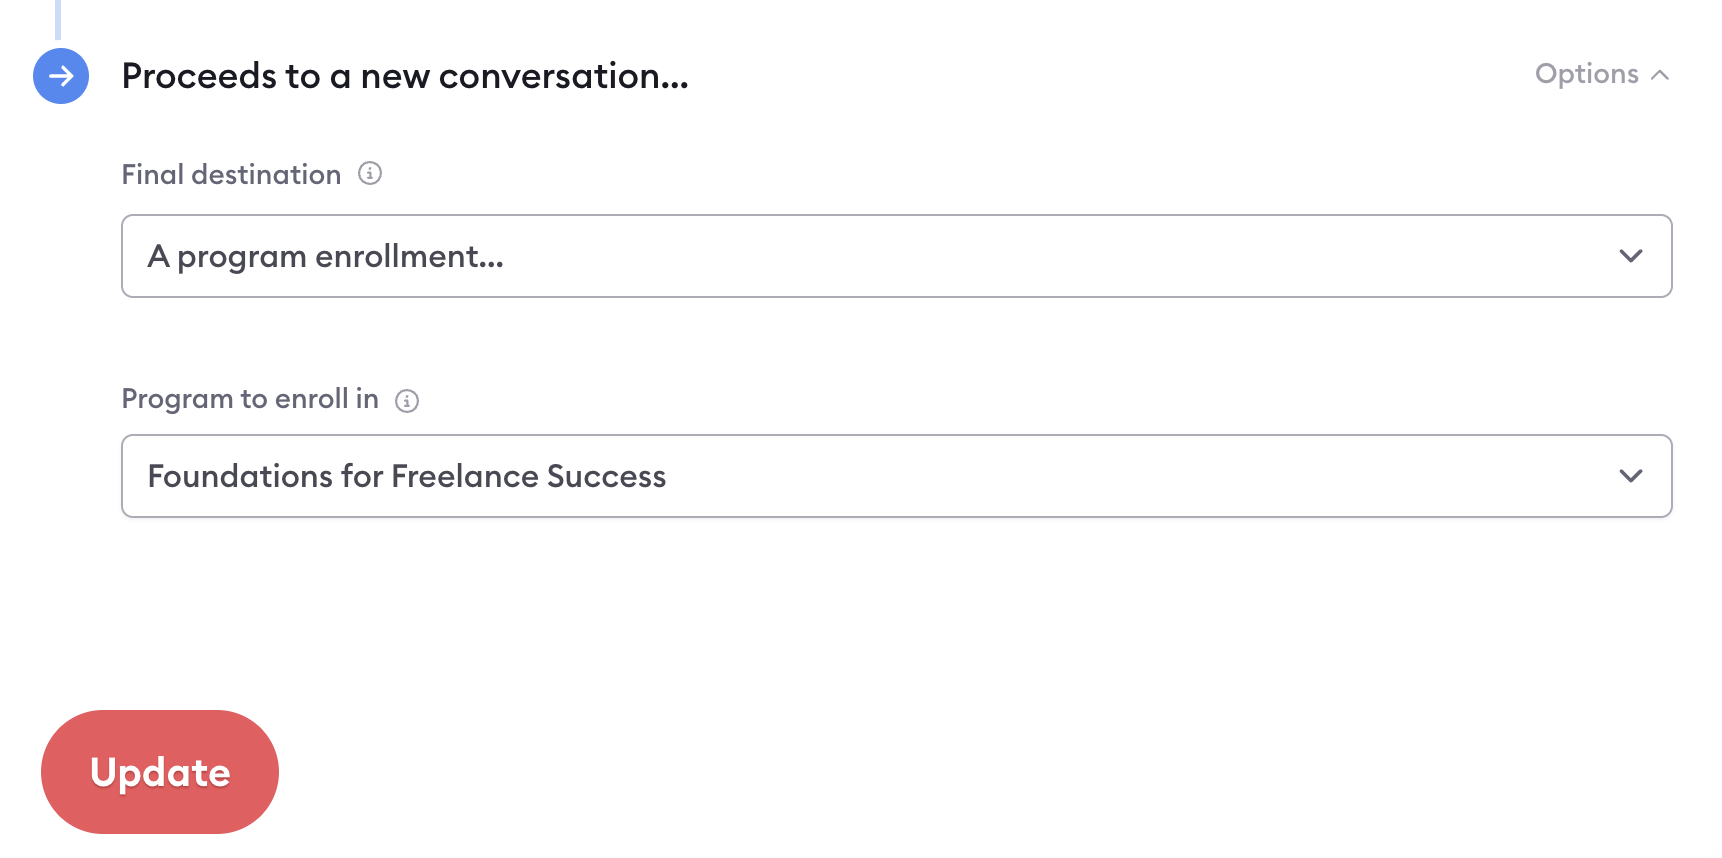
Click "Update"
Copy your invitation link and it's ready to use
Creating a multi-use invitation link for a course
Navigate to your course
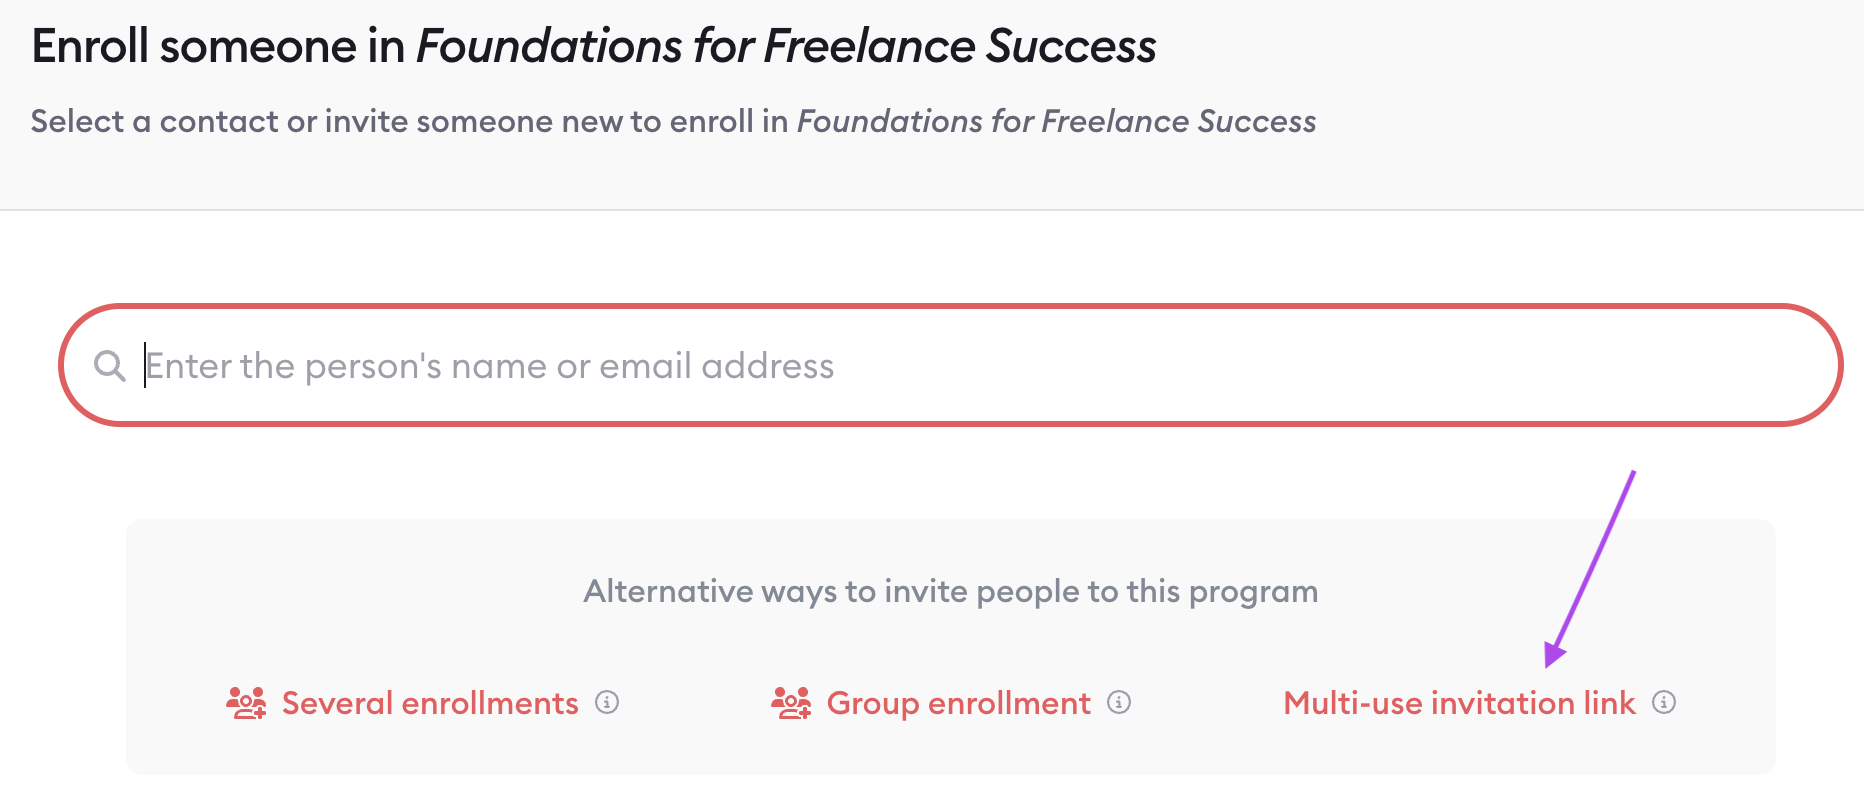
Click the "Enroll People" button
Select "Multi-use invitation link" as your option for inviting people
Navigate to your "Account Settings" and then "Multi-Use Invitations"
Click the invitation you just created from within your Program
Customize your details and onboarding steps following the instructions above
Creating a multi-use invitation link for a group
Navigate to your group
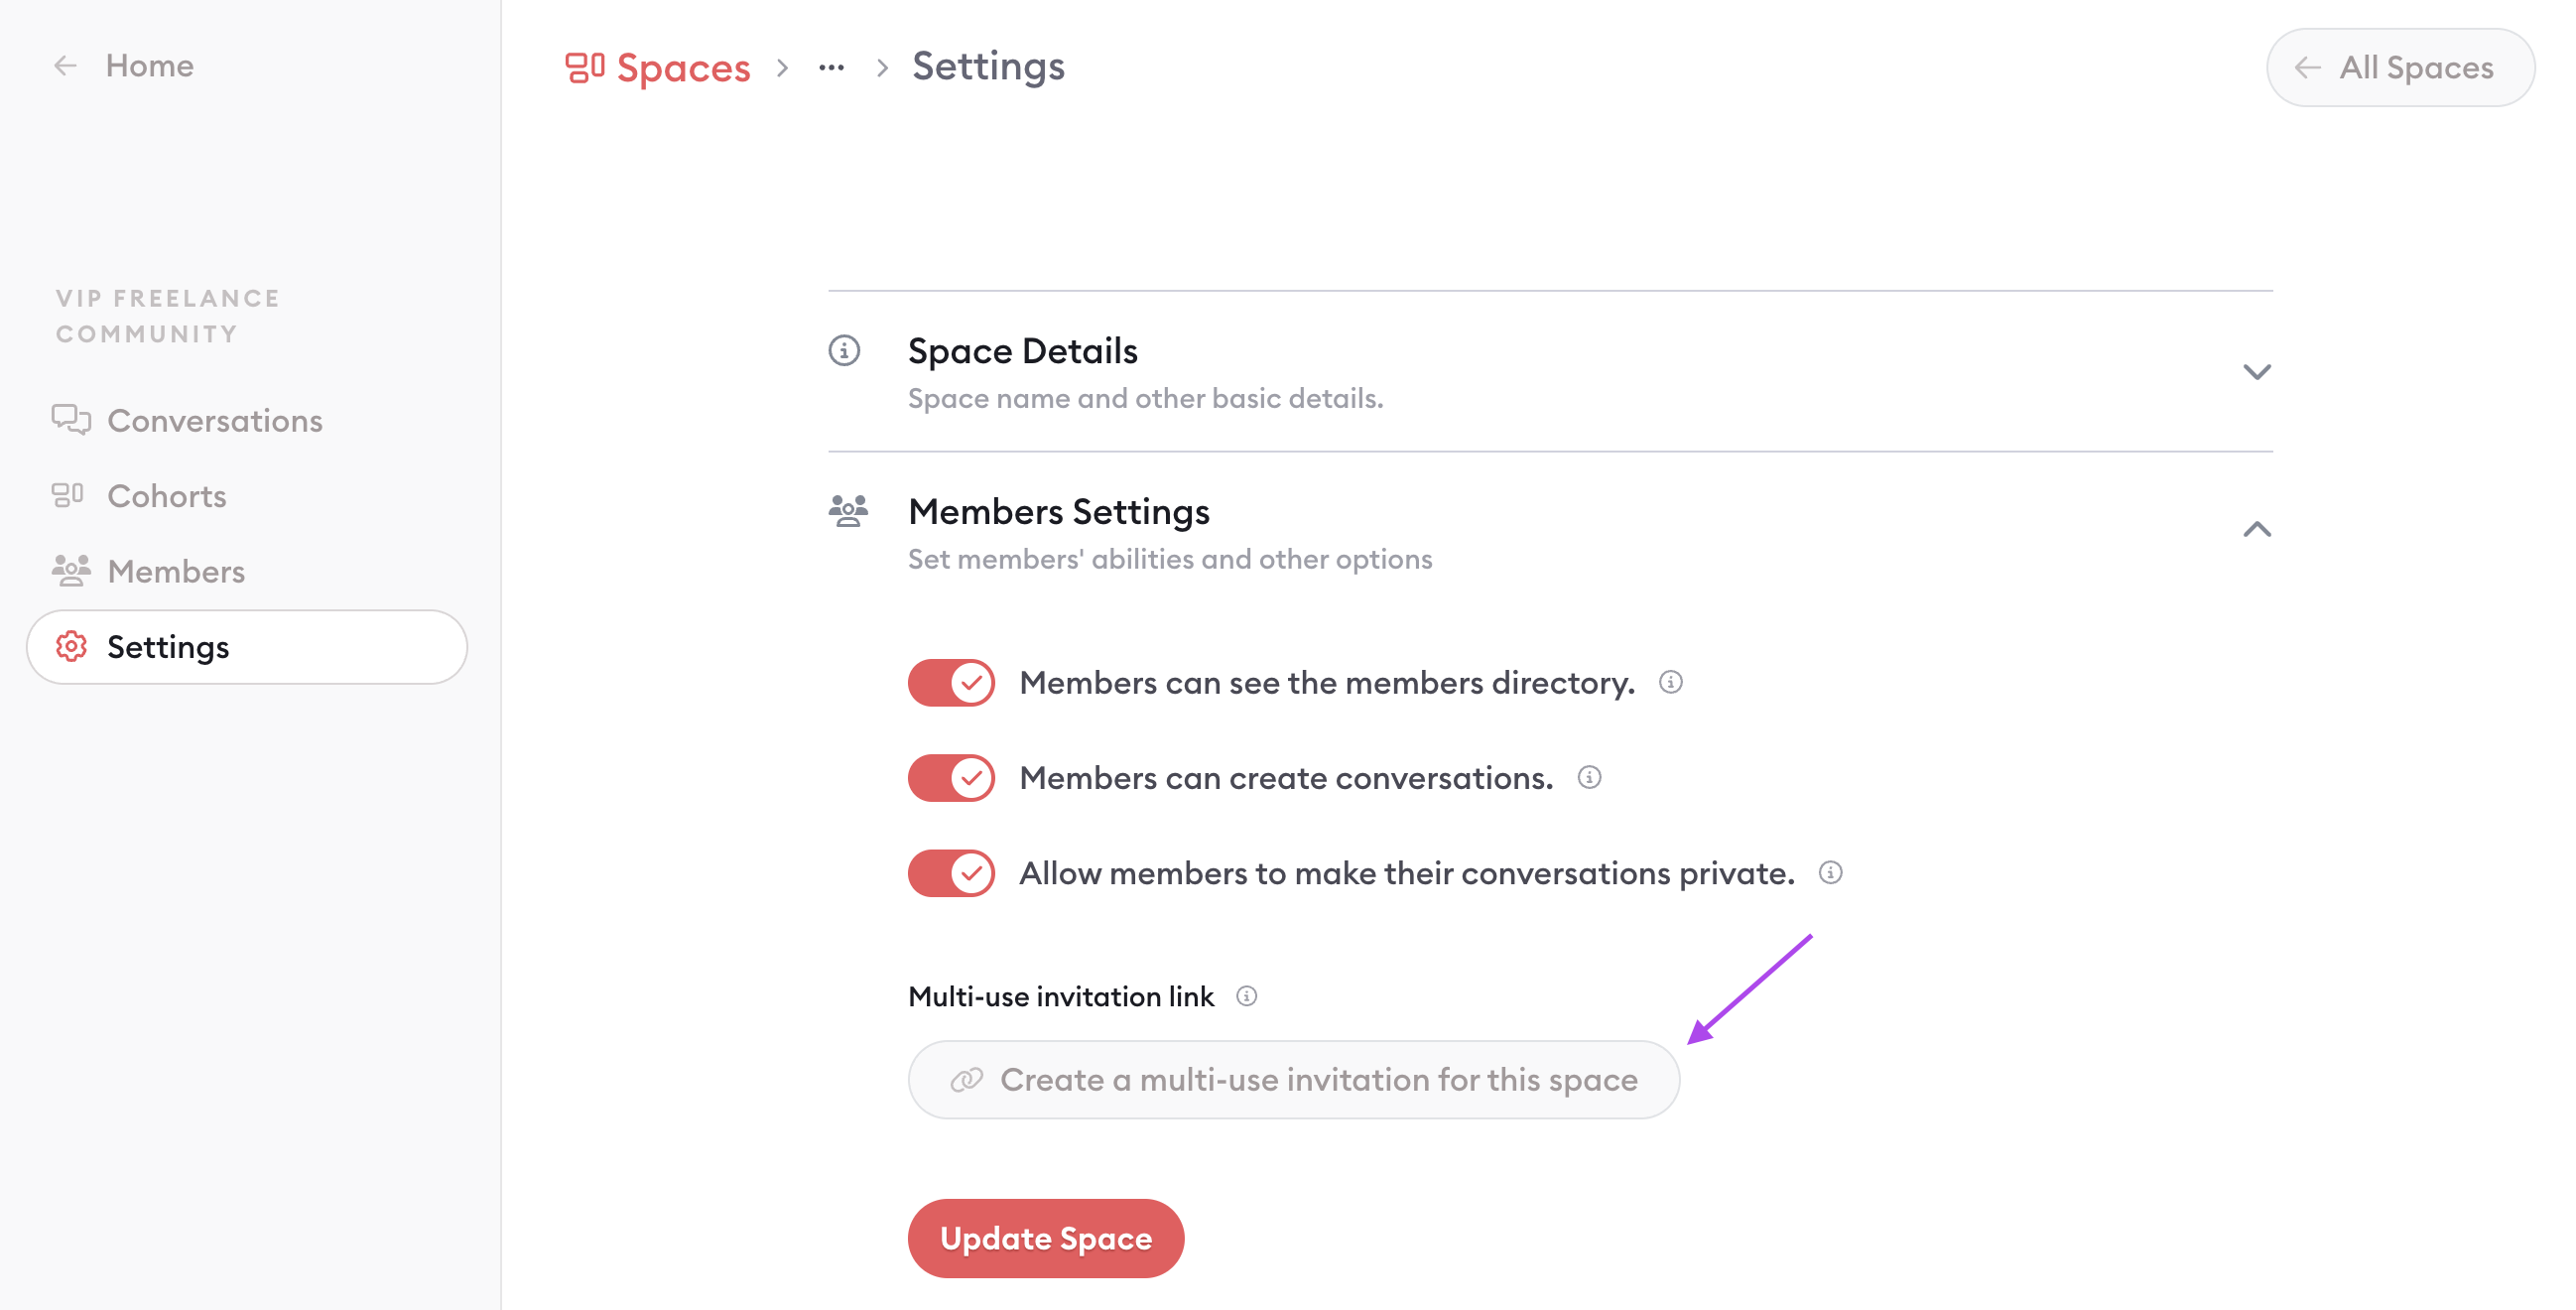
Sect "Settings" and then "Members Settings"
Click "Create a multi-use invitation for this group"
Navigate to your "Account Settings" and then "Multi-Use Invitations"
Click the invitation you just created from within your group
Customize your details and onboarding steps following the instructions above
Creating a multi-use invitation link for a specific conversation
Navigate to a specific conversation
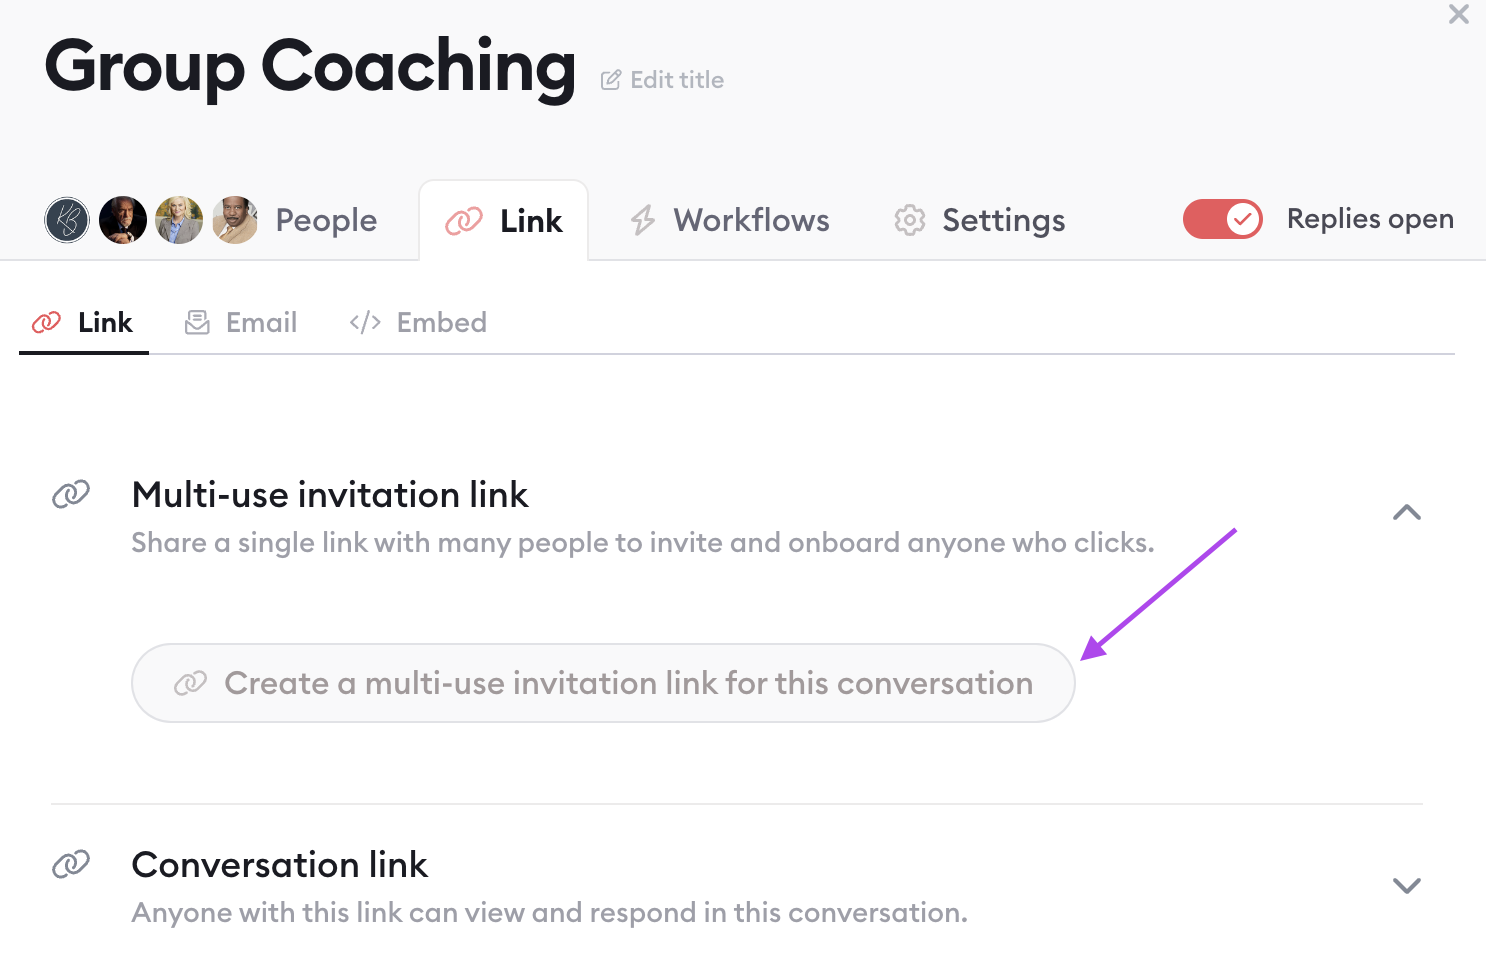
Click "Settings" and then the "Link" tab within the pop-up
Click "Create a multi-use invitation link for this conversation"
Navigate to your "Account Settings" and then "Multi-Use Invitations"
Click the invitation you just created from within your conversation
Customize your details and onboarding steps following the instructions above
Learn more about Clarityflow.