Send a reply reminder email: Workflow recipe
Want to make sure your message gets a response? Set up a workflow to automatically remind someone that you're waiting for their reply to your message.
In this Workflow Recipe, we'll show you exactly how to set this up.
Looking for the detailed reference docs for Workflows? That's here.
Goals for this workflow
Here's what we want to achieve with this workflow:
We're going to share our conversation with a specific client (we know their email) and that's the person we want to "nudge" to reply back to us within a specified number of days.
We will post the first message (our message to the client), and we will expect the client to post a response.
We want to send our "nudge" email to the client three days after they've viewed our message—but only if they have not yet posted their response.
We don't want to send our "nudge" email to the client if they've posted their response.
How to set it up:
Let's walk through the setup, step-by-step:
Step 1: Create the conversation and message to the client
Pretty straightforward. Create a new conversation, then record your video message and post it as the first message in this conversation. This is the message you're going to send to the client (but not quite yet).
Step 2: Create a workflow on your message
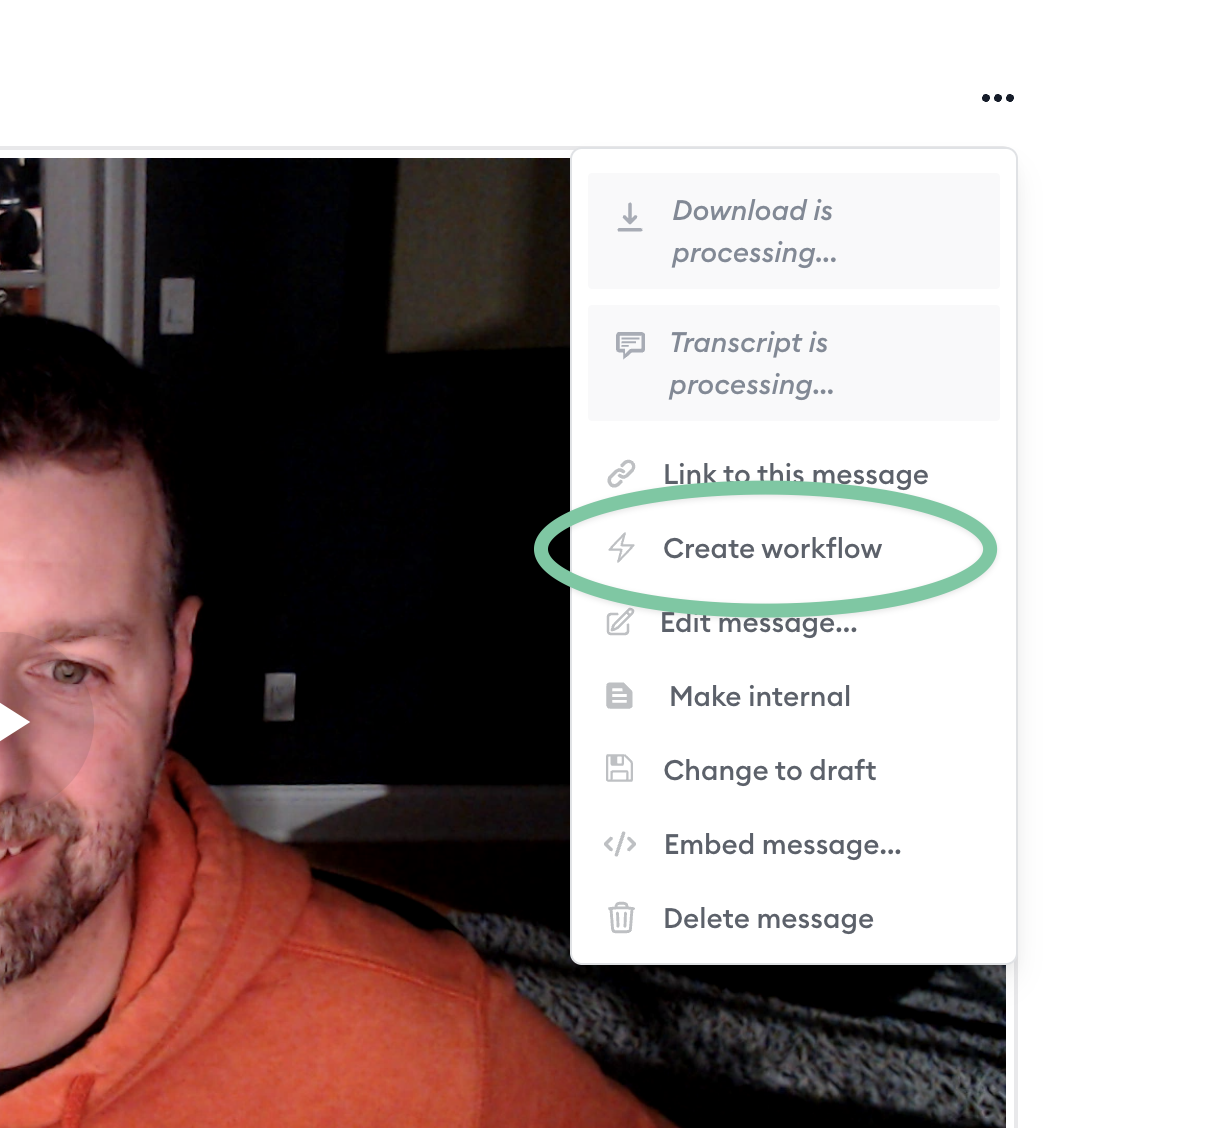
On your message, click the "..." icon to open the message settings, then click "Create workflow."
Step 3: Trigger when this message is viewed
Next, under "Trigger this workflow when...", select "This message is viewed."
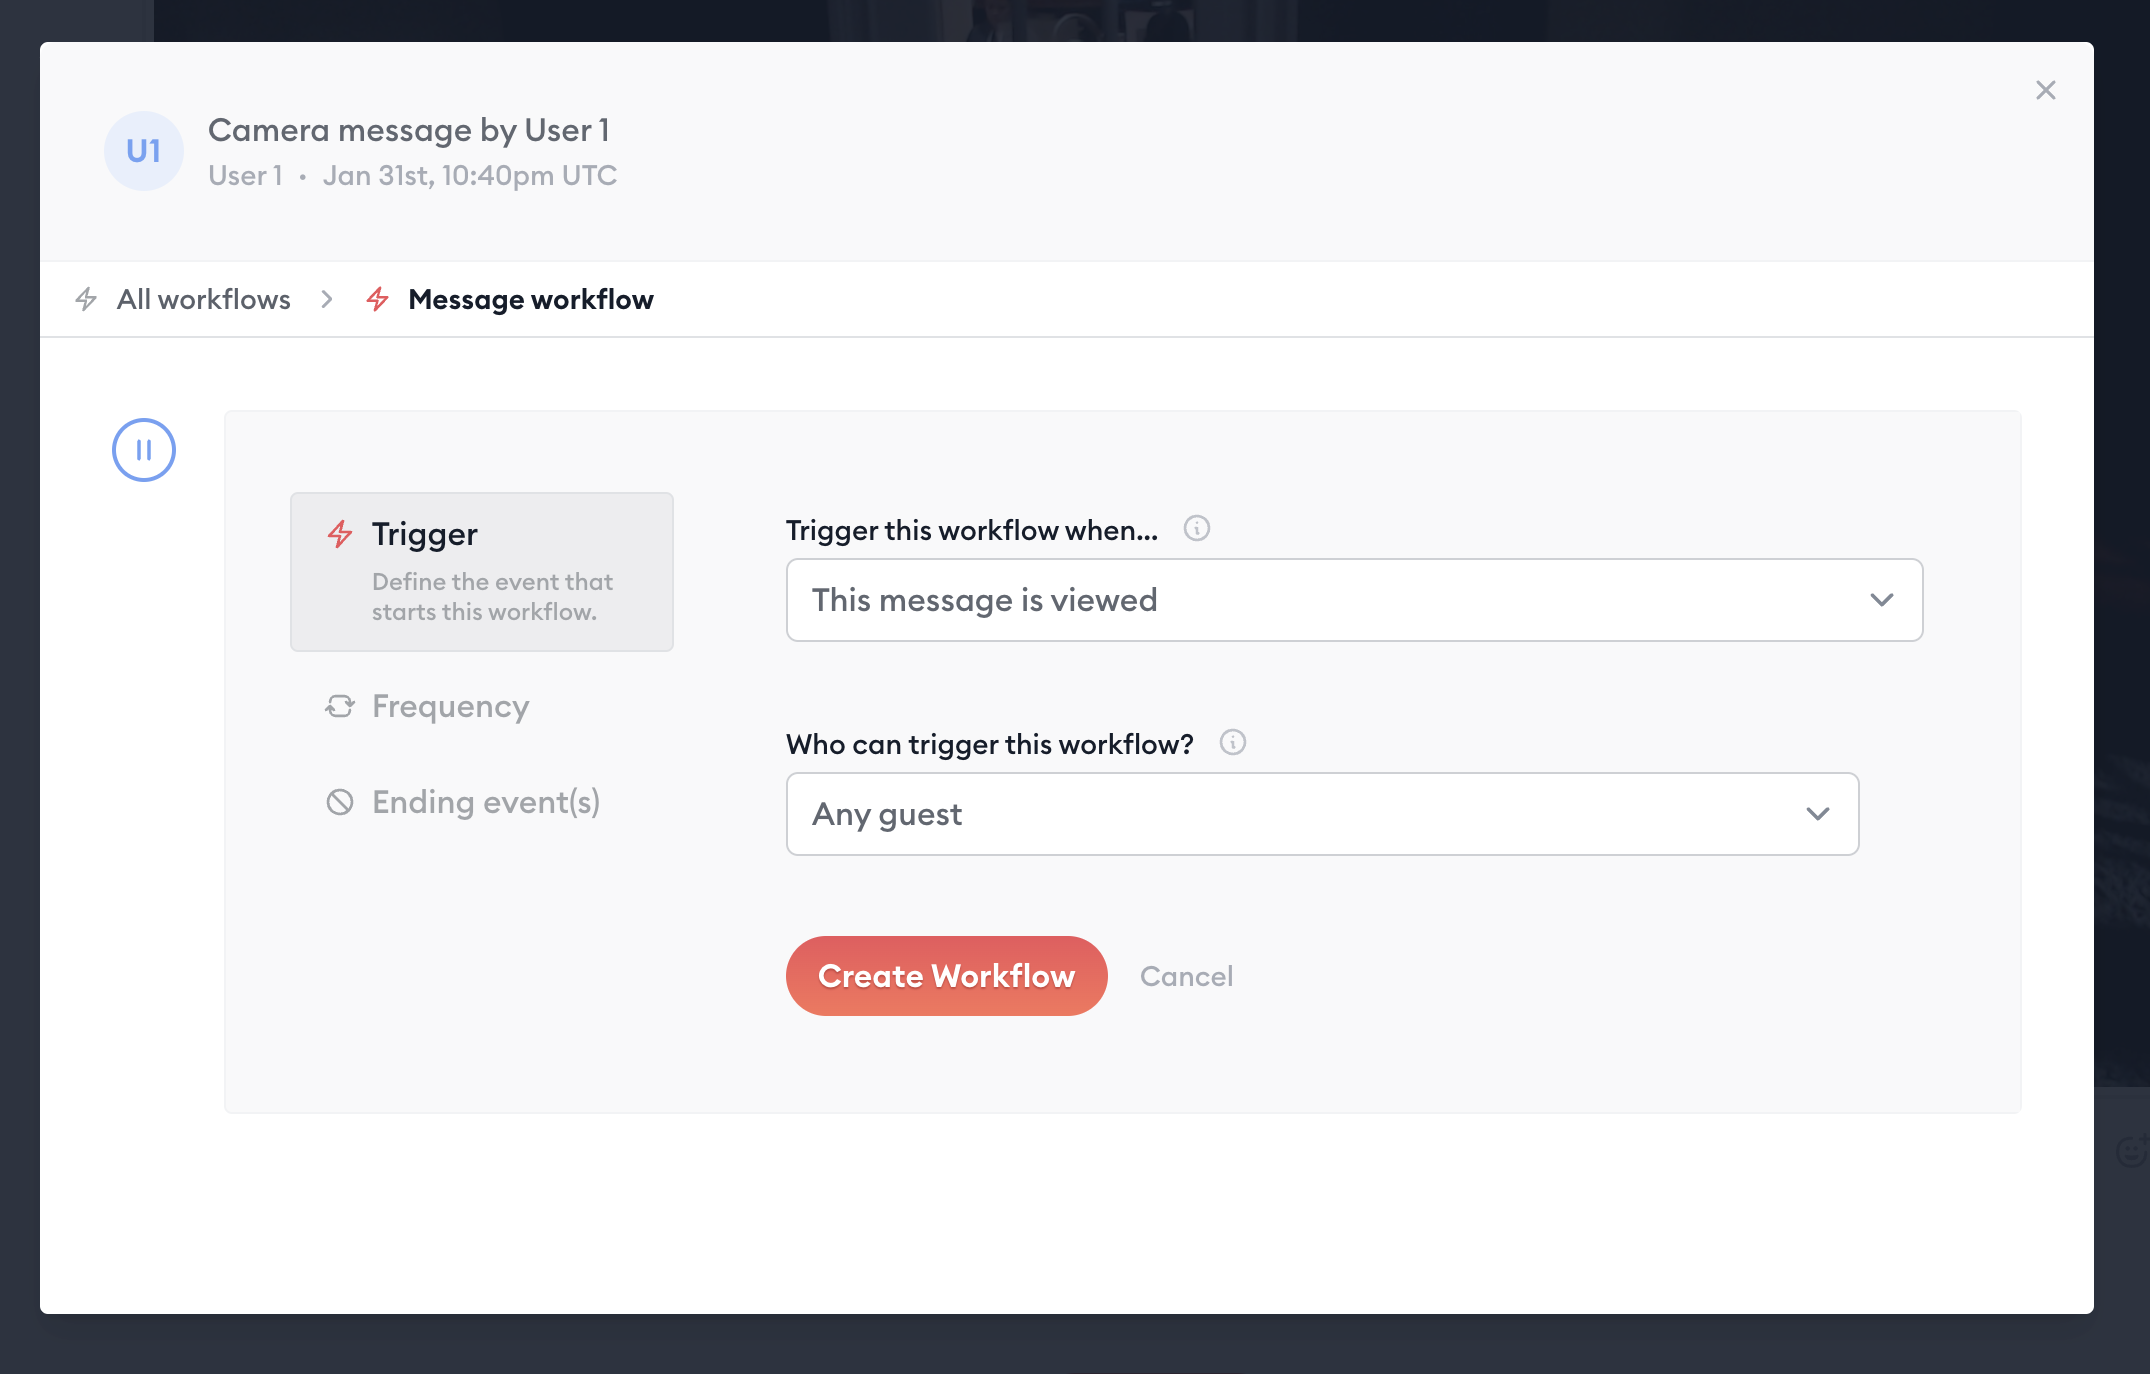
Under "Who can trigger this workflow?" I suggest leaving this set to "Any guest." In this scenario, we know we're only going to share this conversation with one person (our client), so we can assume that our client will be the person who will trigger the workflow.
Now, we could set that to "Contact with email" and then specify our client's email address. However, this would require our client to already be a registered user who can be identified via email at the time they watch our video. This may not be the case, so we'll leave it set to the more flexible option: "Any guest."
(There actually are some workarounds we can use to identify our client, even if they haven't registered yet, but for the sake of simplicity, let's go with "Any guest").
By setting the workflow trigger to "Message viewed", the workflow won't run until a guest—our client—presses play on our video message.
Step 4: Set the ending event
Very important: We want to make sure our workflow doesn't run if the client actually sends their response back in a timely manner.
To ensure this, we'll use the "Ending event(s)" setting, and check the box for "A message is posted..."
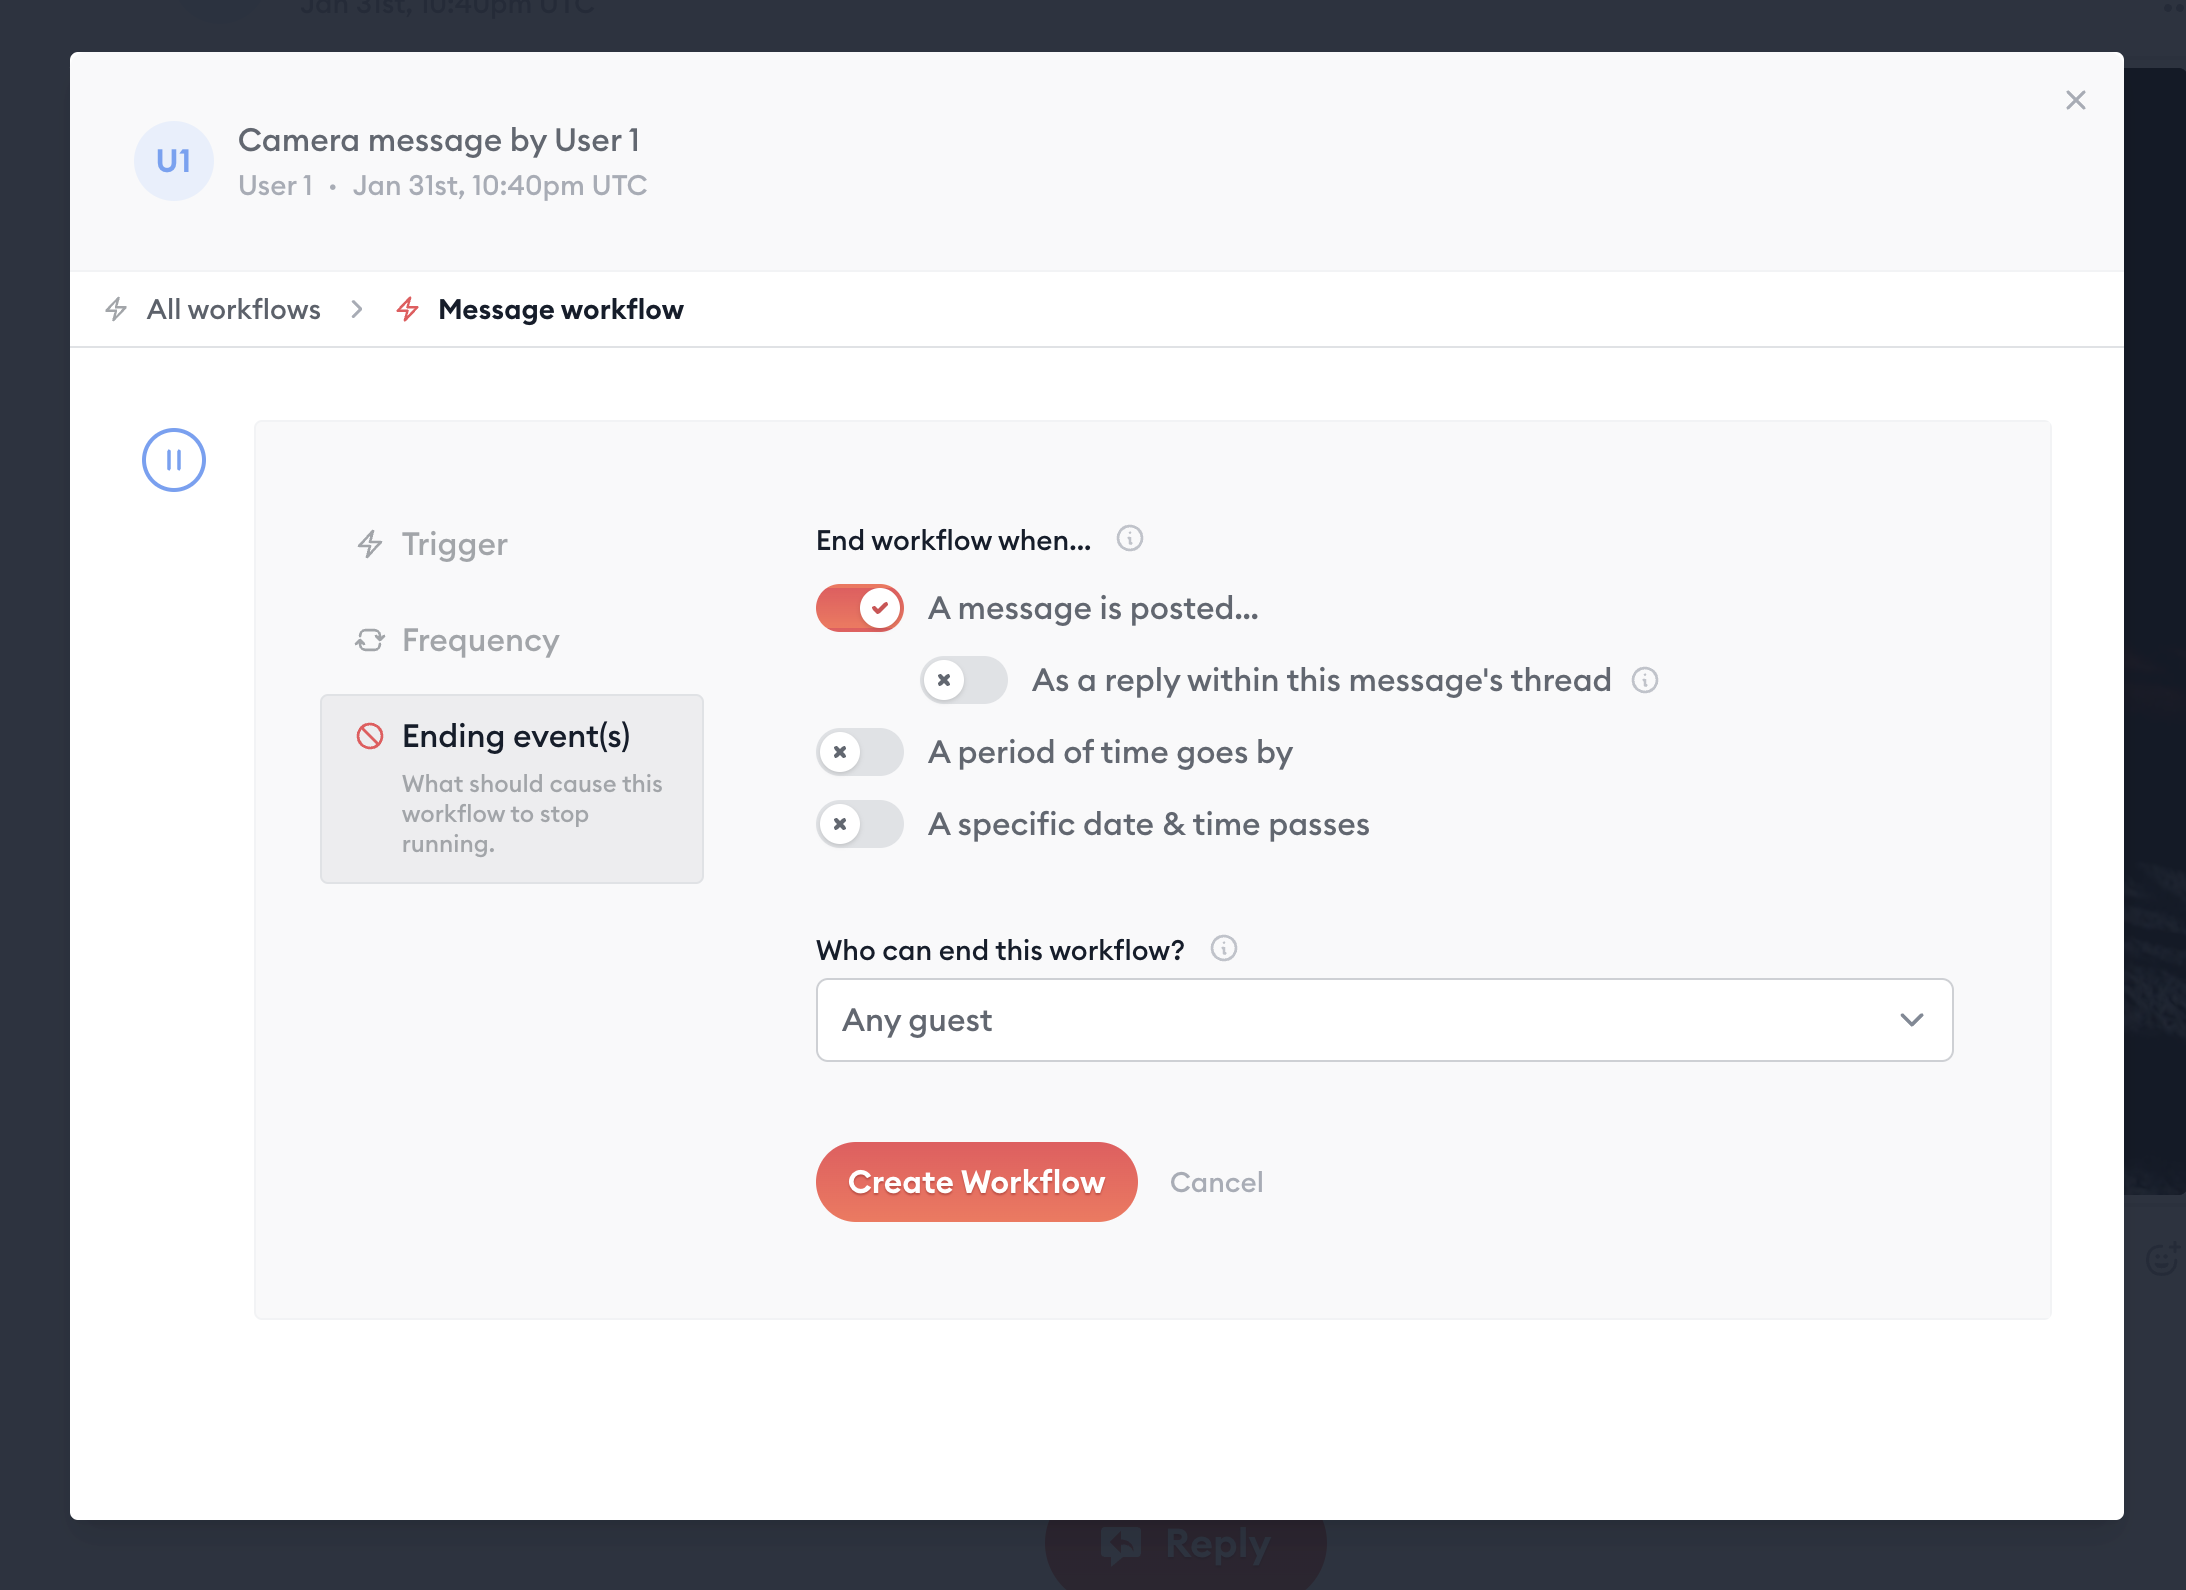
Under "Who can end this workflow?" again, we'll set this to "Any guest" for the same reason in step 3 above.
Setting this ending event to "message posted" will ensure that if the workflow has not yet run and a message is posted by a guest, it will end the workflow and won't run any of its actions from that point forward.
Now that our trigger is configured the way we want, go ahead and click "Create workflow."
Step 5: Add the step to send an email
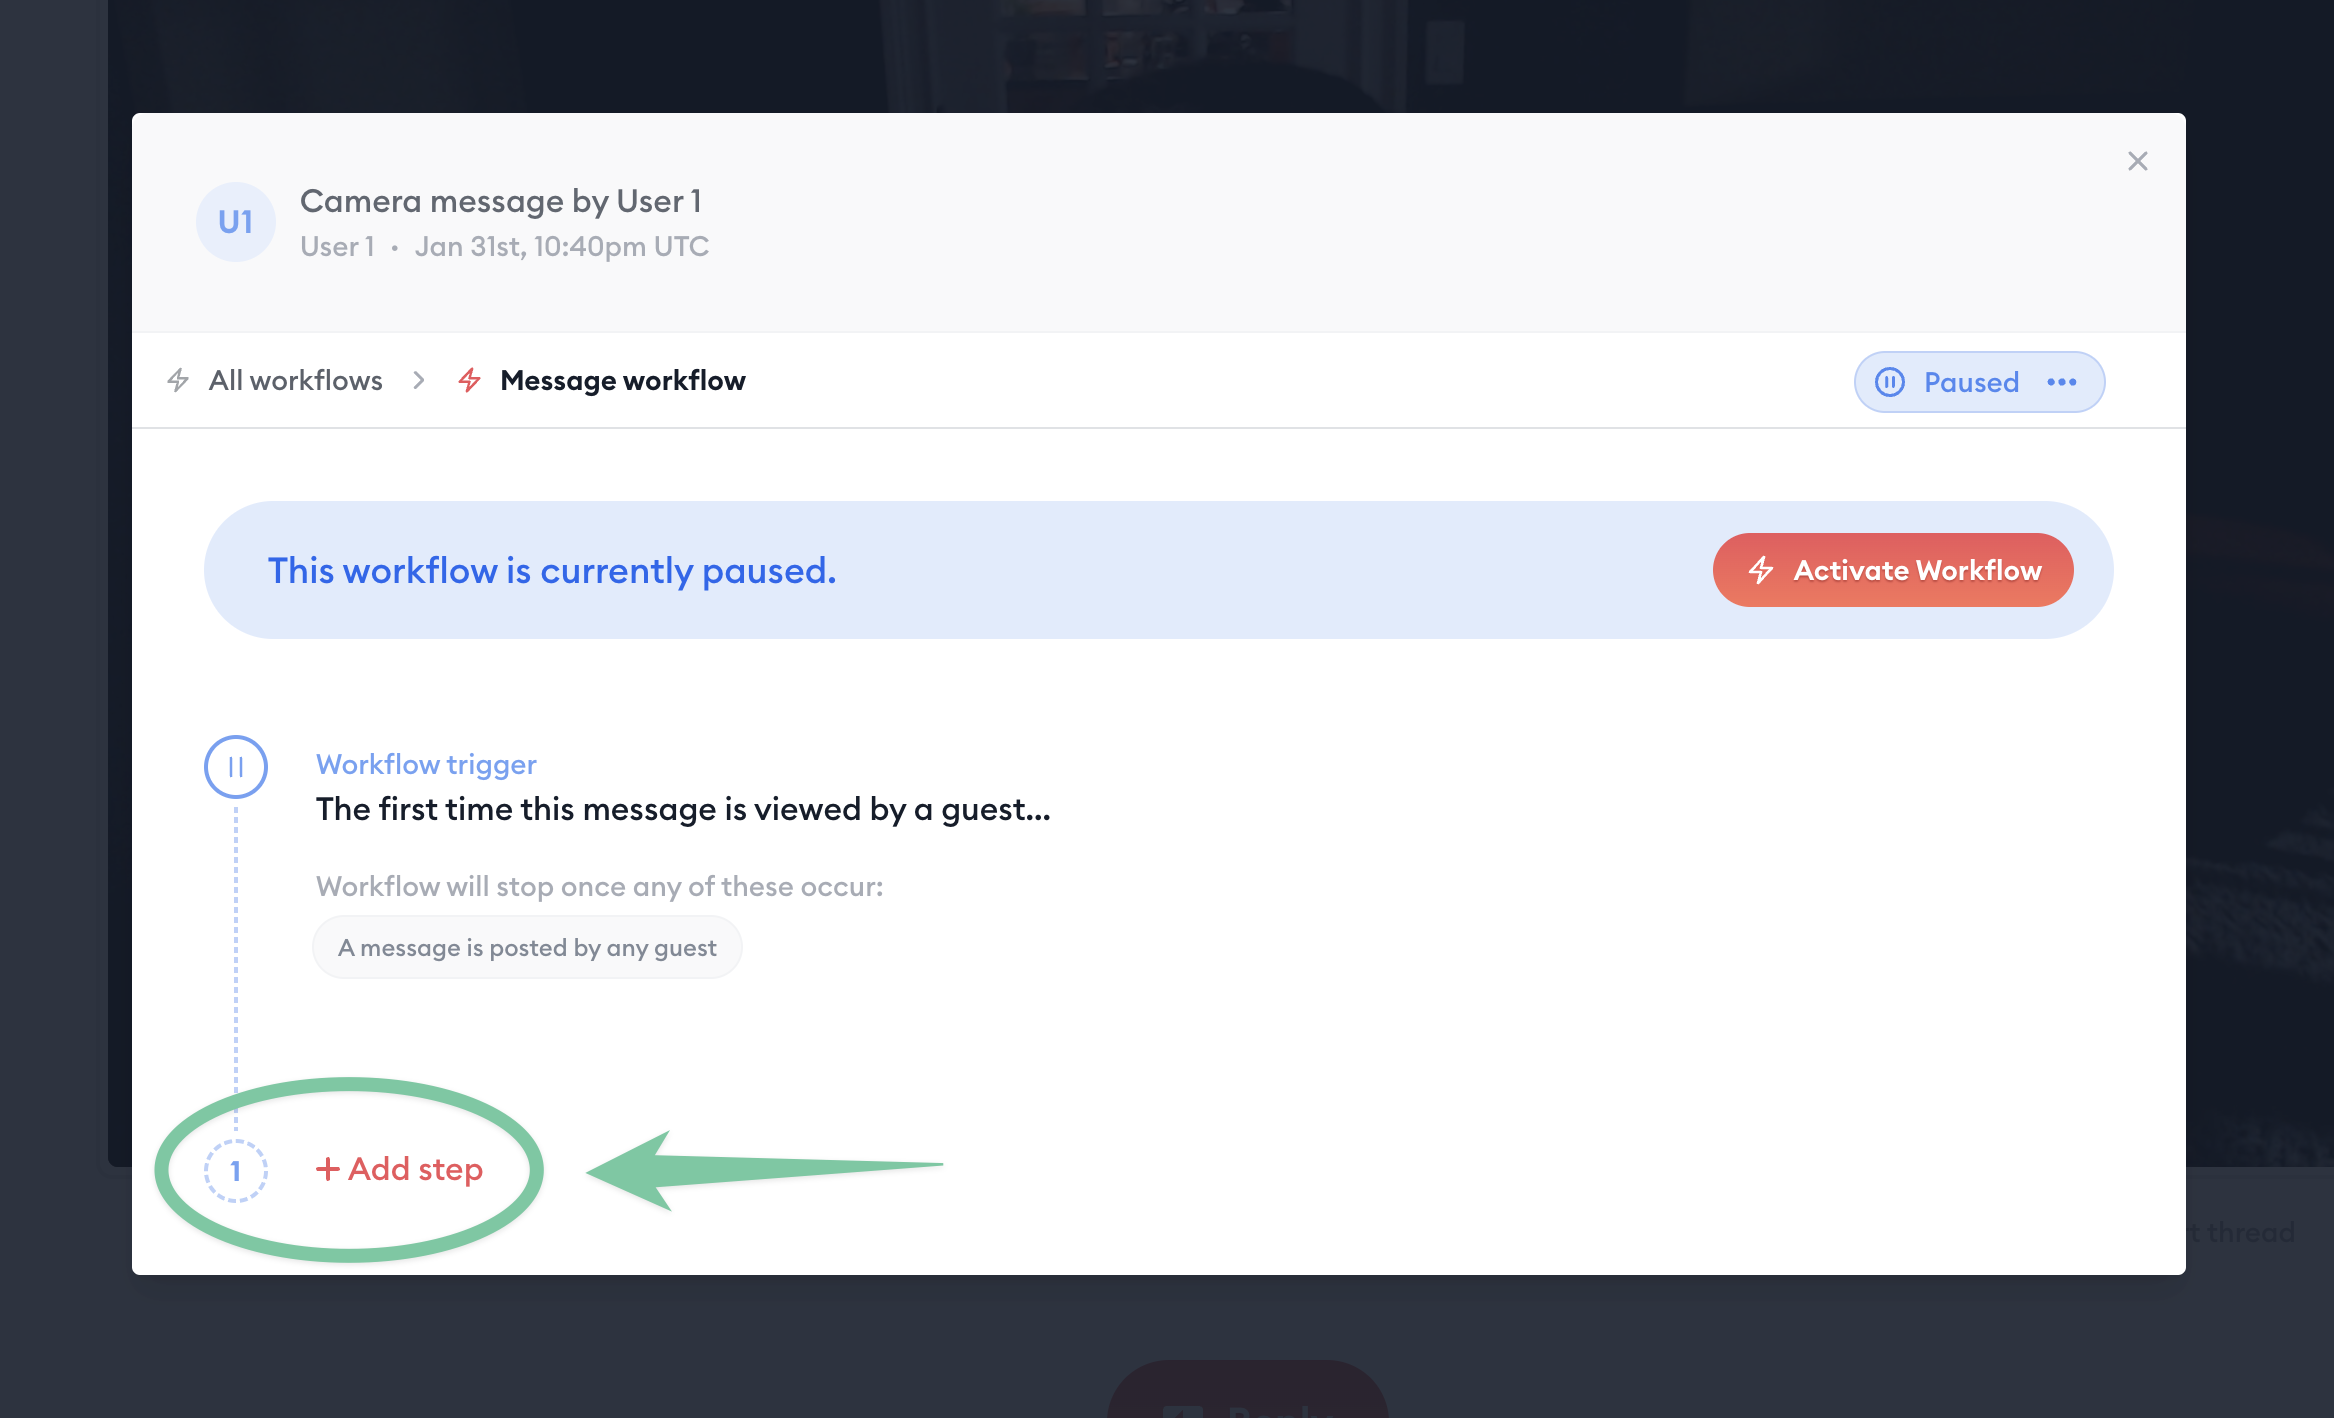
Now click "Add step" to add the first (and only) step in this workflow:
Next, set up your email:

But what if your client is not a registered user already? No problem. Click "Specify additional email(s)..." to reveal the emails field, then type in your client's email address. This will ensure that your client's email receives the notification. If their email is recognized by the "person who triggered this workflow", and it's the same as the email you typed into the box, then the system won't send duplicate emails.
Set the "Email from name" to your name (if it isn't already).
Customize your subject line. You can use {conversation_title} to dynamically insert the title of this conversation into the subject line.
Customize the message.
Note: In the email notification, below your body message, there will be a button that the client can click that takes them directly into this conversation.
Step 6: Set the delay on this step
Click "Delay" to set the delay setting on this step.
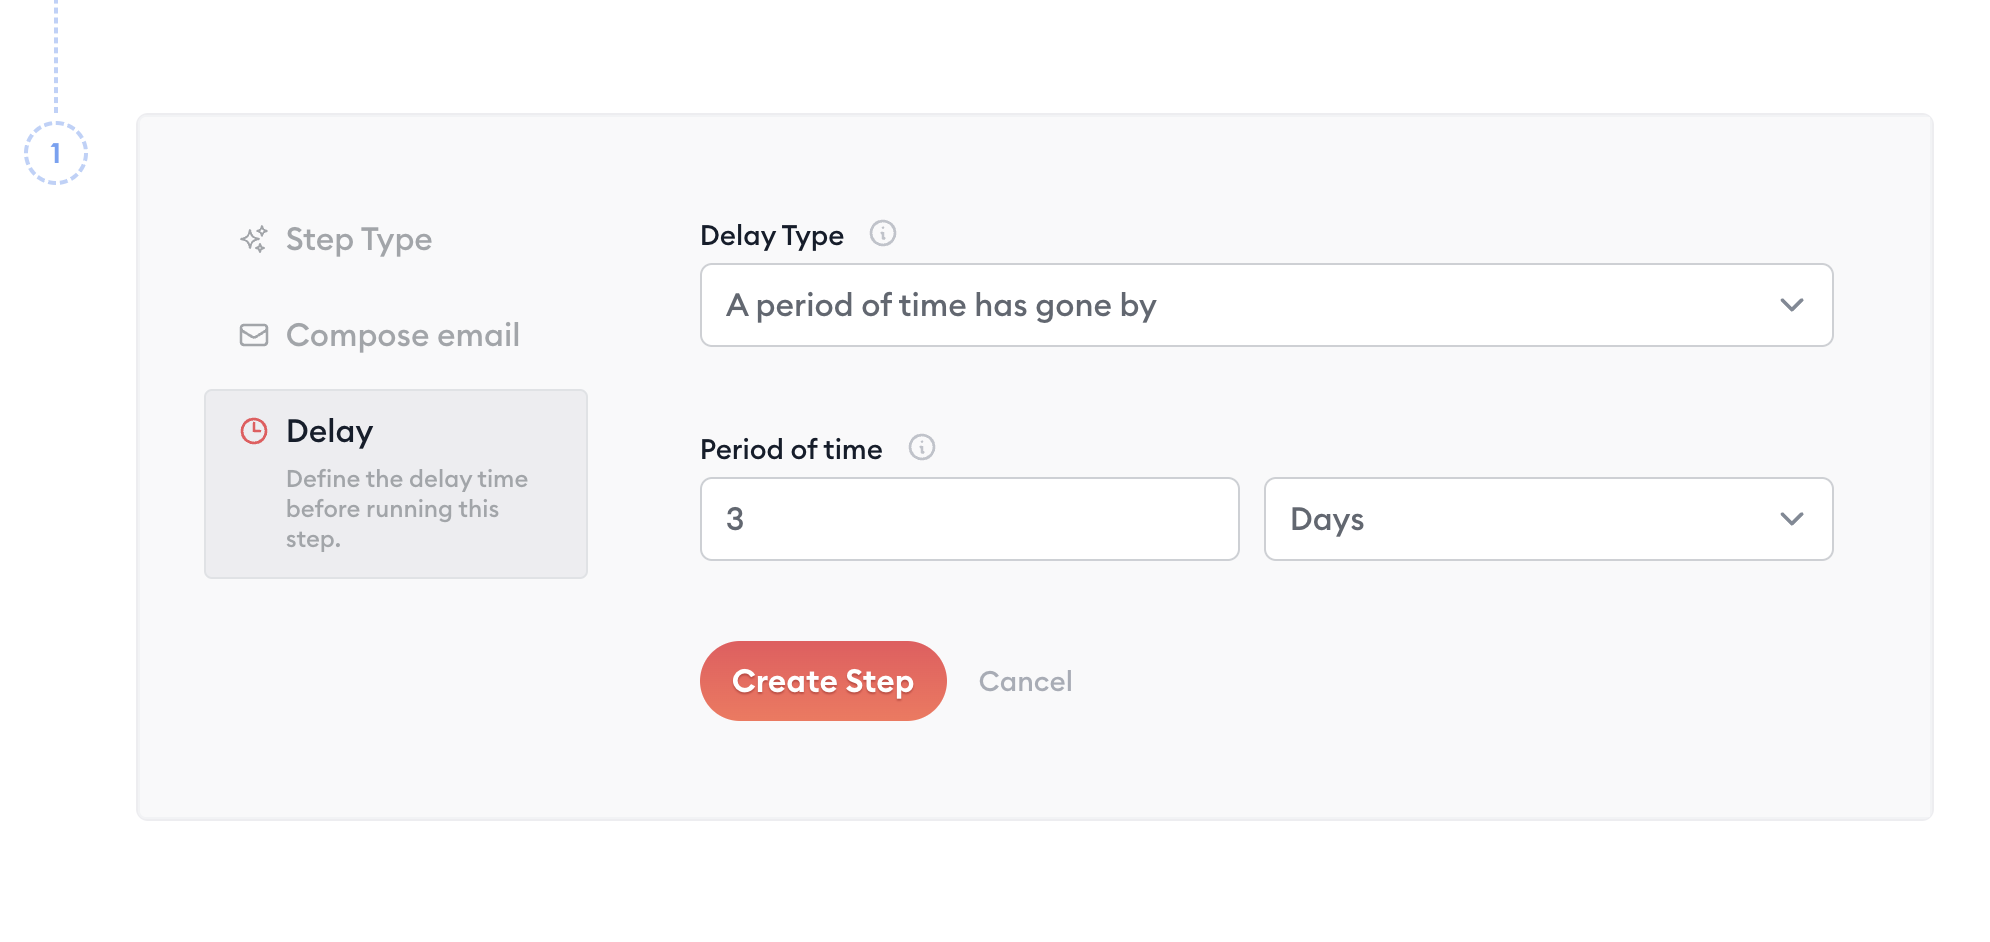
Then set the period of time to three days.
This means that the email notification will be scheduled to send to the client three days after the client presses play on your video message.
But remember—IF your client posts a message before three days have passed, we've set the "end event" (back in step 4) to end (or cancel) this workflow if a message is posted. That means that if a message is posted before 3 days pass, it will not send the email. If no message is posted within three days, then the email will be sent.
Now you can go ahead and click "Create Step" to add this first (and only) step into your workflow.
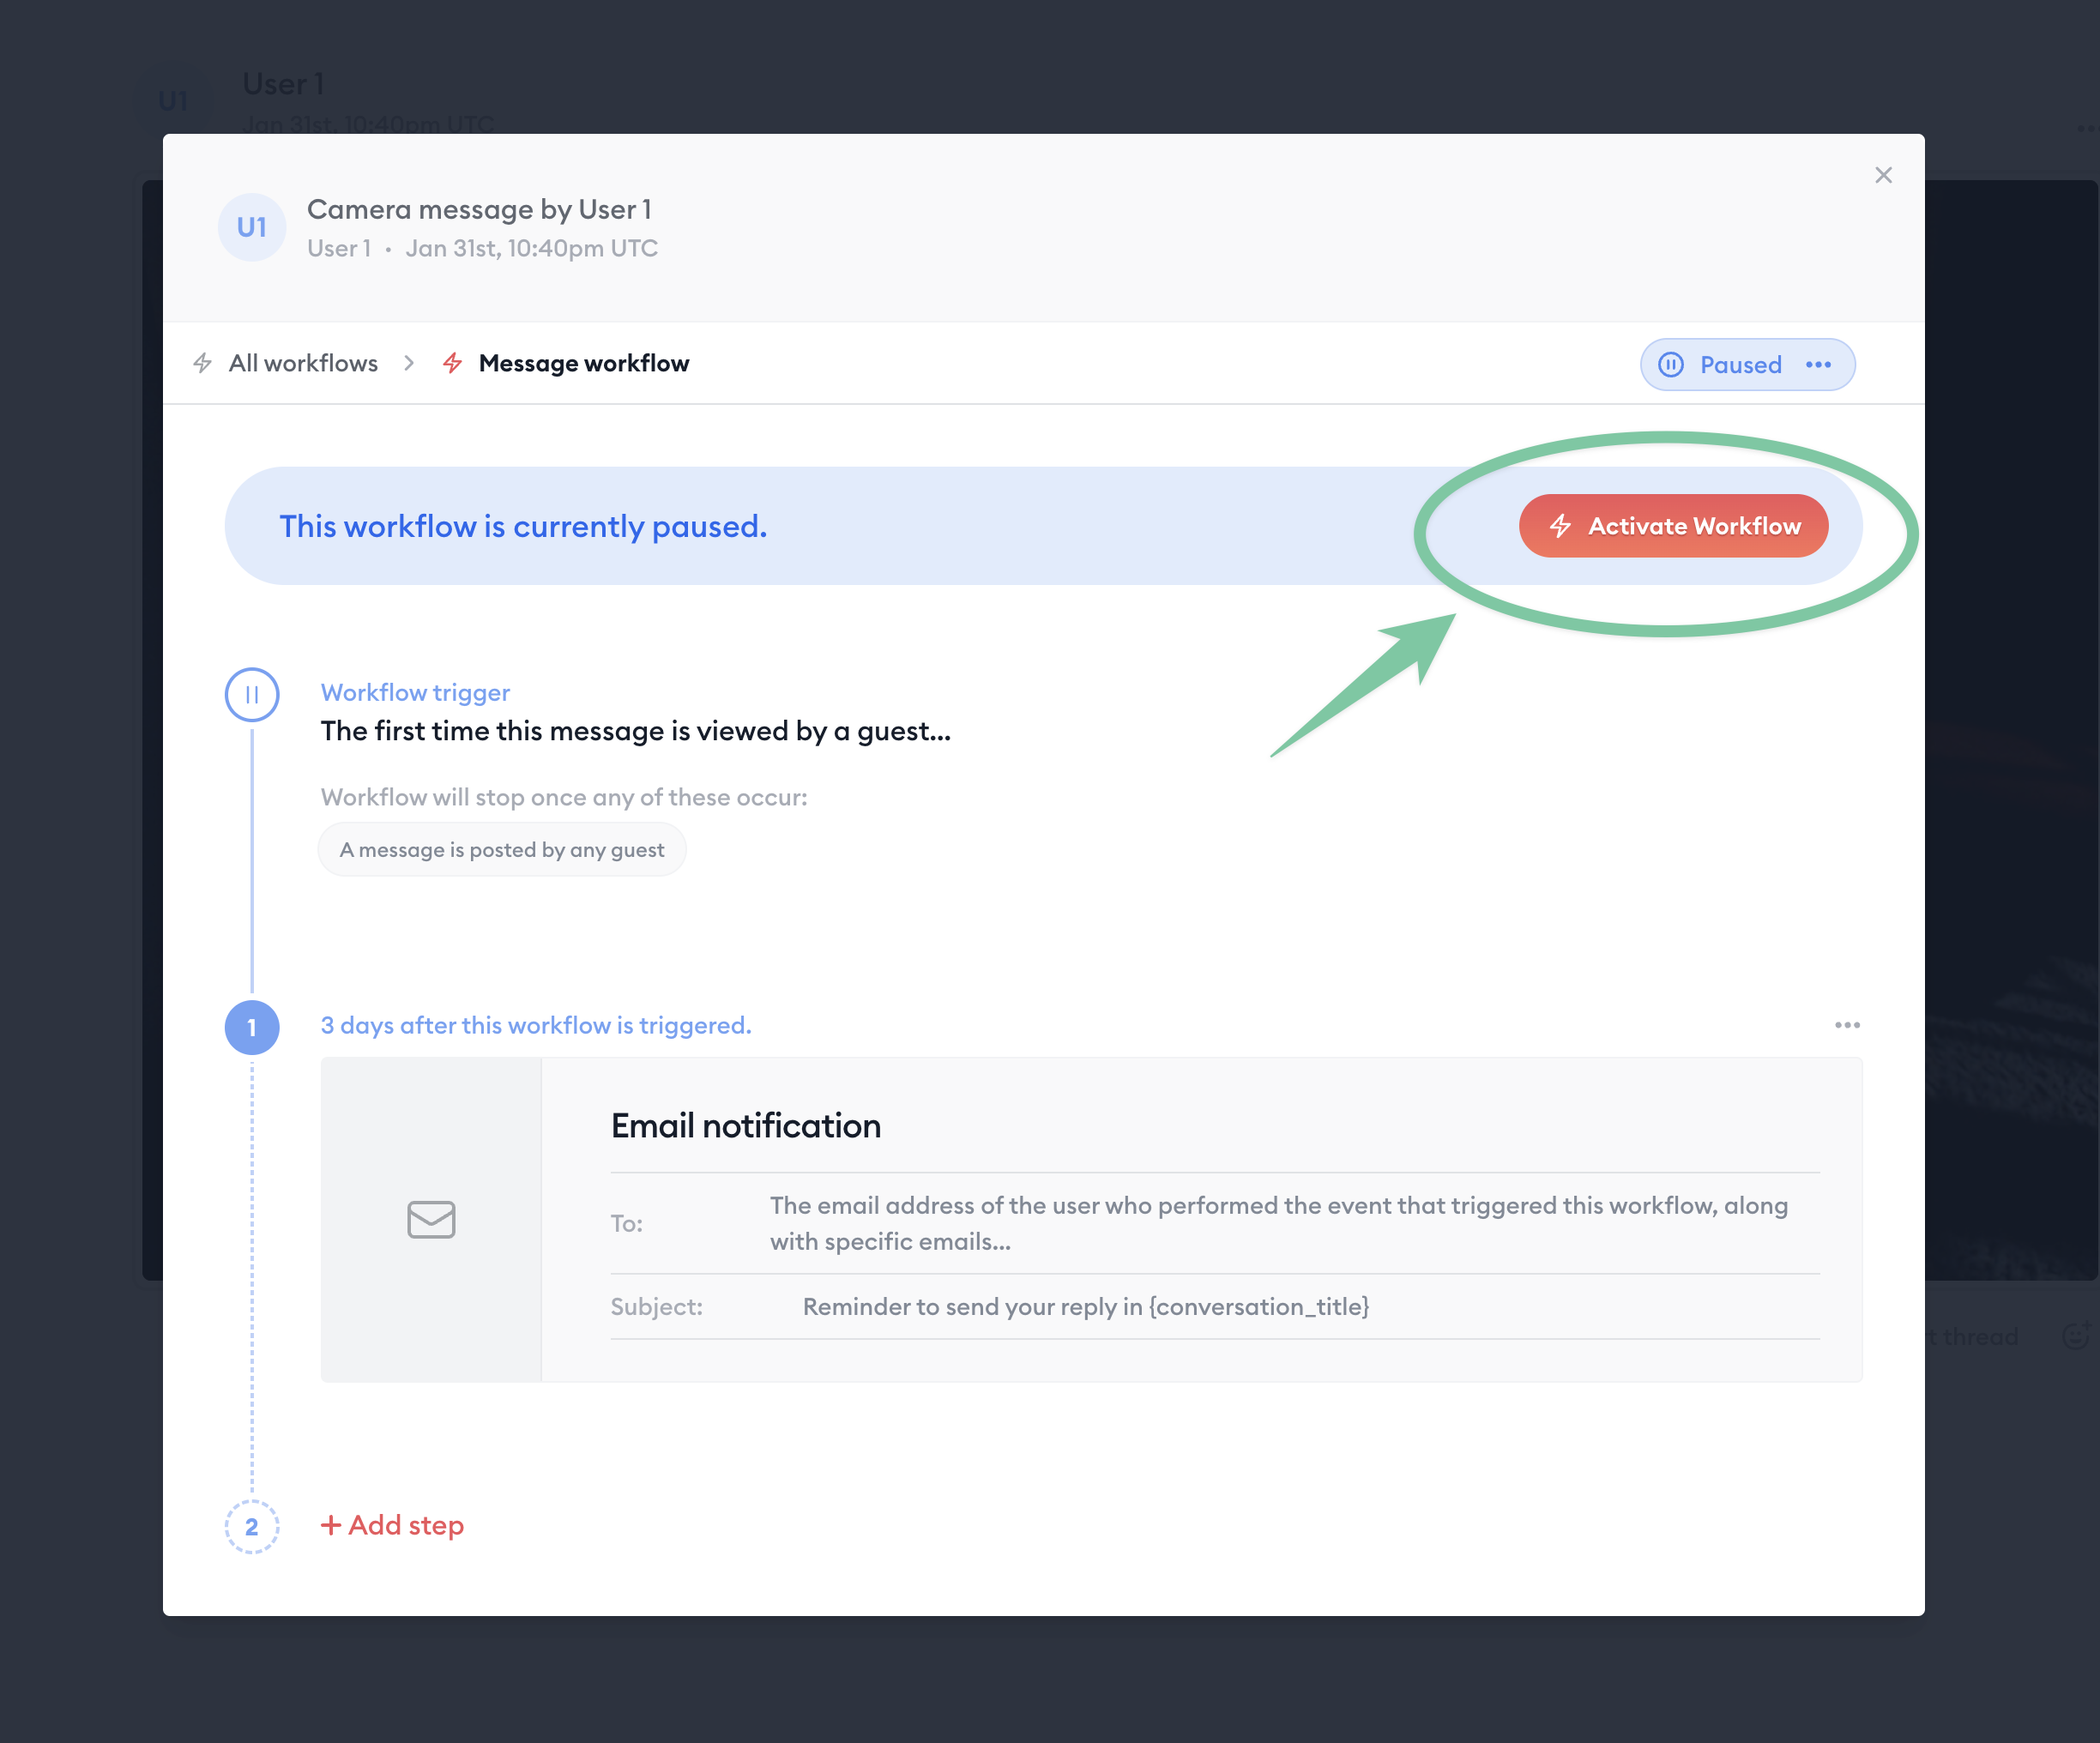
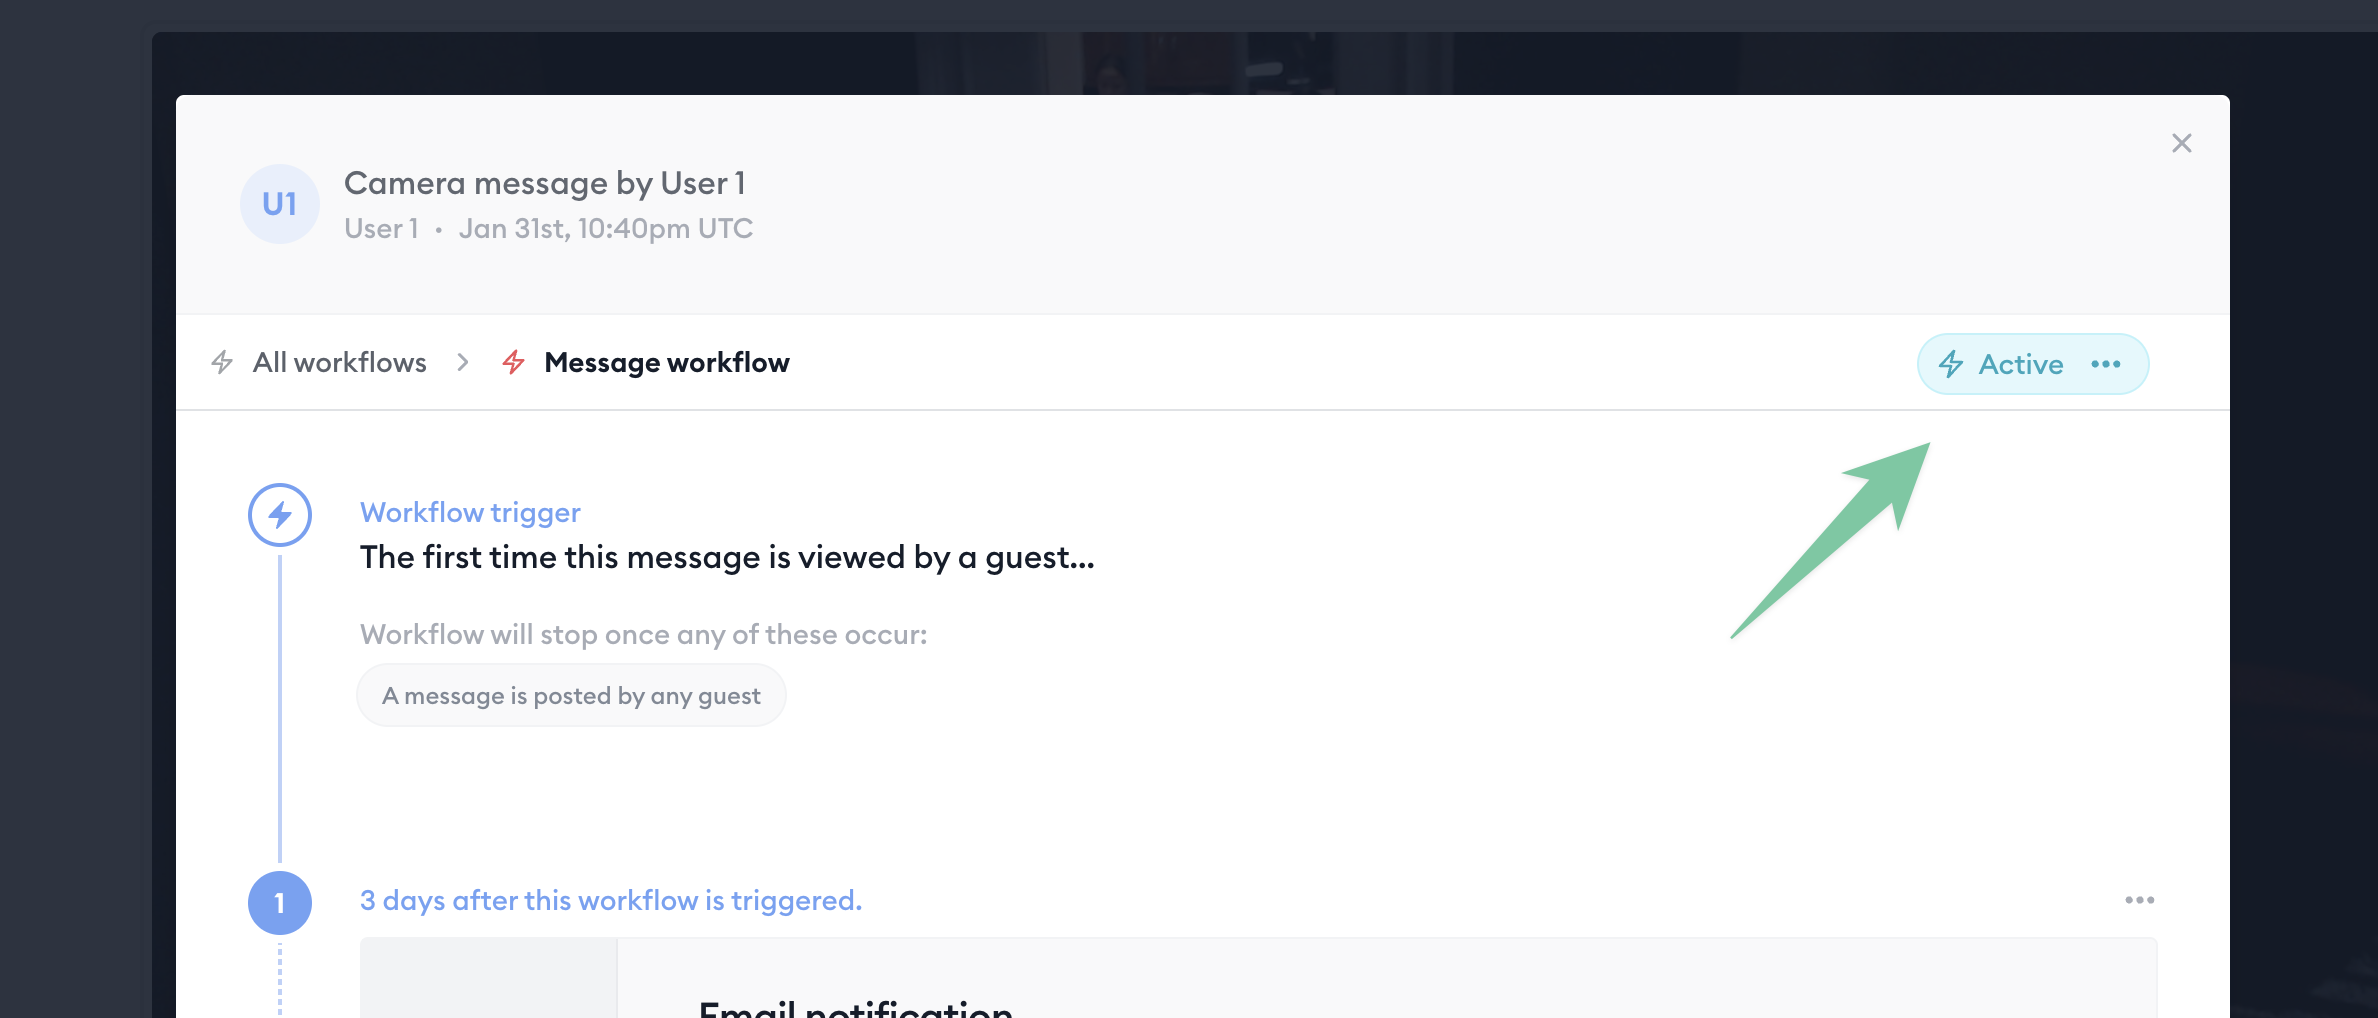
Step 7: Activate the workflow
Very important! Your workflow is still in a "paused" state. If you leave it as is, it will not run.
Click "Activate" on the workflow. The status button should turn green, indicating you've successfully activated your workflow. It is now ready to be triggered.
You can share the link to this conversation in a number of different ways, but we recommend using our built-in email composer to compose and share a link to this conversation with your client's email address.
See instructions for sharing this conversation via email here.
Way to go! Your workflow to send a reminder email to nudge your client for a response is now all set and ready to run.
Learn more about Clarityflow.