Create an automated interview: Workflow recipe
Need to create an automated interview, where each question is dripped out after the respondent answers the previous question? That's possible using workflows.
In this Workflow Recipe, we'll show you exactly how to set this style of automated interview. This same tutorial might also be used to create an interactive quiz or training exercise.
Looking for the detailed reference docs for Workflows? That's here.
Goals for this workflow
Here's what we want to achieve with this workflow:
We're going to create a four-question interview and save our four questions as templates in our library.
When the respondent starts the interview, they should only see the first question.
The second question should display only after the respondent has posted their response to the first question. The third question should display after the student has responded to the second question, and so on through all four interview questions.
How to set it up:
Let's walk through the setup, step-by-step:
Step 1: Create four questions as message templates in your library
You'll want to start by creating your four interview questions as four message templates in your library.
There are two ways to create a message template:
Recommended: Click "Library," click "New message template," then create and save a message template.
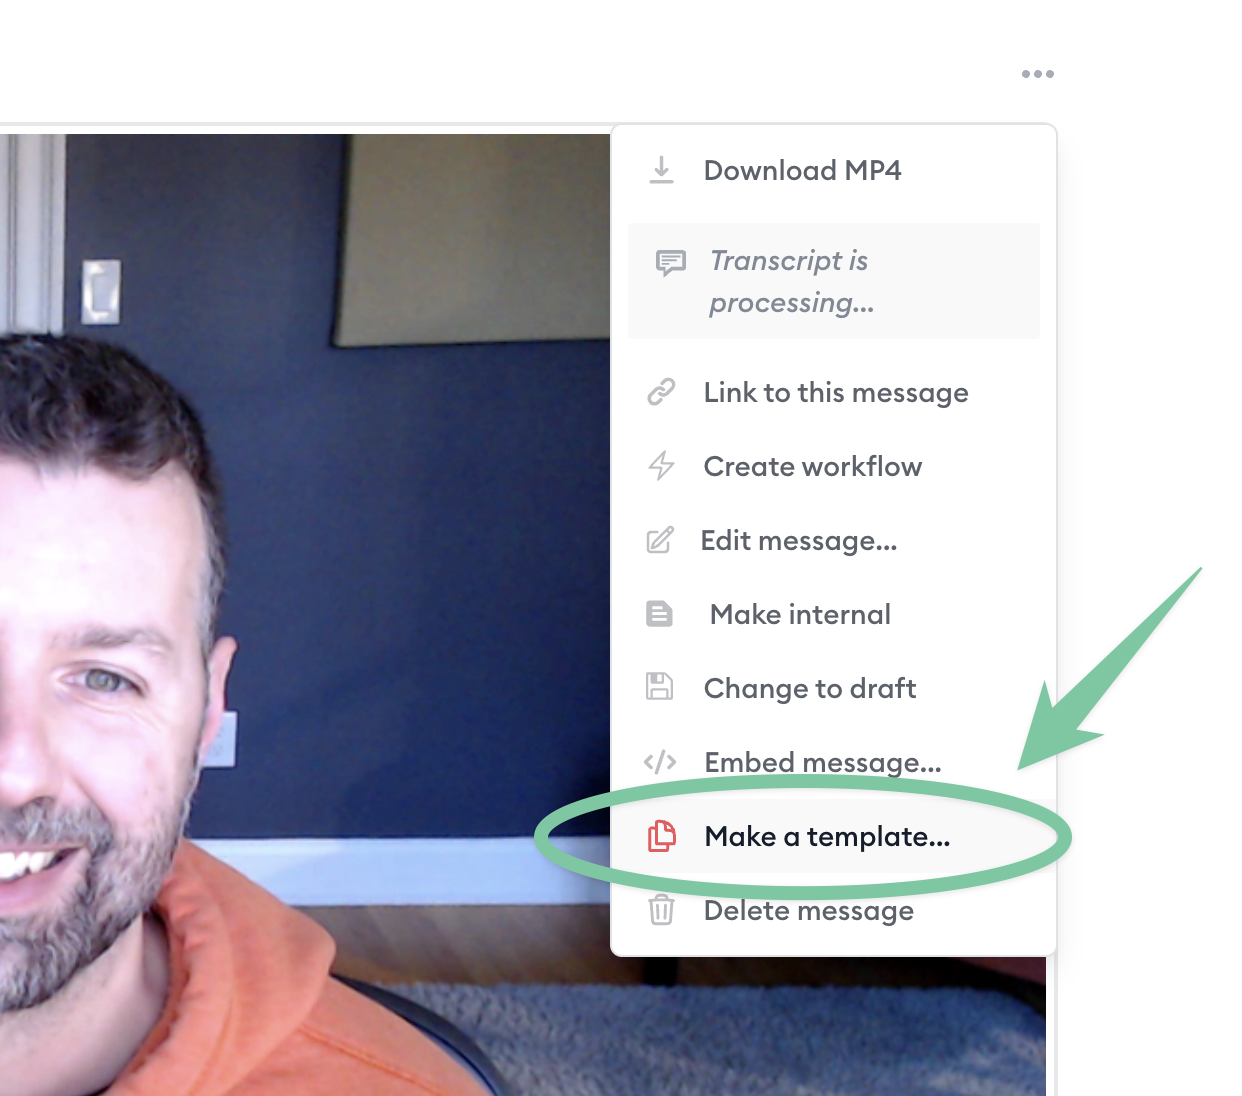
Alternatively: Create a new conversation > Create your first question as a message > Open this message's settings menu > click "Create a template..." to turn this message into a message template in your library.
Step 2: Create a workflow on the first question's message template
After you've created four message templates for your four interview questions, you'll want to go into each of them and add a workflow. We'll start by creating the workflow on the message template for question #1:
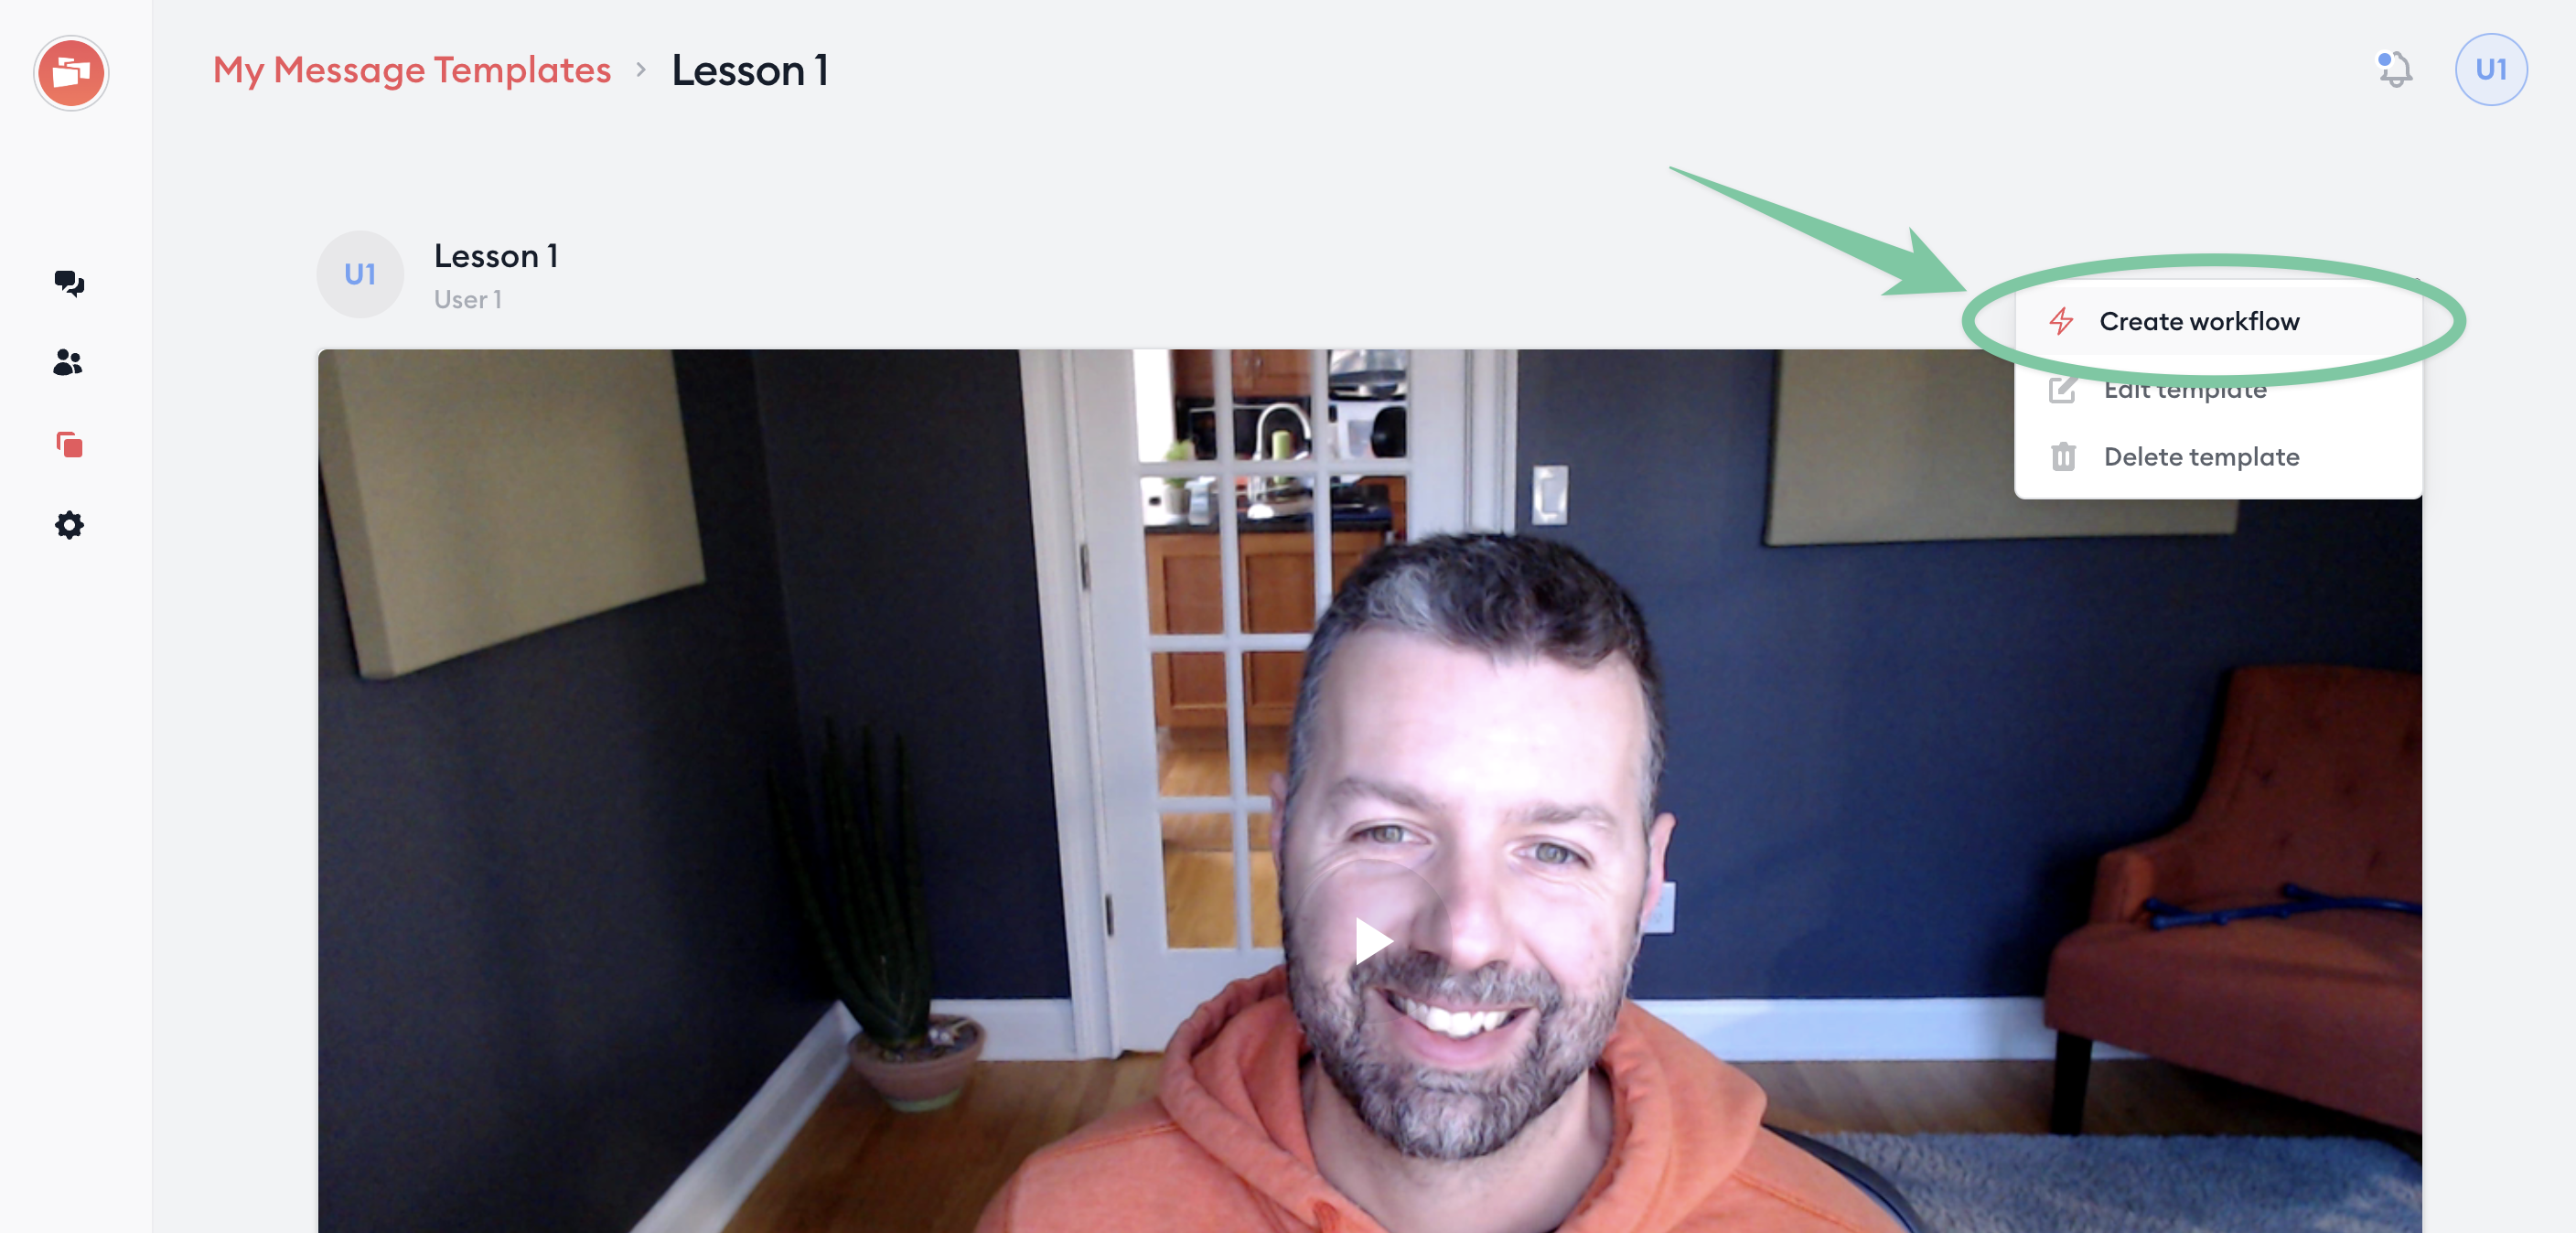
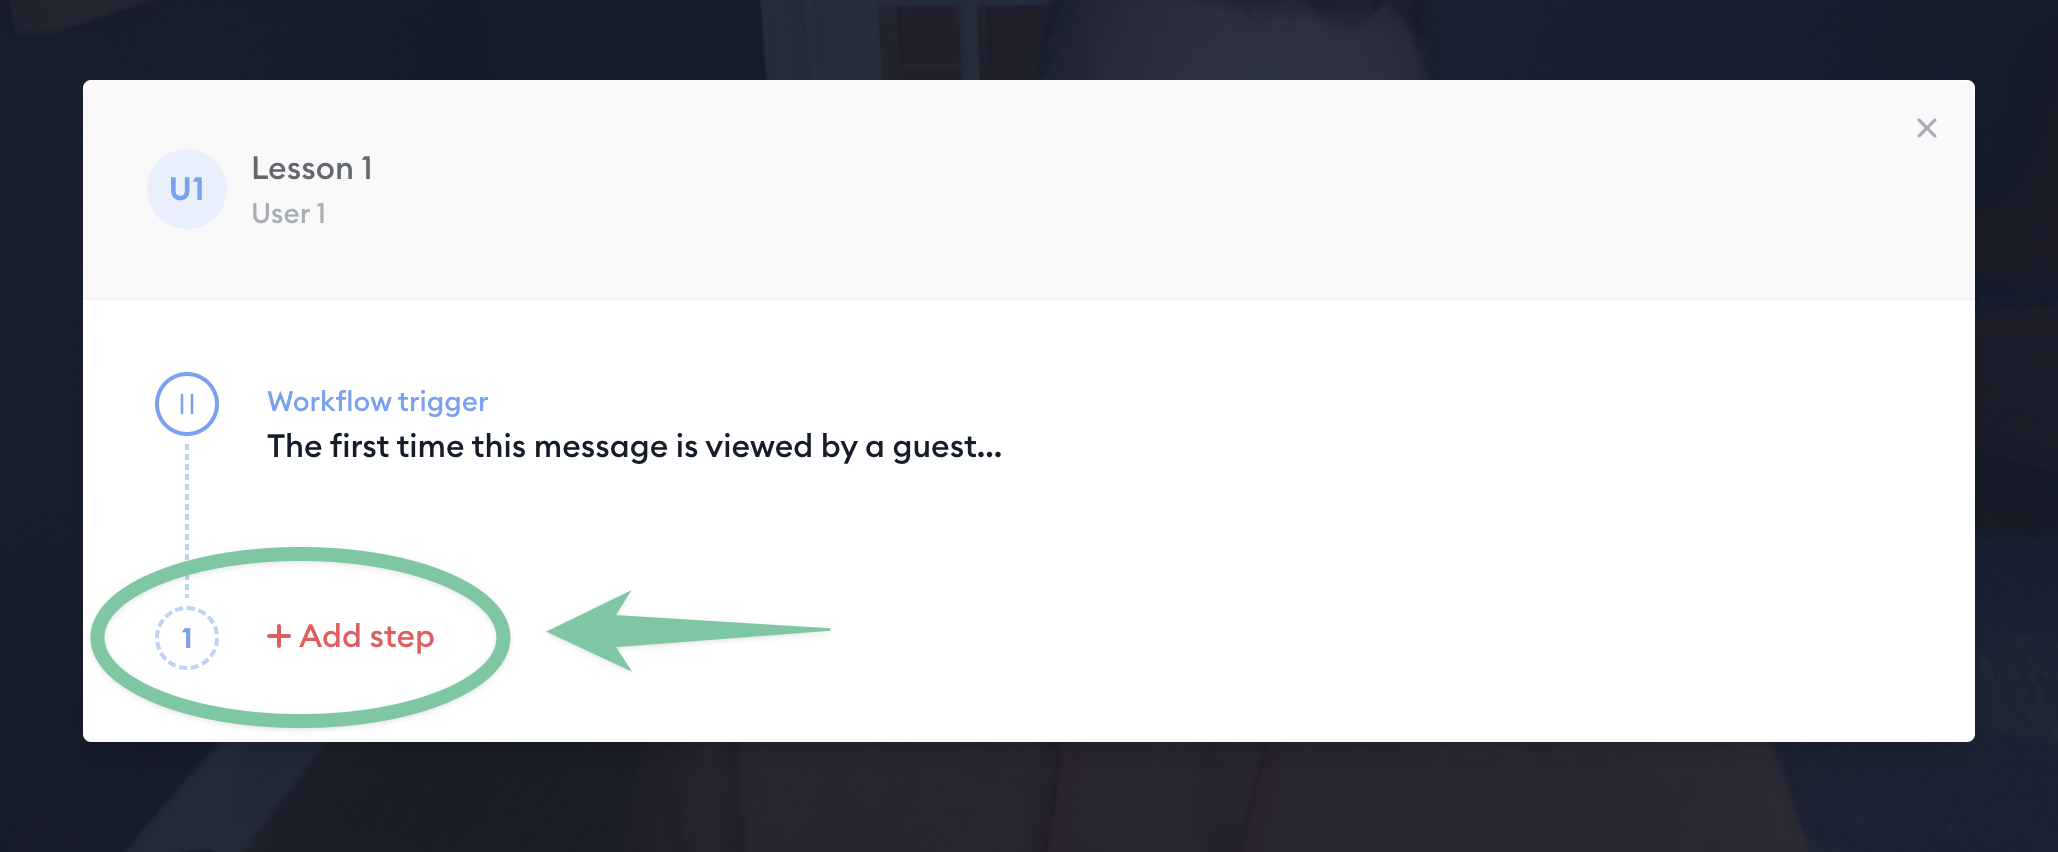
Go to your library and view your message template for question #1. Click "..." to open its settings menu, then click "Create workflow."
Select the trigger for this workflow to be when this message is viewed.
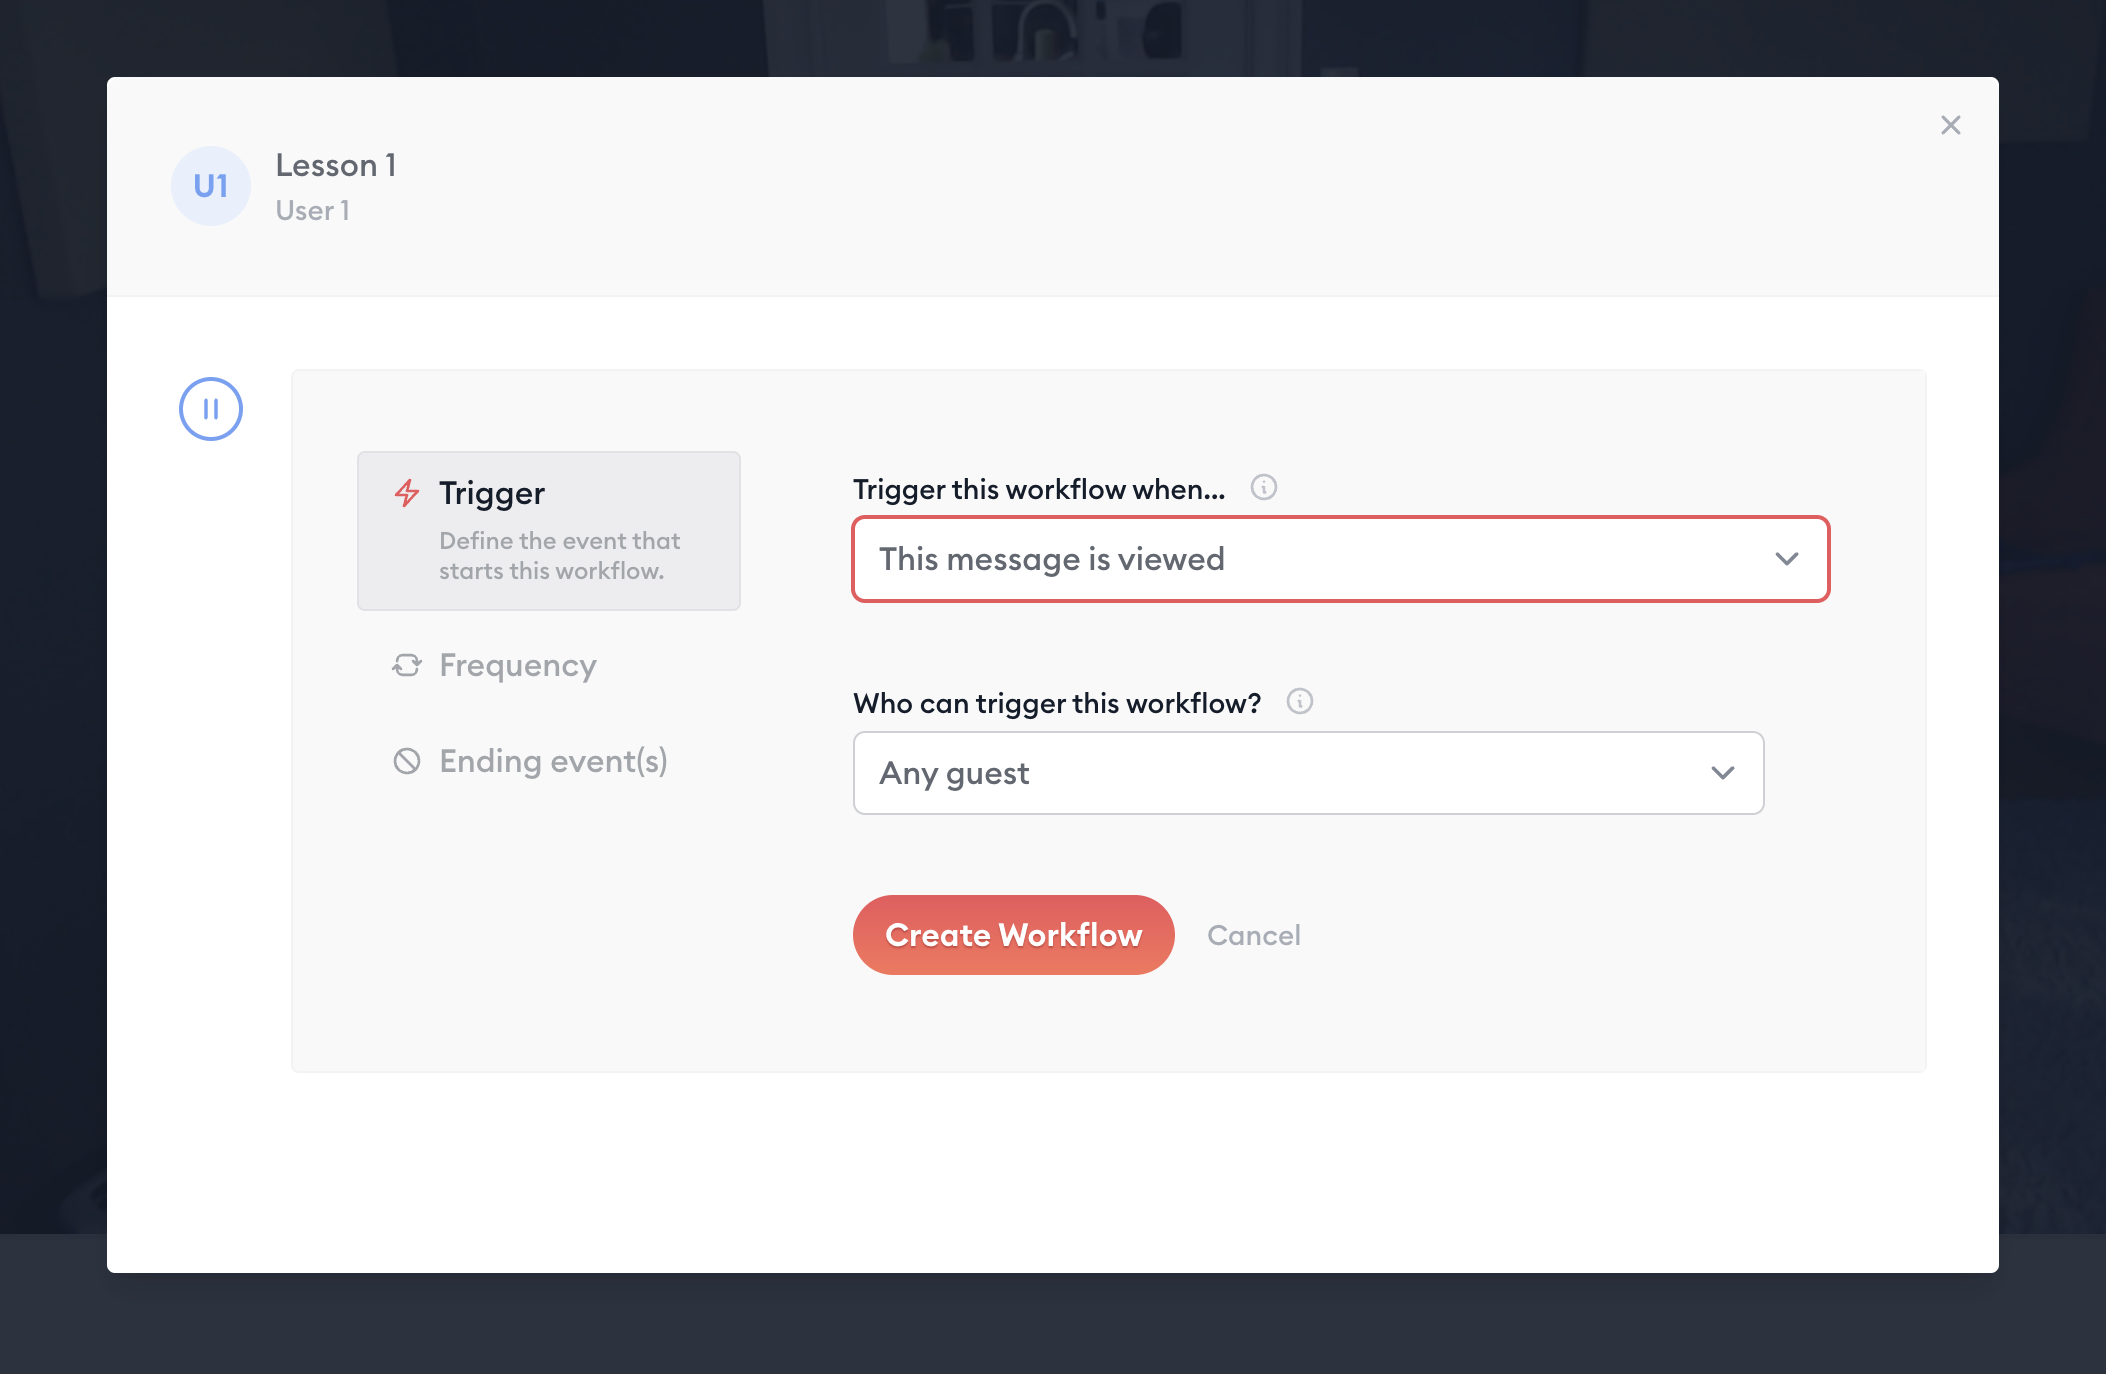
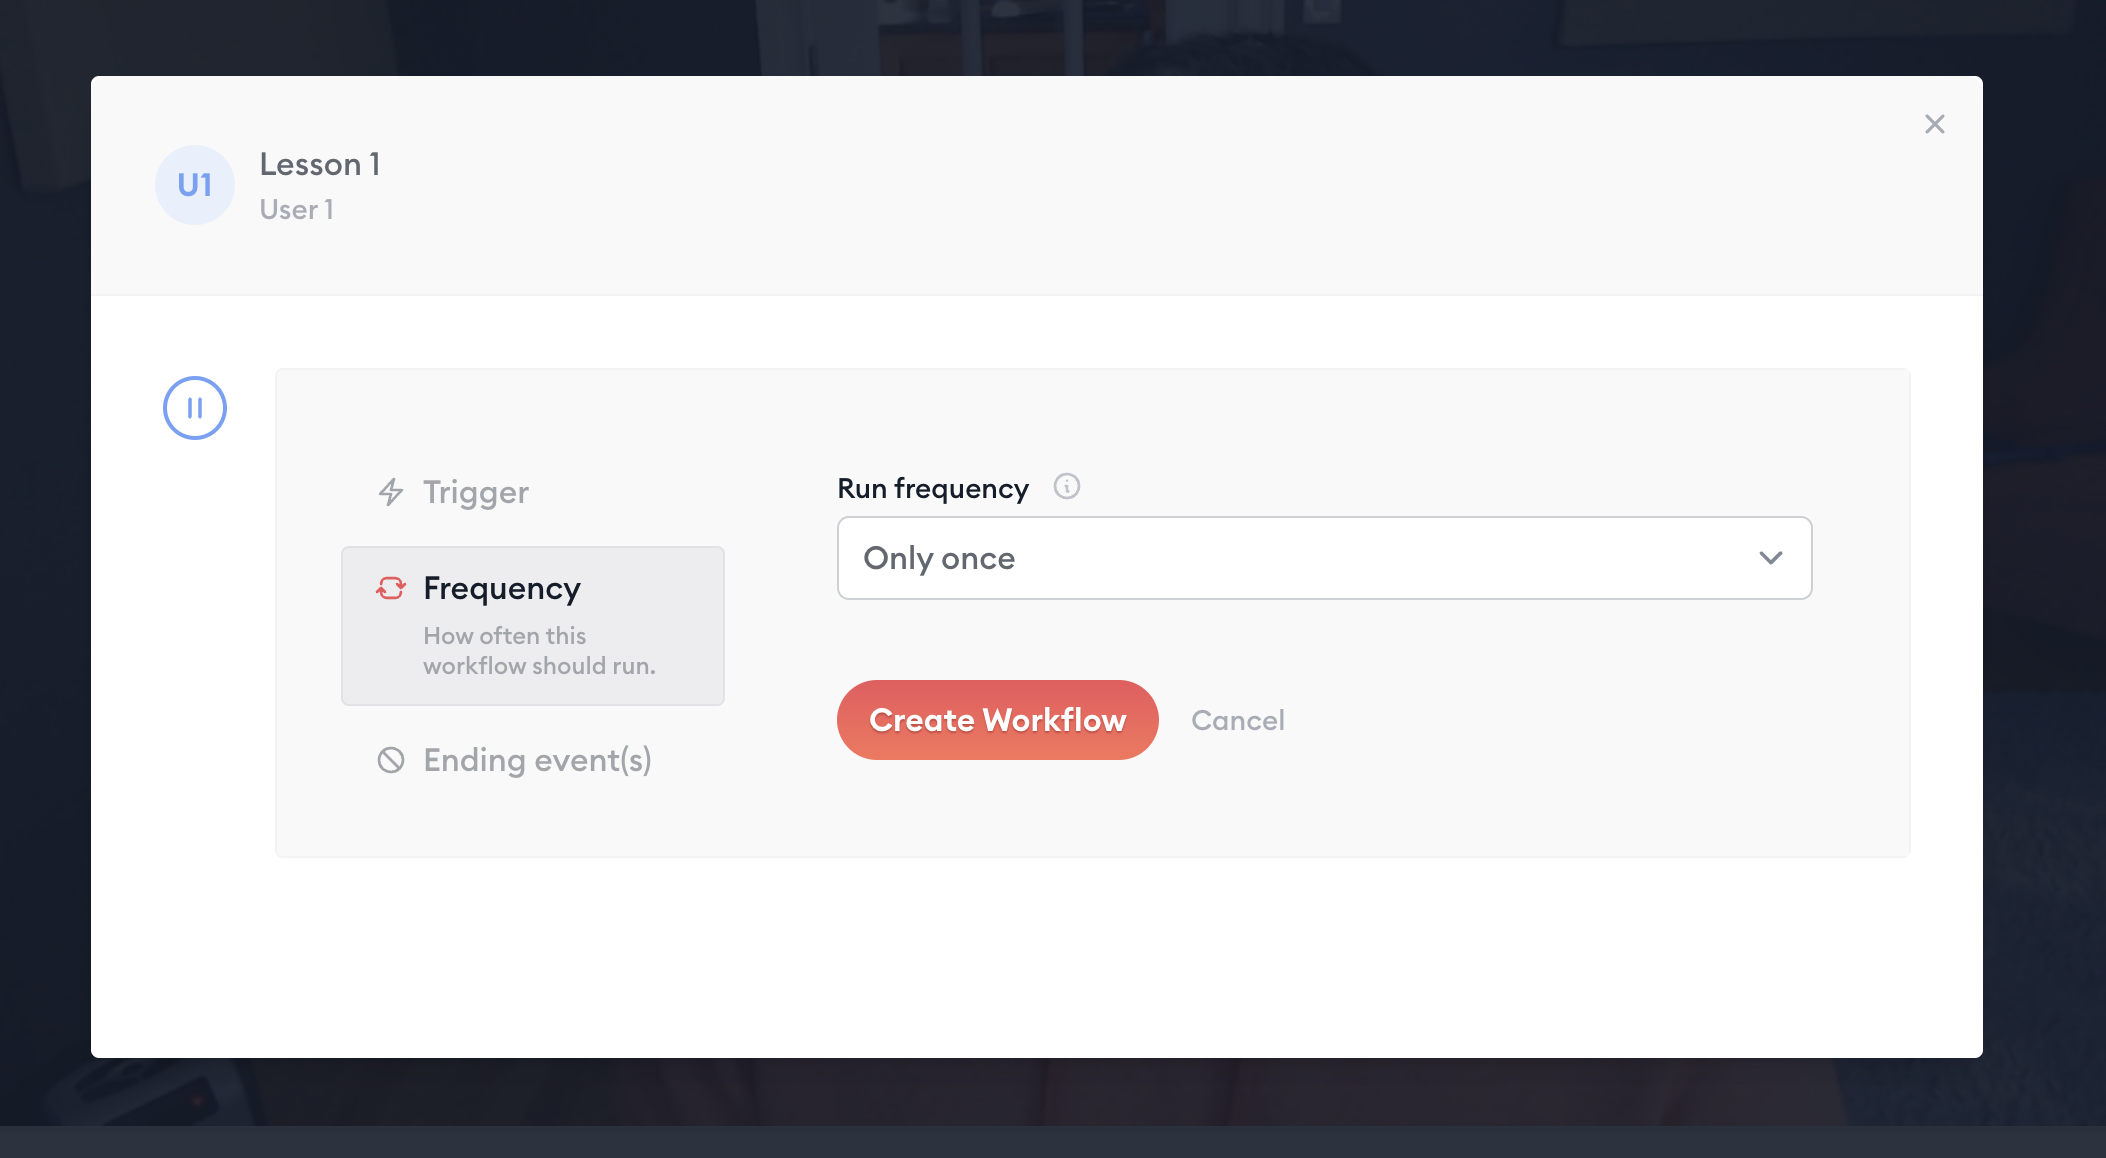
Since we only want this workflow to run once (to display the next lesson for this student), we can leave the "frequency" setting set to its default setting, which is "Only once."
Now you can go ahead and click "Create Workflow."
Step 3: Add a step to display the next lesson's video
Now click "Add step" to add the first (and only) step in this workflow.
This step will be the action that automatically displays the next question (in this case, question #2) after this workflow is triggered by a person viewing question #1.
Set the "step type" to "Send a reply in this conversation."
Then for "Message type," select "Use a message template." Select the message template you created for question #2.
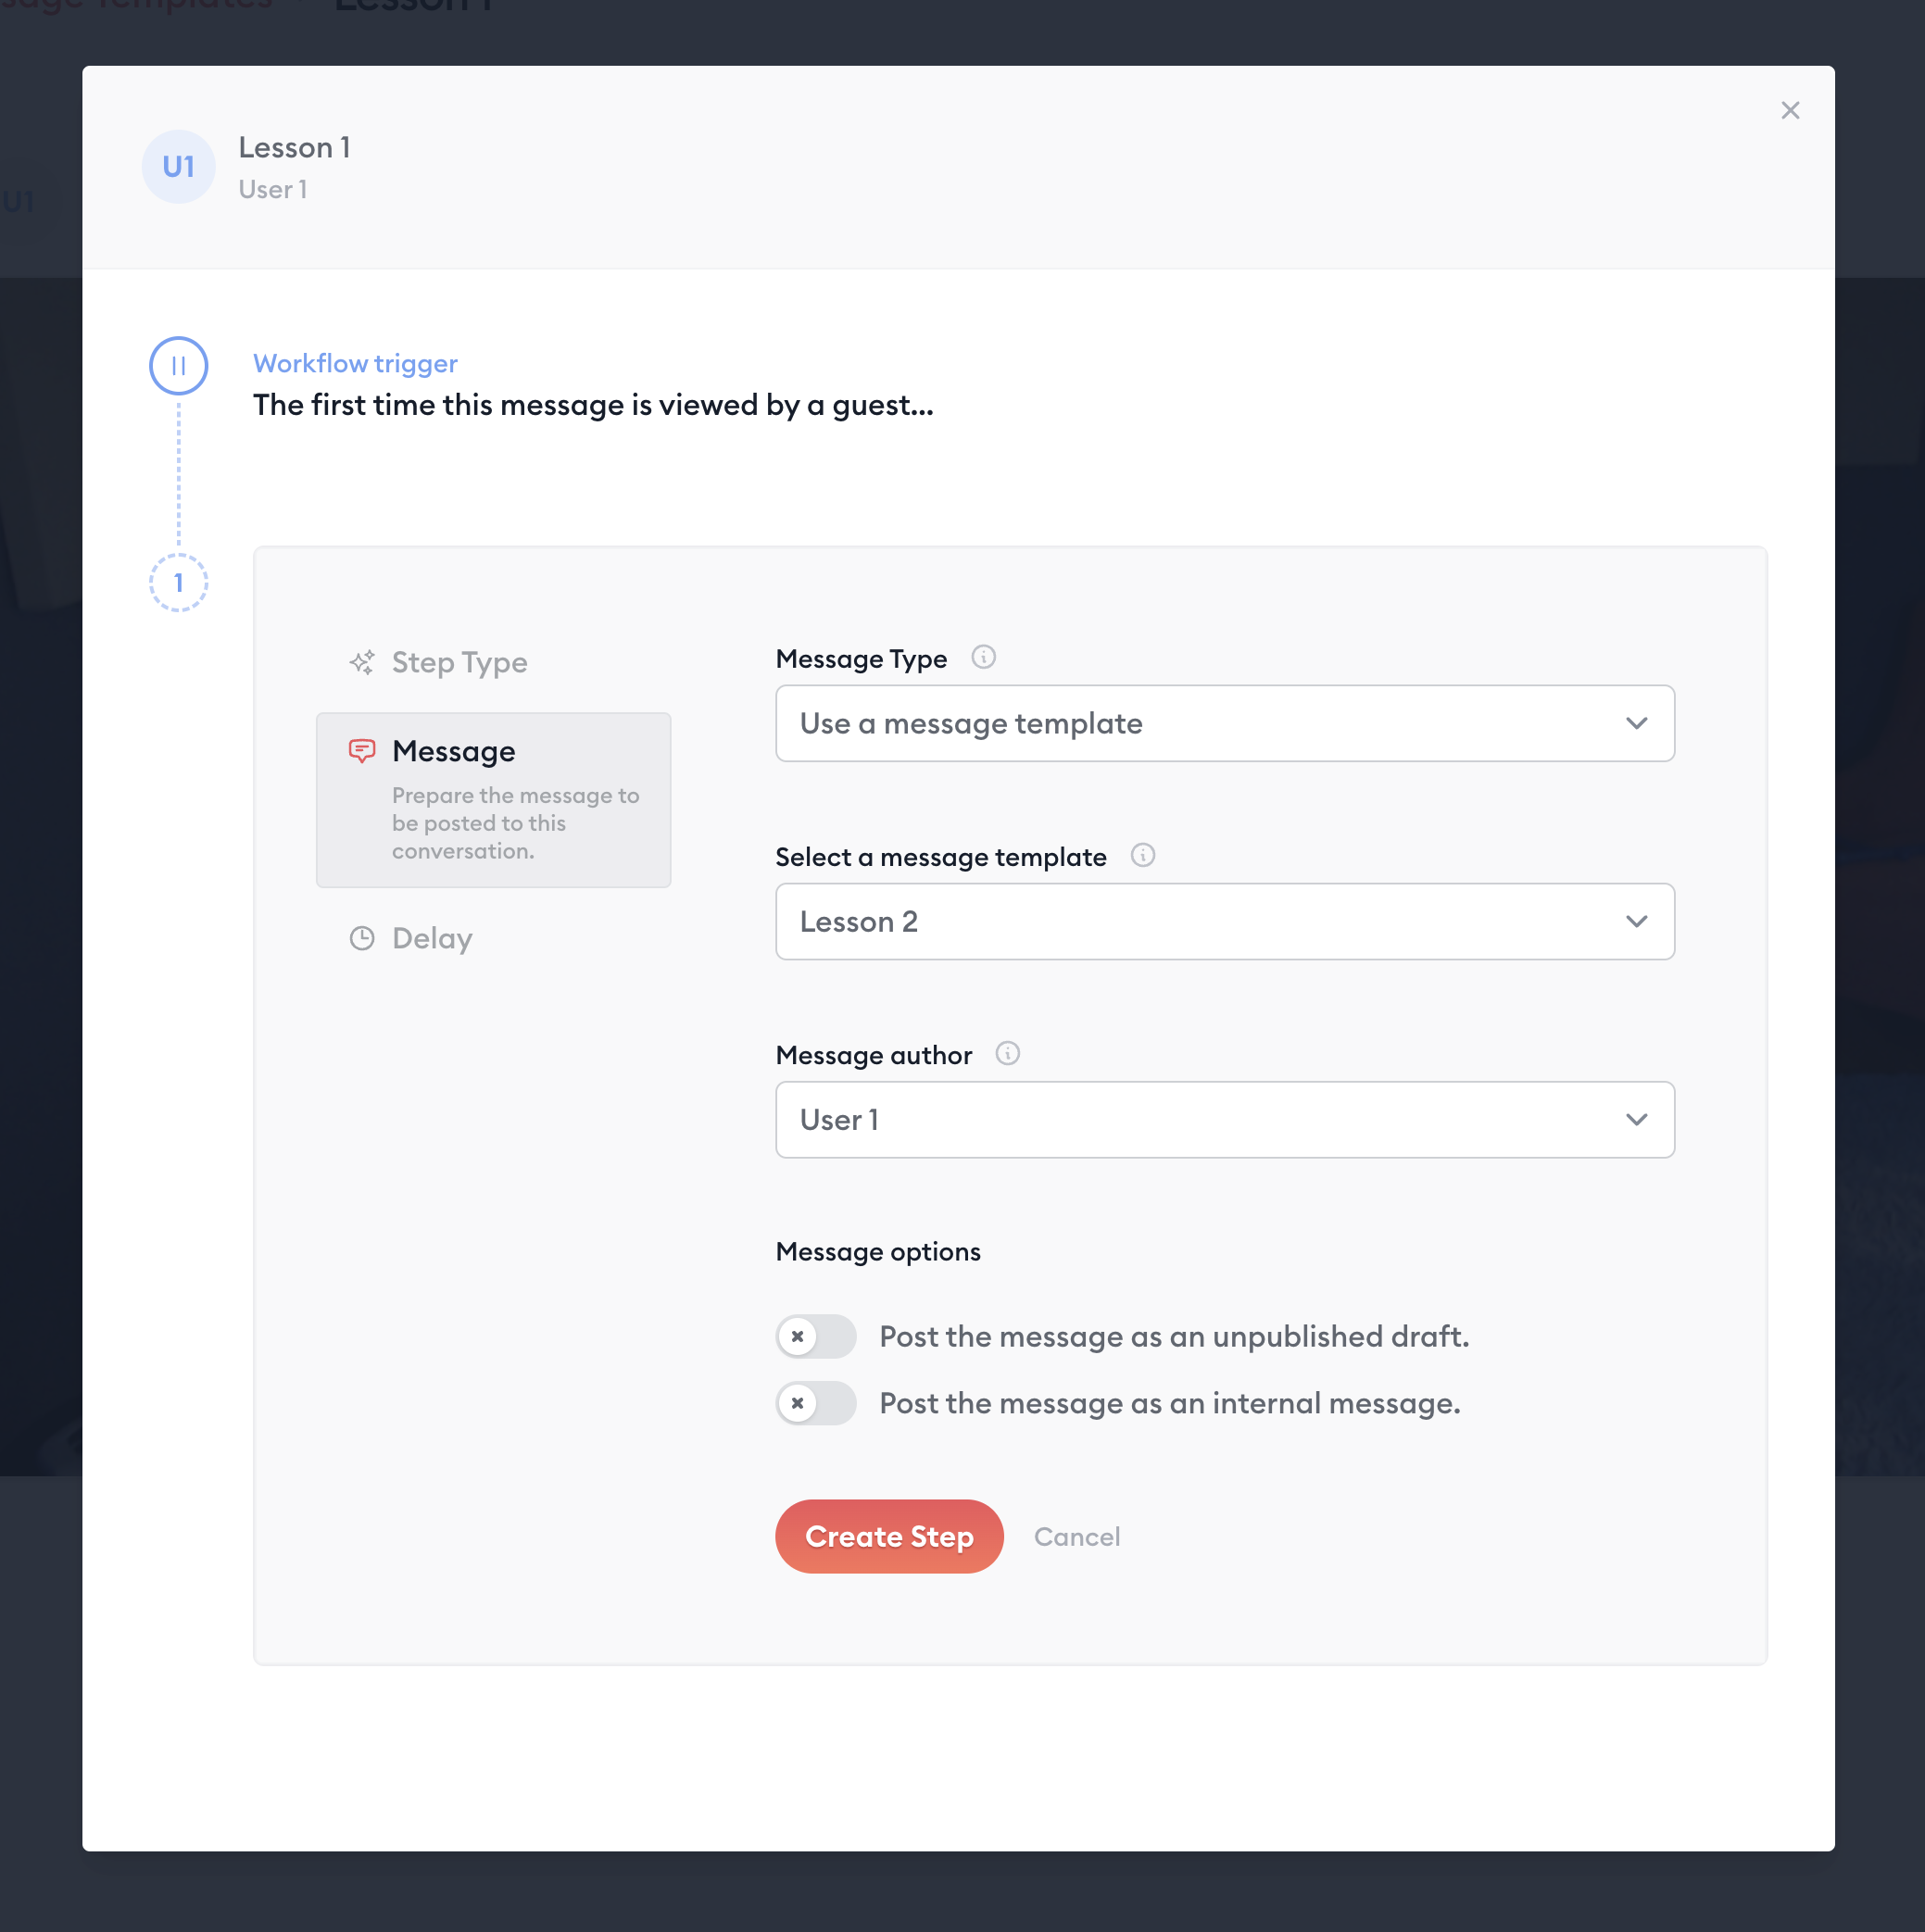
If you want the next question to display immediately after the student has played the previous question, then you can skip this step, leaving the "Delay" setting set to "Immediately."
Alternatively, if you want the student to wait, say, one week before they can see the next question, click "Delay" then select "period of time" and set it to one week (or whatever time period you want).

Now we're finished creating the workflow for question 1, which will display question 2 after question 1 has been viewed.
Step 5: Create workflows on questions 2 and 3
Next, we're going to repeat the above steps to create similar workflows on our message templates for questions #2 and #3.
Again, on each of those message templates:
Create a workflow
Set it's trigger to "Message viewed"
Create a step in the workflow
Set the step type to "Send a reply in this conversation"
Set the message type to "Use a message template
Select the message template.
When setting up the workflow on question #2, you'll want to select the message template for question #3 (so that viewing question #2 causes question #3 to display).
When setting up the workflow on question #3, you'll want to select the message template for... you guessed it... question #4 (so that viewing question #3 causes question #4 to display).
Step 6: Create a course and share it with student(s)
Now that your question templates and the workflows are all set up, you're ready to deploy them.
There are a few different ways you can go about this:
Create this as a course, which can be run repeatedly with multiple students.
Set up an intake page, where anyone can submit a message to "request" a copy of the interview, which will generate a new conversation and automatically trigger question 1.
Create a one-off conversation, insert question 1, and then share it with a single student.
For simplicity, we'll cover the third option here: Creating your course as a one-off conversation, inserting question 1, and then sharing with a single student:
Create a conversation
Create the first message and select "Library", select your message template for question 1, then post that message in the conversation. It has its workflow already built in and ready to run.
Share the conversation with a student: Click "Settings" > "Link" > "Email" > send to your contact's email address.
And there you have it! A fully interactive and responsive interview.
Learn more about Clarityflow.